

When I started making updates to the kitchen, I wasn’t sure what I wanted in terms of the style or overall look, but Kyler was adamant that we not repaint the cabinets. His philosophy is that original wood is classic, not that easy to come by and paint pretty much ruins it because it’s really difficult to remove the paint and the wood is just never the same again. You’d probably have to pay a pretty penny to get real oak cabinets nowadays, so he didn’t want to “ruin” what we already had.
This actually helped me a lot in terms of narrowing down the design of the kitchen. With so many cabinets and having such a powerful wood motif, I more or less decided to go with a somewhat rustic/farmhouse aesthetic that struck a good balance between modern and vintage, and worked really well with the French country vibes of the dining room.
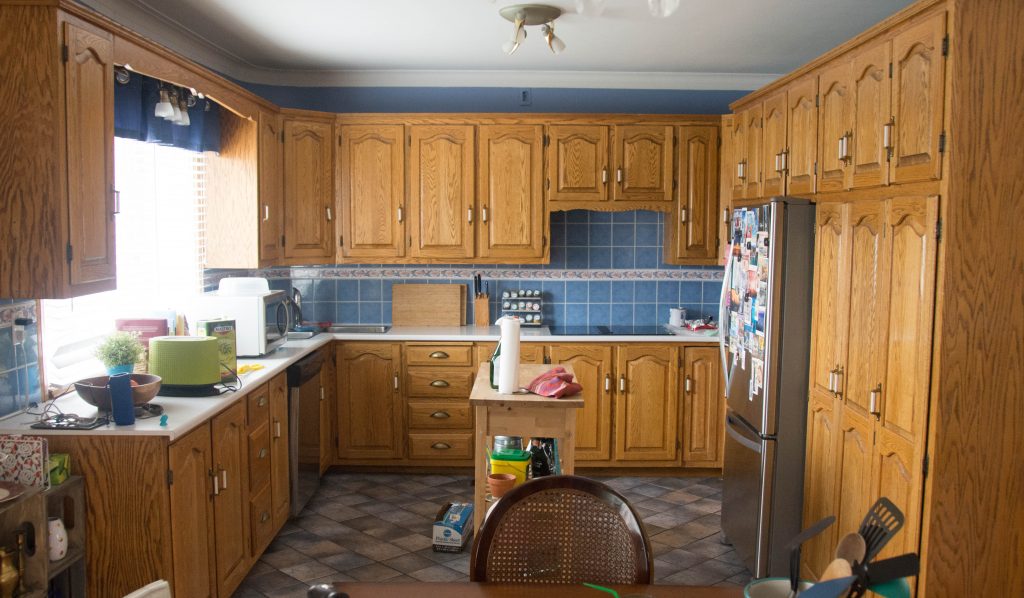
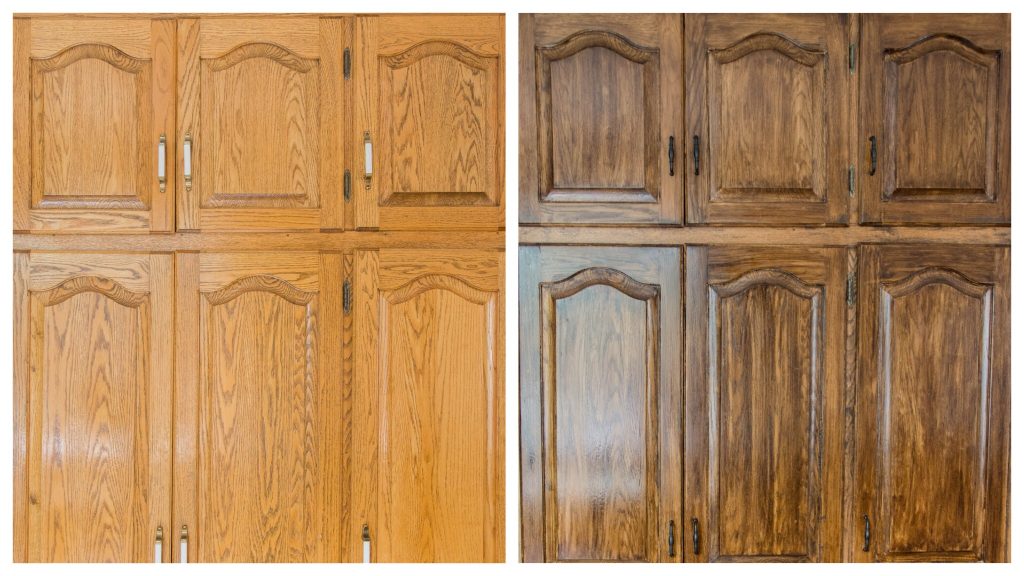
One thing was for certain though: I HATED the orange tone of the wood. It might have been trendy thirty years ago, but to be honest with you, I pretty much don’t believe in orange wood. Like ever. So with painting not being an option, I decided to stain the cabinets to create a slightly deeper, more neutral brown. Here’s how we did it!

Materials
-sander/sandpaper
-latex or rubber gloves/work gloves
-lint-free cloths
-wood stain
-top coat/stain sealant
-screwdriver/drill
-eye protection
-face mask
-earplugs/ear protection
-drop cloth/plastic sheeting
-painter’s tape
-synthetic paintbrush
-(optional) vacuum
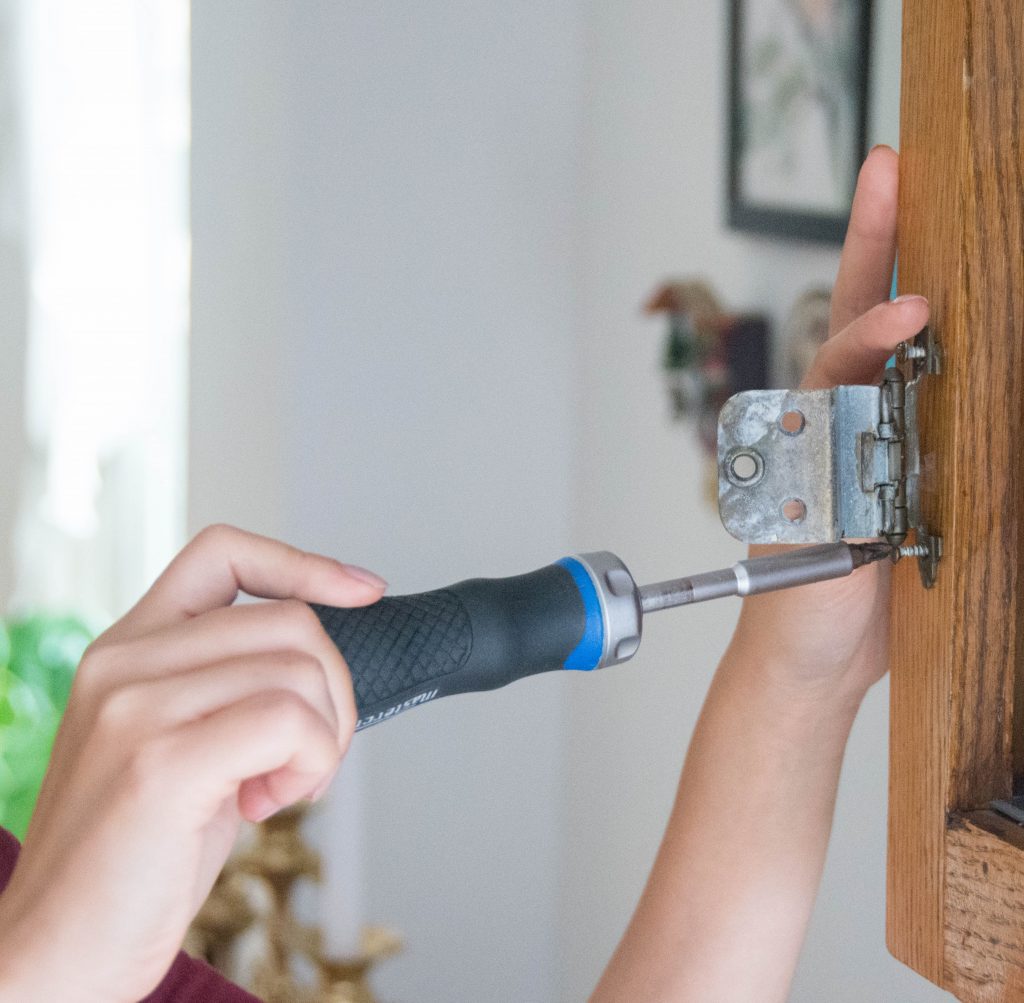
1. Remove all the cabinet doors, drawers and hardware from the boxes
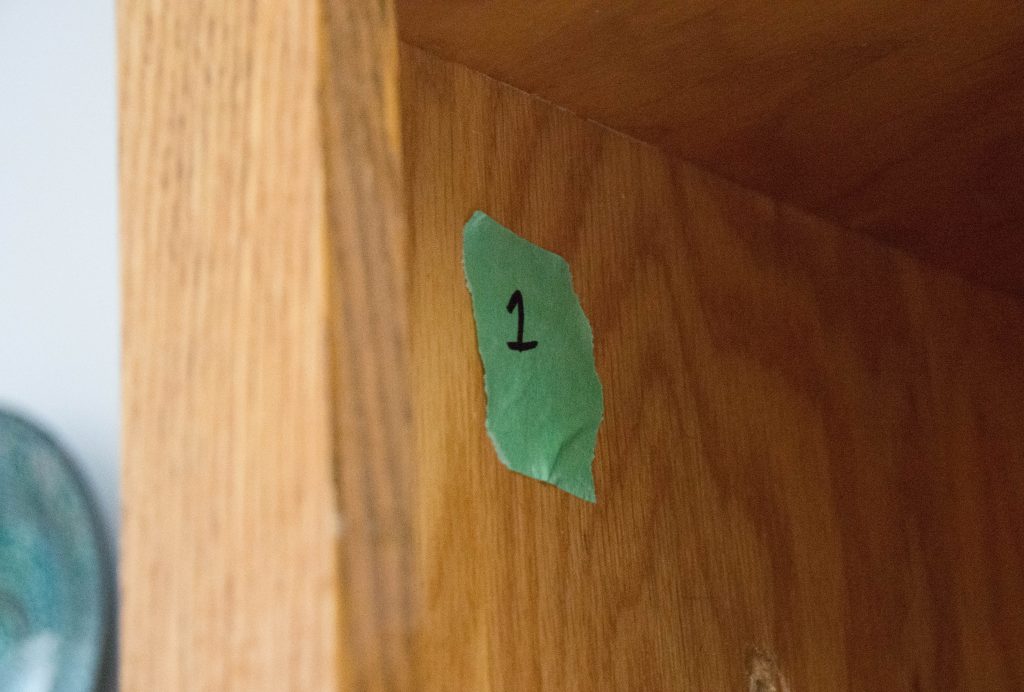
To make it easier to organize and keep track of our 41 cabinet doors and drawers (and all their hardware), I numbered the doors and put a piece of painter’s tape with the corresponding number inside the boxes where the doors go. I also put all the hardware (including the handles) in baggies with the same number on them and kept them inside the corresponding boxes.
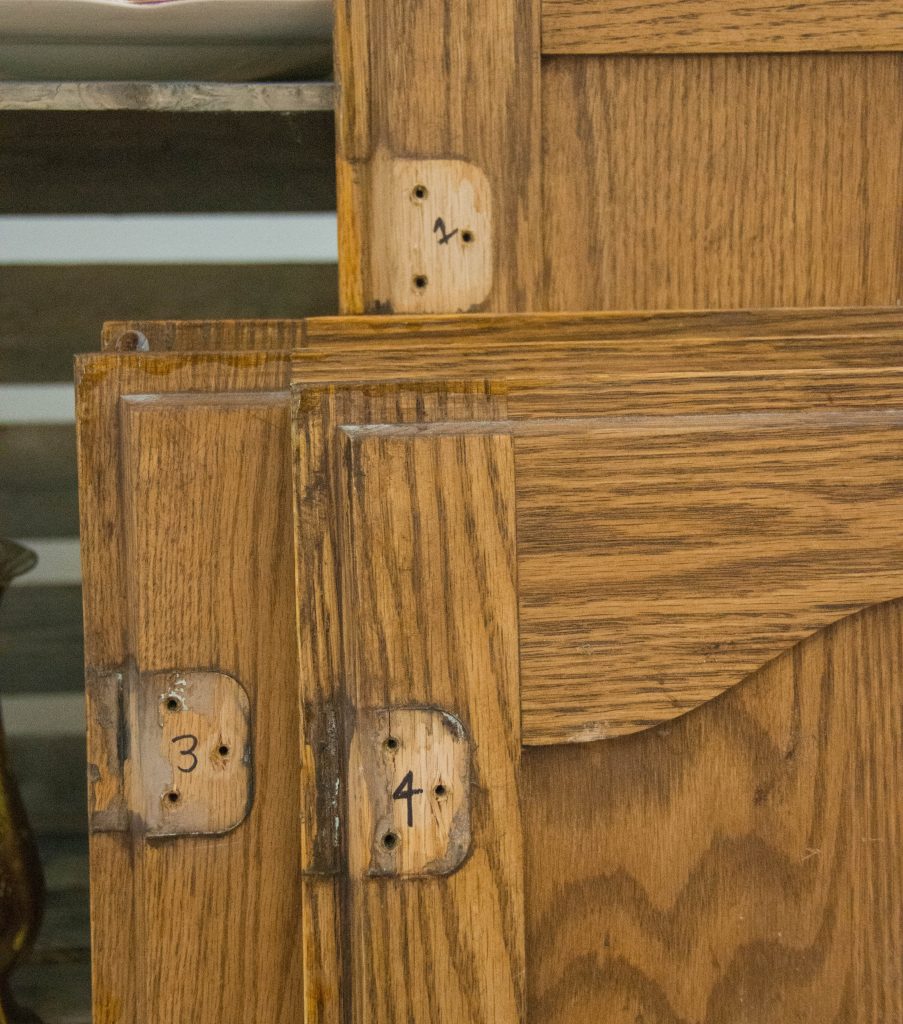
I initially didn’t want to put marks on the wood, but I ended up putting the numbers in a spot where they would get covered up with the hardware when we reattach all the doors. I couldn’t put tape on the doors because they would’ve gotten in the way of staining, (which ended up not being an issue because we only did the fronts). If you have very few cabinets, you can probably skip the numbering step, but I found it really helpful in terms of organization.
2. Sand the old finish off the doors
We used a sheet sander for the flat parts and I do highly recommend using one if you have a lot of cabinets. It helped the process go so much faster. But we still had to manually sand all the tiny/curvy parts. If you use an electric sander, be sure to sand with the grain of the wood and go slowly, or you might introduce unsightly scratches to the wood surface.
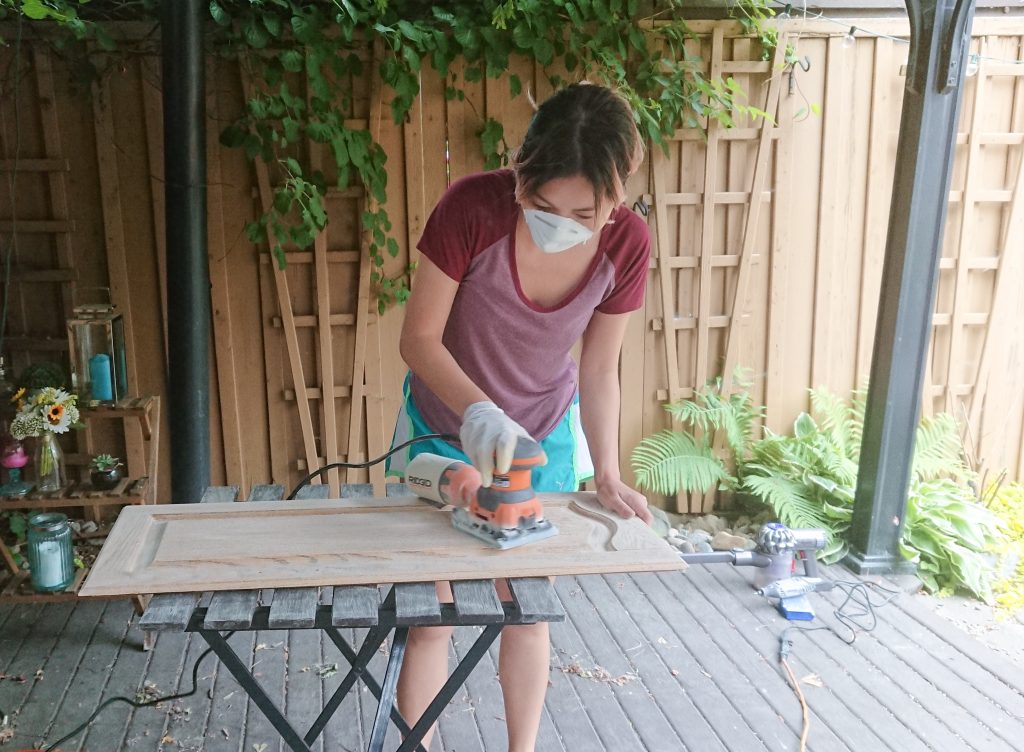
Make sure you clean off all the sawdust before staining. We used a handheld vacuum to get most of it and then wiped it down with a wet paper towel. Right before I started staining, I wiped them all down with a lint-free cloth, which I really think does the best job of getting rid of all the tiny bits of debris.

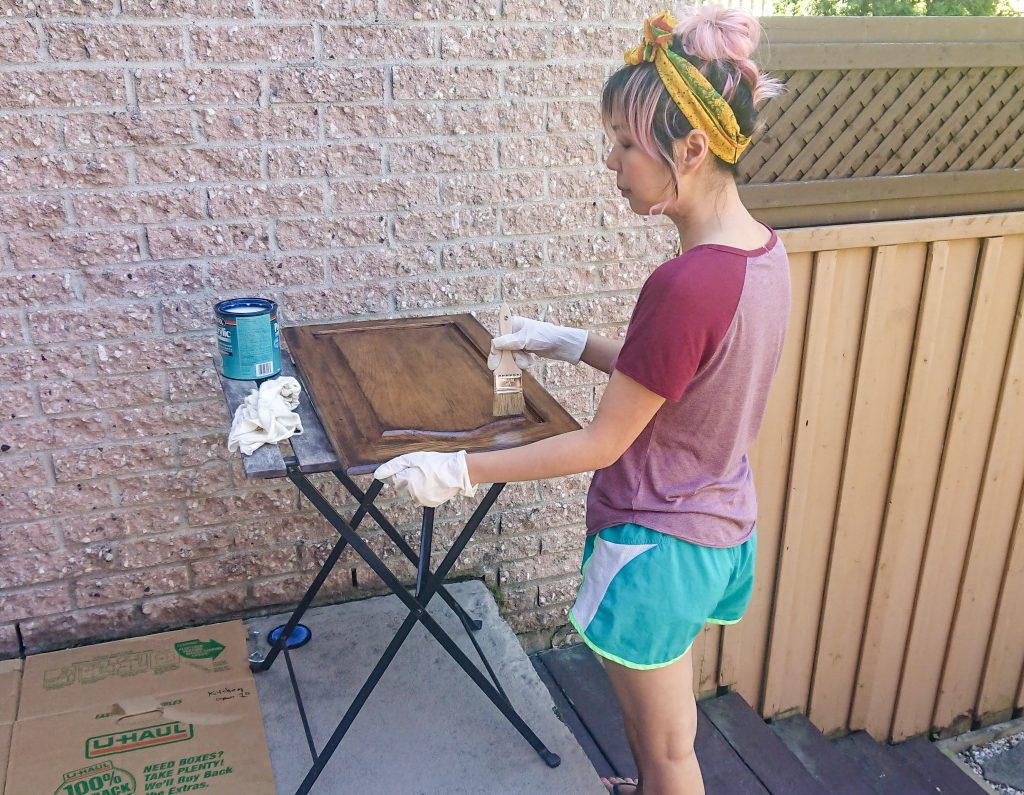
3. Stain and seal all the doors and drawers
We did a complete test door before proceeding with rest of them. We picked a pretty skinny door that’s kind of tucked away. In case it went horribly wrong, it’s not super visible. We ended up getting a few different coloured stains to test before picking the one we wanted. I highly, highly recommend testing your stain before going through with it all!
Depending on how your original cabinets have been treated, the colour of the stain might appear different on your cabinets from how it looks in the can or on the samples at the hardware store. Also, depending on how your original cabinets were finished, how you prep the wood might make a difference in how the colour looks and adheres.
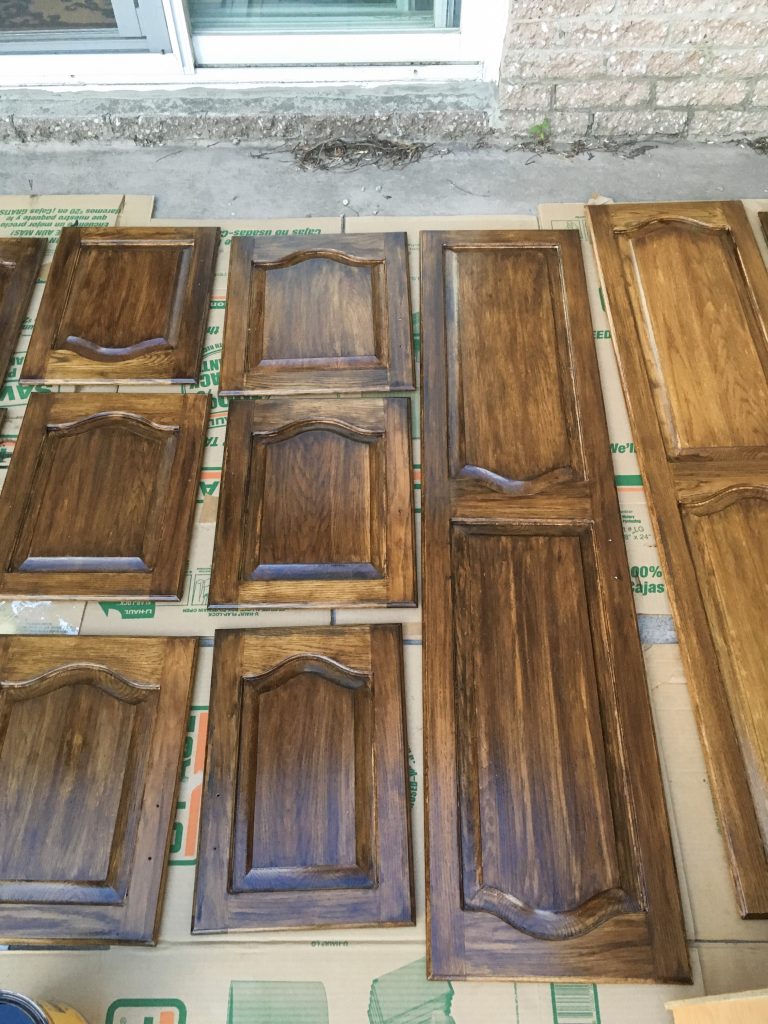
We ended up going with a much darker and cooler shade of brown than I had anticipated. I wanted the finished look to be a mid-toned to slightly dark, warm, rich brown. Basically, just slightly darker and more brown. But after testing one colour that looked exactly like what I wanted in the sample, I found that it didn’t really do much to change the colour of the wood. So we ended up going with the Miniwax Wood Finish in Deep Walnut.
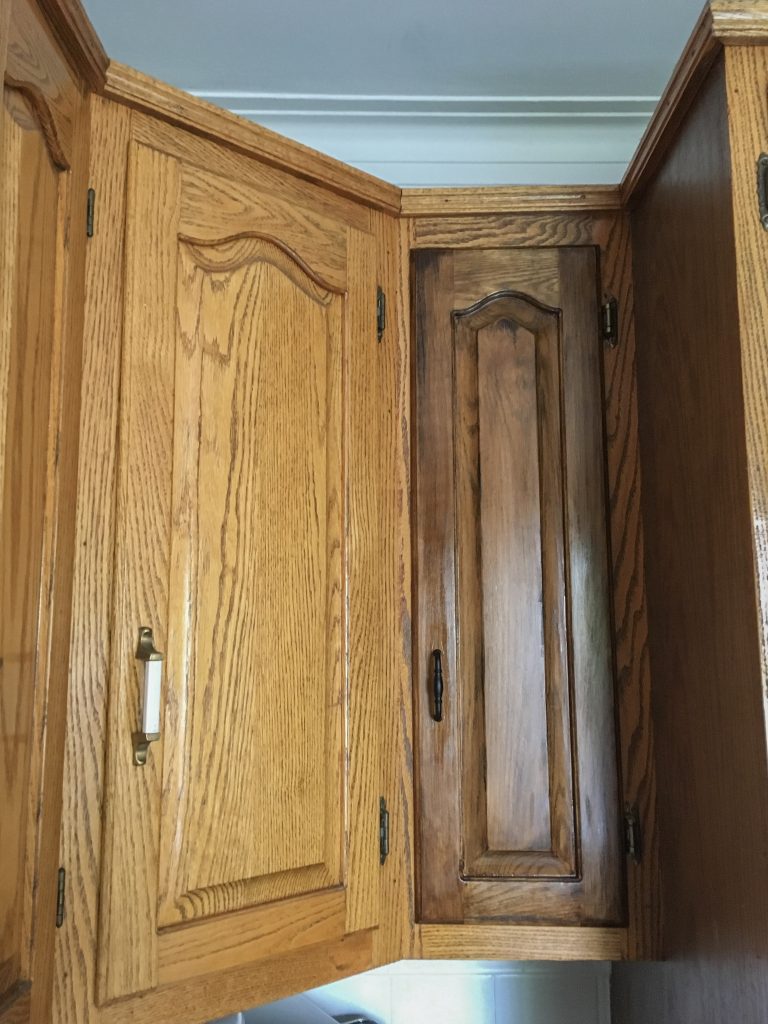
We were very careful with the test door. We sanded and cleaned it off well, and I did three very thin coats of stain, allowing it to dry as per the stain’s label in between. Then, I finished with a polyacrylic top coat, put on the new handle and reattached it to the cabinet box to see how it looked. We were very happy with how it turned out so we proceeded with the rest of the doors and drawers.
I used a lint-free staining cloth for all the staining. I highly recommend wearing strong rubber or latex gloves for this. I kept breaking my flimsy latex gloves (I probably went through 15 pairs). You should work in a very well-ventilated area and if you have some kind of respirator, you should probably wear it, too.
Although I did three thin layers of stain on my test door, I ended up doing two thicker coats for the rest. The results were pretty much the same, but you should be careful not to make the layers too thick because I noticed it gets kind of streaky. Once the stain had cured for the appropriate amount of time, I brushed on a thin layer of Minwax Polycrylic Protective Finish with a synthetic bristle brush and let it dry.
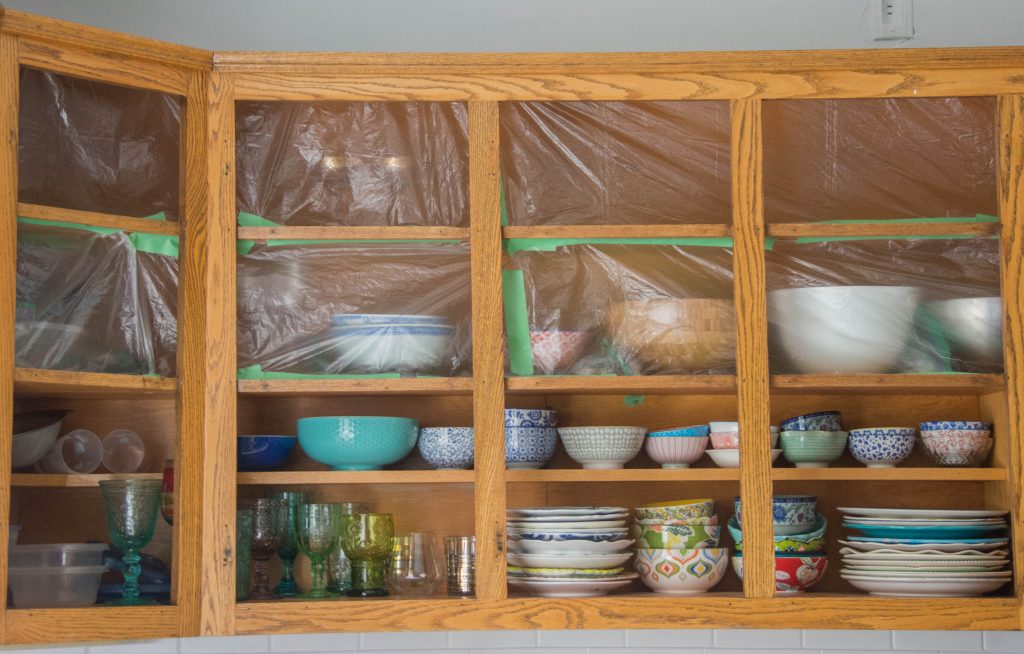
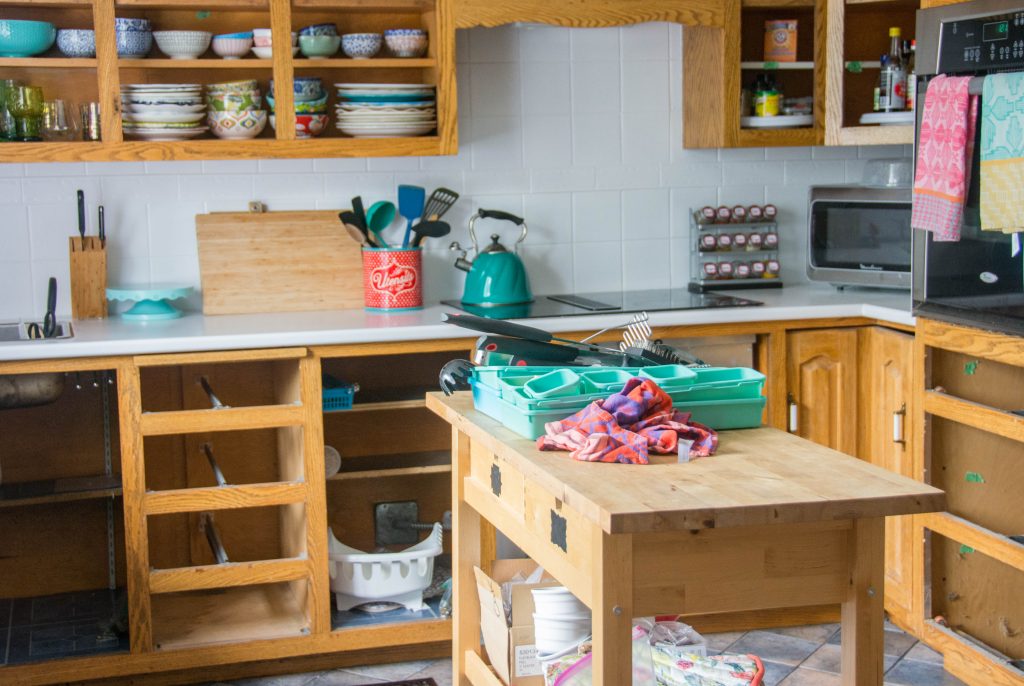
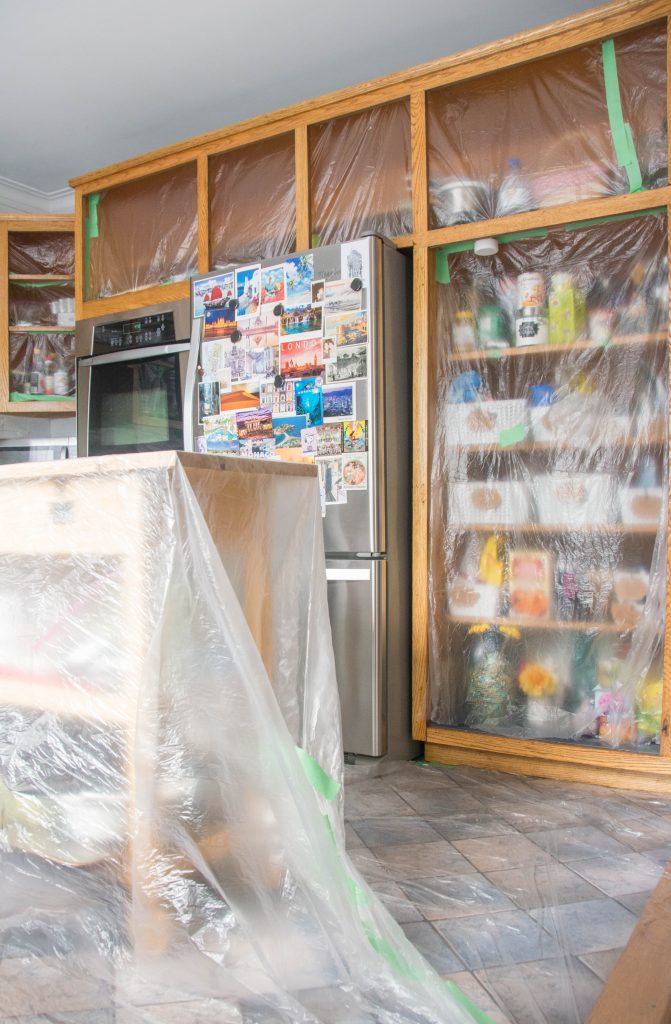
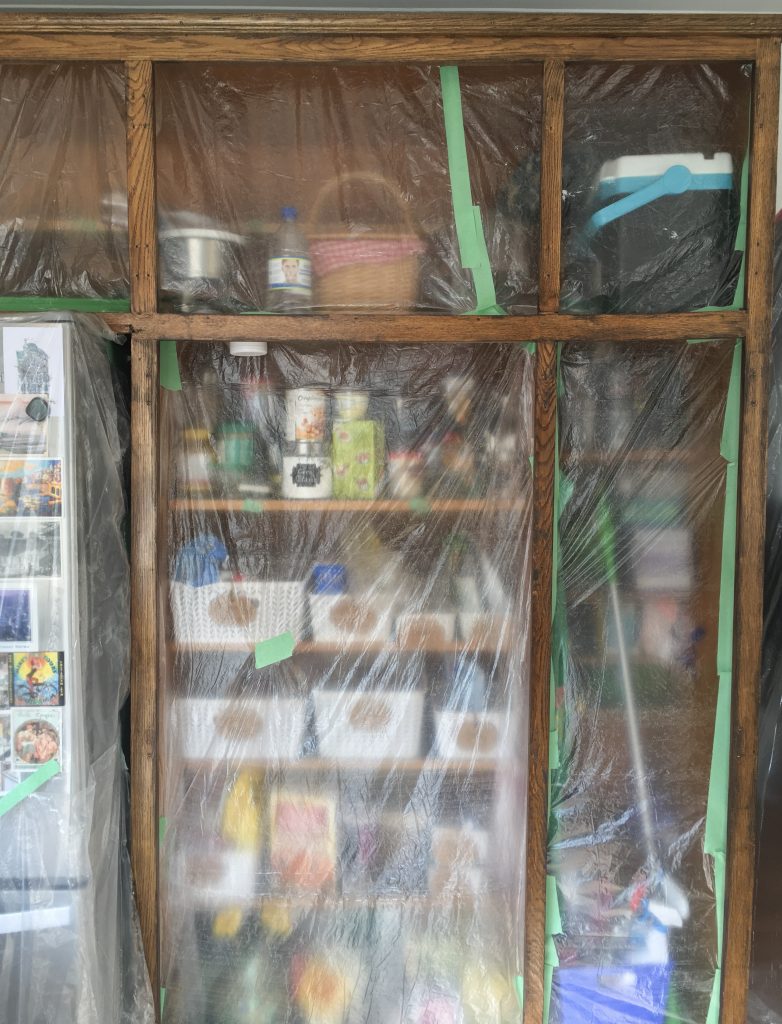
4. (Optional) Cover kitchen in plastic/drop cloths and tape off the cabinet boxes
I went a little crazy on this step, but I tend to be a messy DIYer, plus stain is even runnier than paint (which means it will get everywhere, even if you’re careful), PLUS we had to sand down all the wood and we didn’t want sawdust getting everywhere. Also, I didn’t want to move everything out of the cabinets or have to clean the interiors too much when we finished, so I decided to tape off all the interiors of the cabinets with plastic, as well as the kitchen floor, countertops, appliances and island.
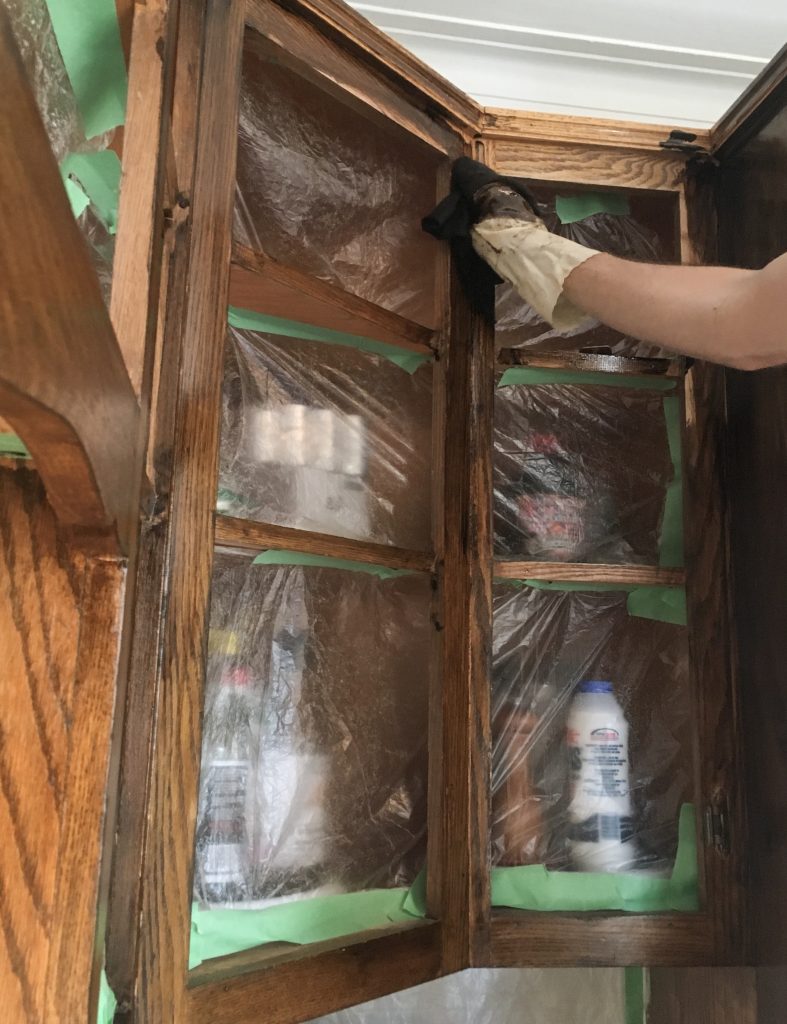
5. Sand, stain and seal cabinet boxes and trim
Basically, just repeat step 3, except with the boxes and trim. Once the top coat is dry, you can remove all the plastic and tape from the kitchen, start cleaning up all the dust and debris and reattach all the doors/drawers.
To be honest with you guys, this is one DIY that I’m not 100% happy with. Usually my DIYs turn out better than I expected, but this fell a bit short for me. The whole thing turned out a bit darker than I had intended. I don’t know if working outside in the sun skewed my impression of what the colour looked like or if I just went way too heavy with the stain and assumed it would be okay. I definitely should have diligently checked every door against all the other doors to make sure they were the correct shade, but oak cabinets are so heavy and we had 41 to do! I was just too lazy.
There’s also just a bit too much inconsistency in the finished colour and a bit too much streaking on some of the doors. Using a stain primer might help with the streakiness (again I was too lazy to even go there). That is one lesson I think I learned from this whole ordeal…DO NOT take the lazy way out when it comes to the actual staining part!
But of course, I am a perfectionist and can’t be trusted to accurately judge my own work. Overall, I’m still pretty happy with the new cabinets. They are definitely way better than the old orange oak version. These little nitpicky details I’m complaining about are probably not very noticeable to most people. And I bet these little inconsistencies can probably be dismissed as a result of the uneven lighting from our giant window.
It’s just crazy how adjusting the warmth and depth of the wood colour can transform cabinets from dated to vintage/rustic. And we have even more changes planned for the kitchen, which I think will pull it all together and make it look even better, so I just have to be patient and trust that it’ll end up looking fine in the end.

So what do you think of our “new” kitchen cabinets? I’d love to hear your thoughts!
xoxo
We are in the daunting task of trying to update our cabinets. We also like stained wood but I think it is old fashioned and I really wanted an updated look. Your cabinets are pretty but my kitchen is very small and I am worried that darker cabinets will give it a closed in look. We also have stained trim and waonscoat trim in every room and every door. That bothers me. Did you paint your wall and window trim or is it painted? With so much brown I do not see an updated and fresh look for my older home. Any suggestions?
The stained wood can definitely look old-fashioned, but it works in our house ’cause it’s a bit of an older home and my room designs are all vintage-inspired. If you’re worried about the darker look of the stain, I find that painting our backsplash and kitchen walls white helped a lot with keeping it bright and open. Instead of staining your cabinets, you could always paint them! White cabinets are very trendy at the moment.
I love it!! We did ours with briwax! Such a difference and very budget friendly! I too have a husband who wouldn’t hear of painting these!!!
Yeah, I actually love how it turned out! No wood painting for the win!!
did you strip your cabinets ?
is sanding ok w/ no stripping
i love your tones w/ the dark color
any suggestions to make darker and lighter spots
I did not strip my cabinets, I just sanded. I think it depends on the finish of your wood. If there’s a thick lacquer/top coat or paint or you’re trying to change the colour drastically, you’d probably have to strip the wood. If you want a multi-toned look, just use a different amount of stain here and there. The thicker coats will look much darker than thinner coats!
Absolutely GORGEOUS! We have the exact cabinets with the same stain. Your after picture is what popped up first and the color/look is the exact color/finished product I’ve been searching pics for and couldn’t find! Thanks so much for posting! Wanda
No problem Wanda!
I think it looks great! I’m
About to start refinishing our oak cabinets in our kitchen! Hope they turn out as great as these did!
Thanks! It was a lot of work, but I love how it turned out. Good luck with your project!
I LOVE the new look and color of your cabinets! I too have the old orange look oak cabinets that I don’t want to paint. I plan to stain mine also but we just moved into this house in October and have a few other projects that are more pressing. I’ve been researching what to do and how to do it. I’ve read on some posts where instead of sanding you can use one of the liquid deglosser/sanding products and just wipe the cabinets down good before applying stain or paint. Do you know anything about using this type of product?
Thanks for the info & pictures!
Unfortunately, I don’t know anything about liquid deglosser or sanding products. Sounds like they might work, though! Good luck!
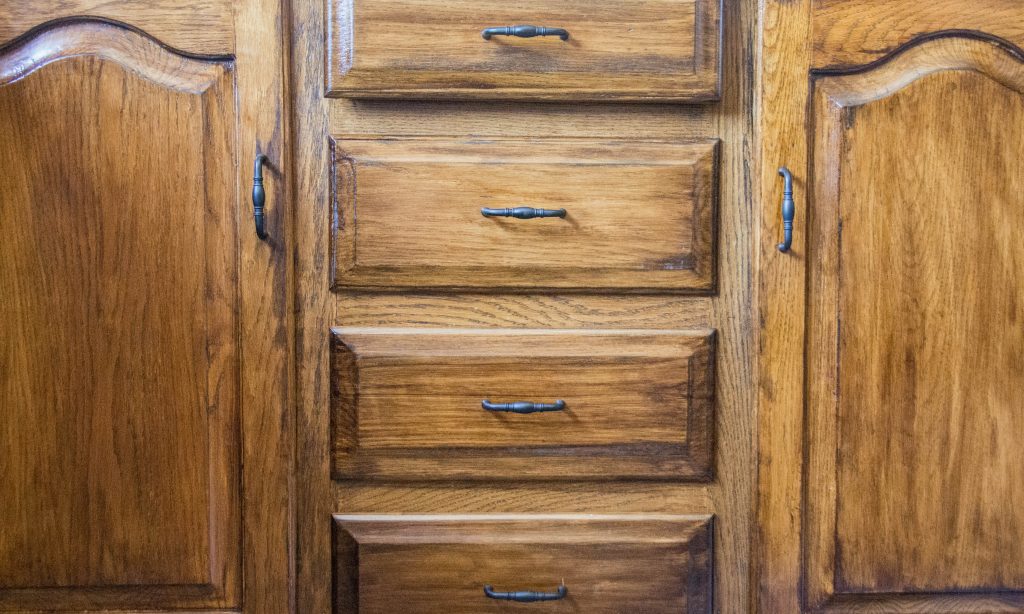
I love your cabinets! Just curious about your cabinet pulls, did you buy new ones or did you paint them too?
We bought new ones! But I’m sure you could spray paint old ones as well. I wouldn’t paint them though. I think spray paint would be faster, look better and last longer!
Looks FANTASTIC! We are preparing to do something similar with our old oak cabinets, and your pictures are the best I’ve seen so far. What kind of stain did you use? Was it a liquid base?
We used Miniwax Wood Finish in Deep Walnut and it was was liquid!
Hi! Beautiful cabinets! Just wondering when you sanded, did you remove the top layer (gloss) and the previous stain color to bare the natural oak wood and then stained or did you just sand the gloss off and stained over the old stain
Thank you! Sanding was mostly just to remove the gloss. Some of the original stain also came off, but as I was staining it darker, I didn’t mind if some of the original stain remained.
Hey Jackie, This was a very courageous DYI project and I must commend you on an amazing job, the final results looks stunning, congratulations. I also pride myself as the ultimate DYIer 🙂 and yes a perfectionist like yourself :-). I have an almost identical circumstance in my kitchen, but I am very intimidated by the work ( I could be very impatient DYIer at times lol ). I am also very concern I may end up selecting the wrong colour stain, something that does’t lends well with my current decor and finishes. I do intend to take on the challenge this spring, so your inspiration will certainly help me. Do you have any comments or advise on liquid stain VS Gel stain ? Thank you.
I think both are good, although I find the gel stain a bit harder to work with just because it’s kind of thick. You have to work faster if you use the gel, or work in smaller sections. It is somewhat intimidating to start a project like this, but once you get going, you’ll find it’s actually not at all complicated, there are just a lot of steps and prep you have to do. I’m sure you can tackle it! Good luck!
May be a little late to the party but wanted to share my experience (as well as the helpfulness of this article). We are in the process of remodeling a recently purchased home. A total design disaster, btw. Between the turquoise blue sunroom, neon pink spare bedroom, 80s floral wallpaper, and one-stroke paintings adorning every door, it has been a daunting task. Last week I started the kitchen. Apparently the cabinets are solid oak and I can’t even begin to fathom why someone would coat them with the thickest, glossiest blood red paint ever to be found. I must admit, however, that I love wood. There is nothing more beautiful than natural grain, stained or otherwise. So I couldn’t bring myself to paint the cabinets again. I am now in the process of stripping, sanding, and conditioning the doors for staining. After hours of trying to visualize my project using google searches I stumbled across this article. Your cabinets look awesome! They are exactly what I envisioned for my own kitchen. Hopefully ours turn out this well.
I’m so sorry Cassidy, I didn’t see your comment until now! And wow, that house really sounds like something else…Painting wood cabinets has been such an unfortunate trend these past few years. There’s really nothing like the grain and colour variations in real wood! I do not regret the painstaking labour of re-staining our oak cabinets one bit, it has truly given our kitchen a new life! Good luck with your remodelling adventures!
I think you did a great job and it’s a tremendous improvement! I also prefer wood cabinets over painted ones. Could you share what wall colors you recommend for a darker oak kitchen cabinets? (It looks like your walls are in the family of white)
I definitely think whites are the way to go with darker oak cabinets. It’s a lovely contrast to the wood colour/texture and really lets the cabinets shine! If you like more colour in your kitchen, I would still try to keep the walls within a lighter/muted colour palette.
I’ve looked all over Pinterest for a good detailed tutorial and yours is by far the best! I want to eventually paint mine but don’t have the courage just yet. Thank you again for the great tutorial!
Just what I was looking for! I’m going to do this!! Love it!! I think one solid color would look less charming. Love the variation in stain. Can you just help me make up my mind away from painting!!
Yeah, I really love how it turned out! The visual texture of the wood is so beautiful, it really would be a shame to cover it all up! Of course, you should do what you want, but I am definitely team keep the visual texture of real wood if you’re lucky enough to have real wood!!!