
When I asked Theo what he wanted to be for Halloween, he predictably was like, “uuuuuuuuh, huh?” Now, I don’t know how old kids typically are before they get involved in and excited about Halloween, but I guess 2 is too young! So when it came to coming up with a costume this year, I just took a page from his biggest obsession at the moment: trains.
And when I say obsession, I mean nearly everything we see or do reminds him of trains. He calls the tire prints his dump truck makes on the sand a “train track.” He calls the pattern on my gold decorative tray a “train track.” He calls pedestrian bridges “train bridges.” He’ll just randomly go, “SSSSSSSSSSSS” and then giggle. That’s the sound of a train stopping, by the way. When I say he’s obsessed, I mean…He. Is. OBSESSED.
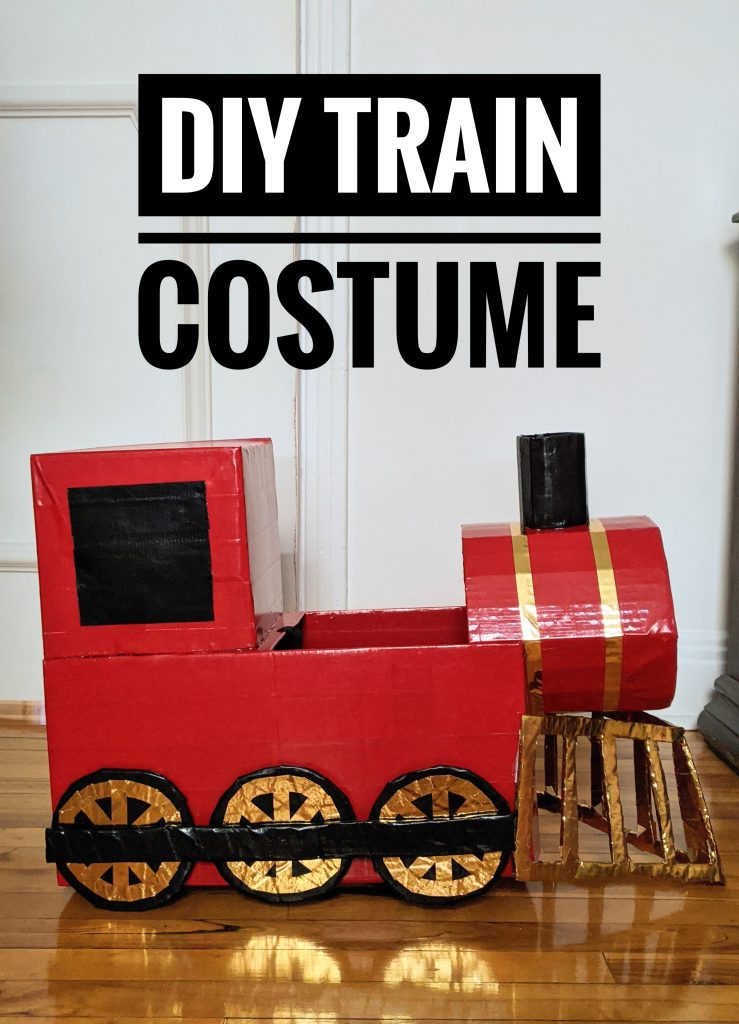
Obviously I had to make him a train costume for Halloween! And I love this idea because it can work as a toy too, long after trick or treating is over. There’s also a fun bonus costume at the end of the post if you’re into group/couples costumes like I am!
Materials
- cardboard boxes
- coloured tape
- masking tape
- strong glue
- pillow stuffing or something similar
- scissors/box cutters
- suspenders
- sewing needle and thread
- (optional) washi tape/markers/paint
Create The Train Parts Out of Cardboard
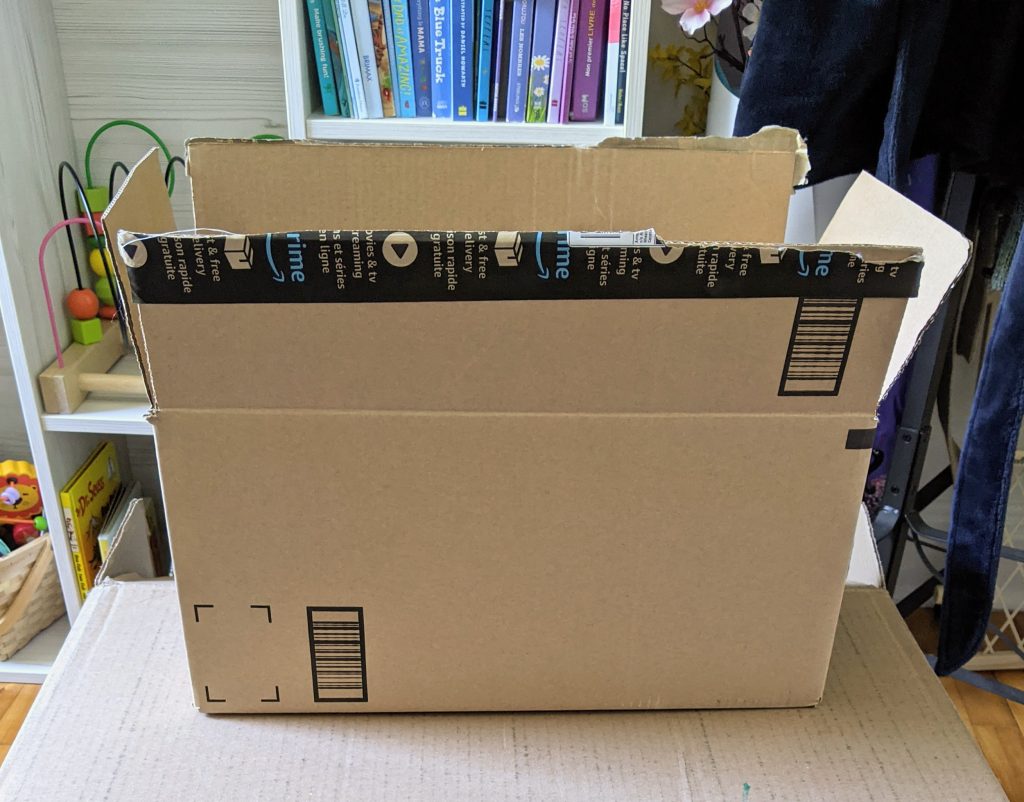
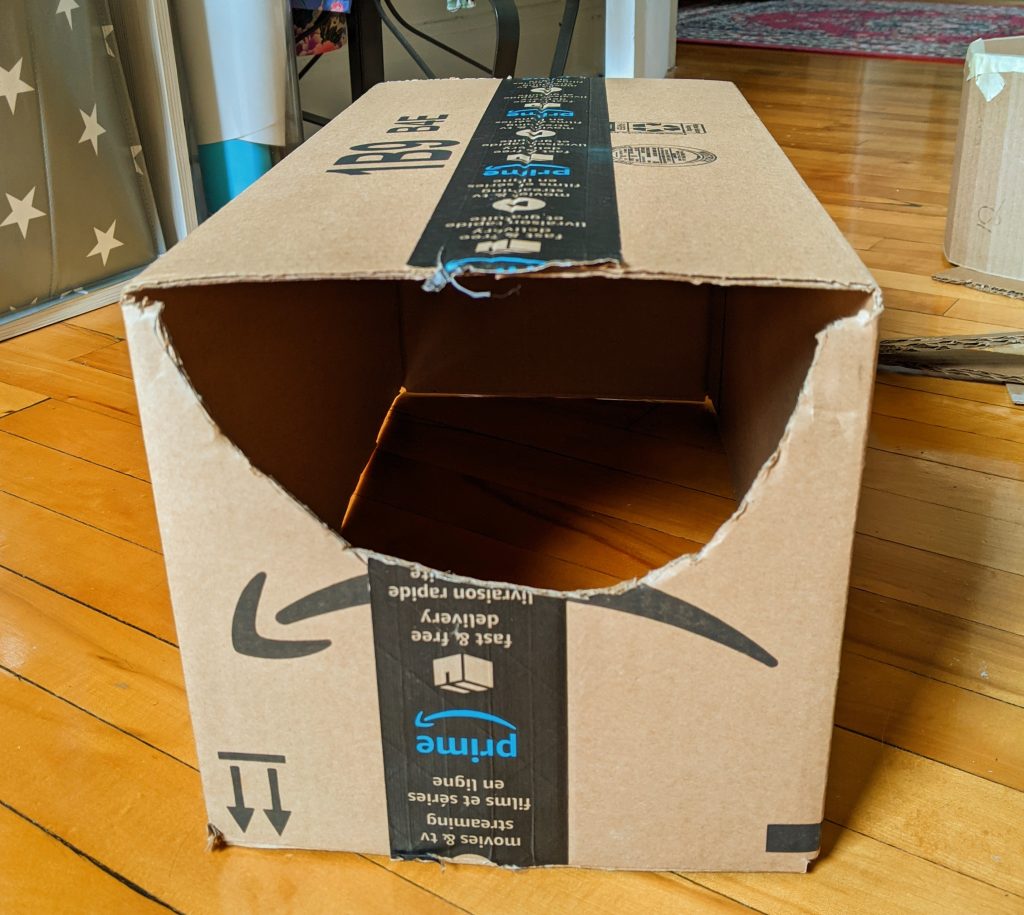
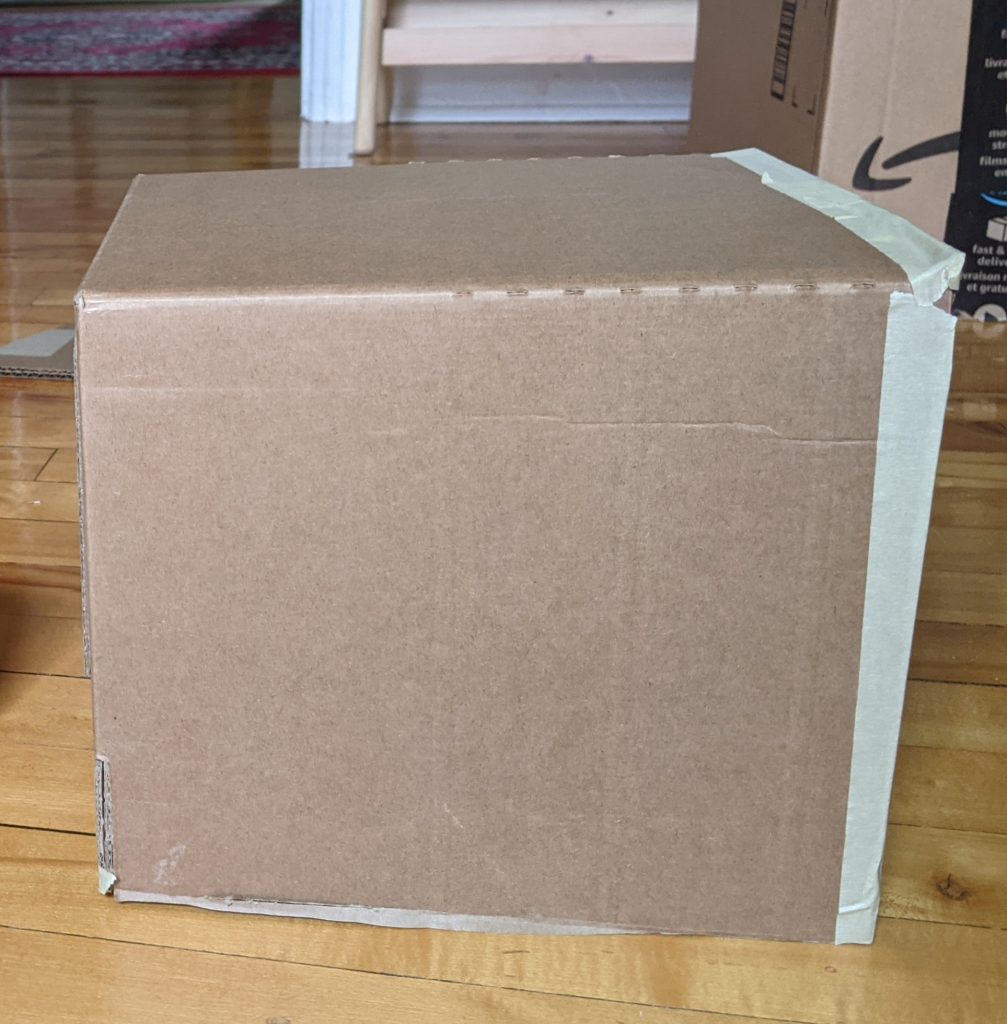
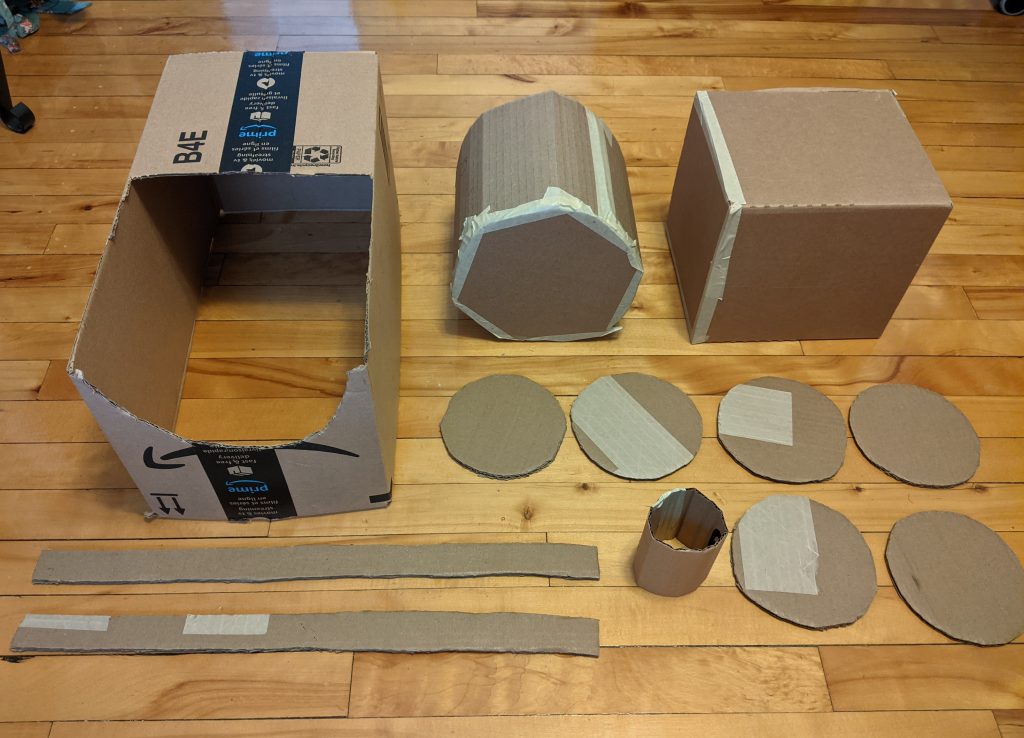
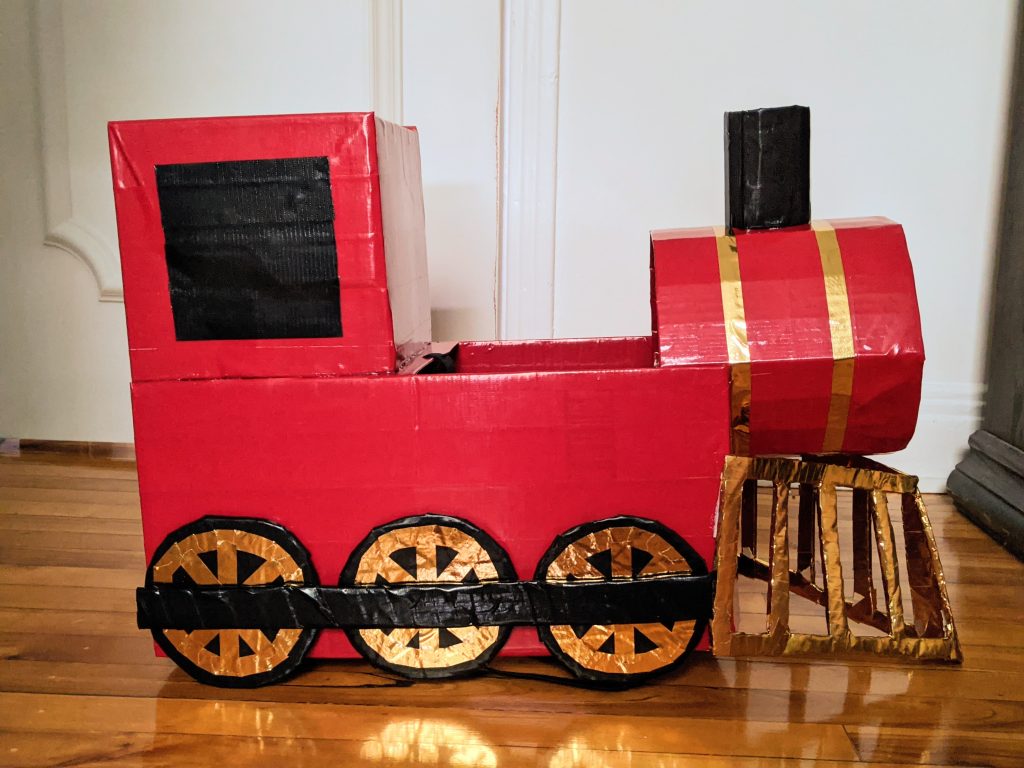
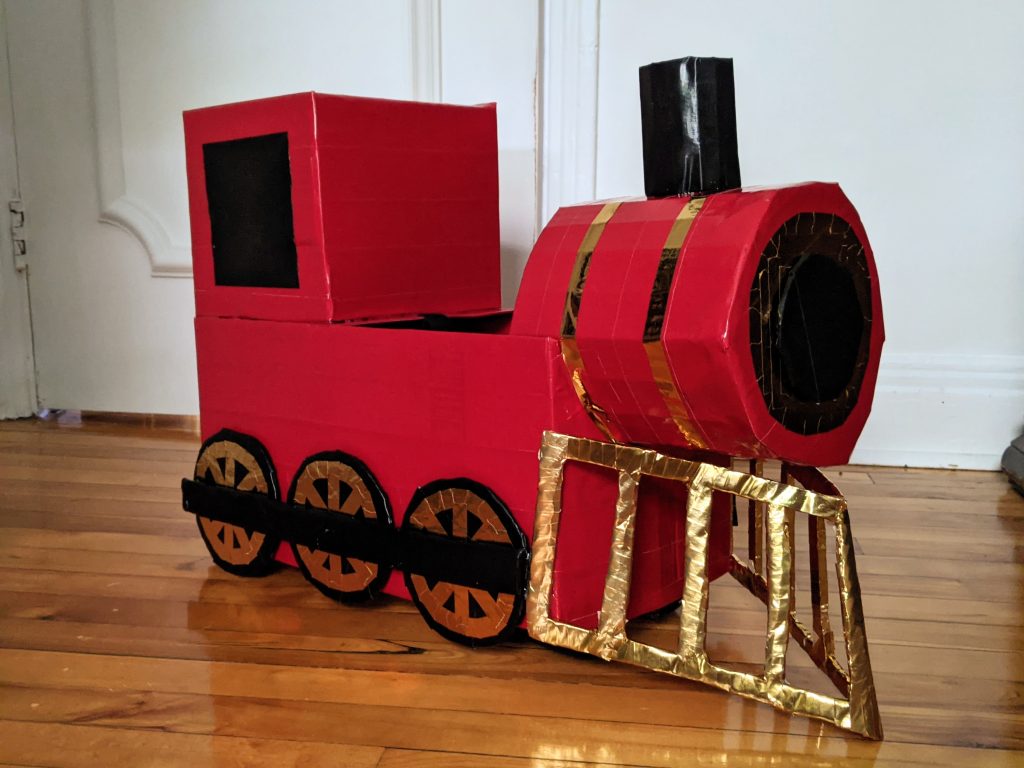
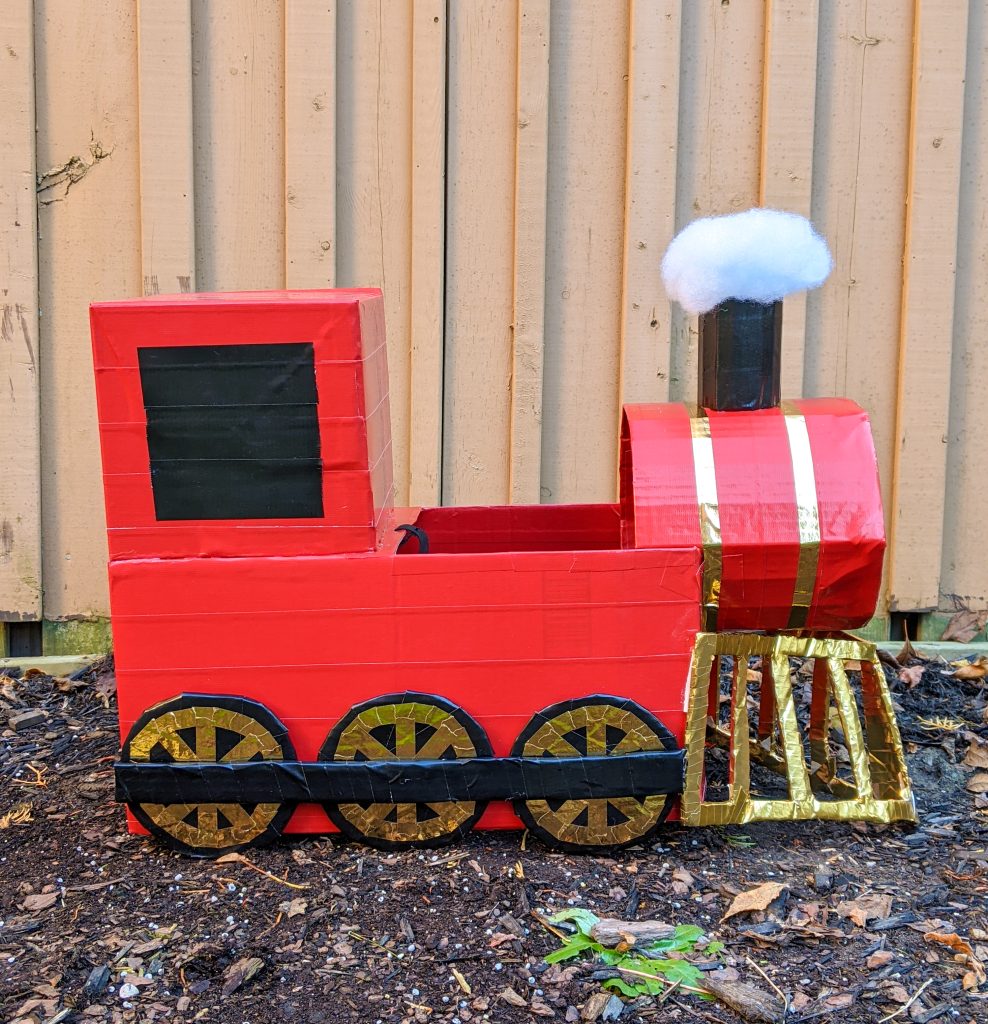
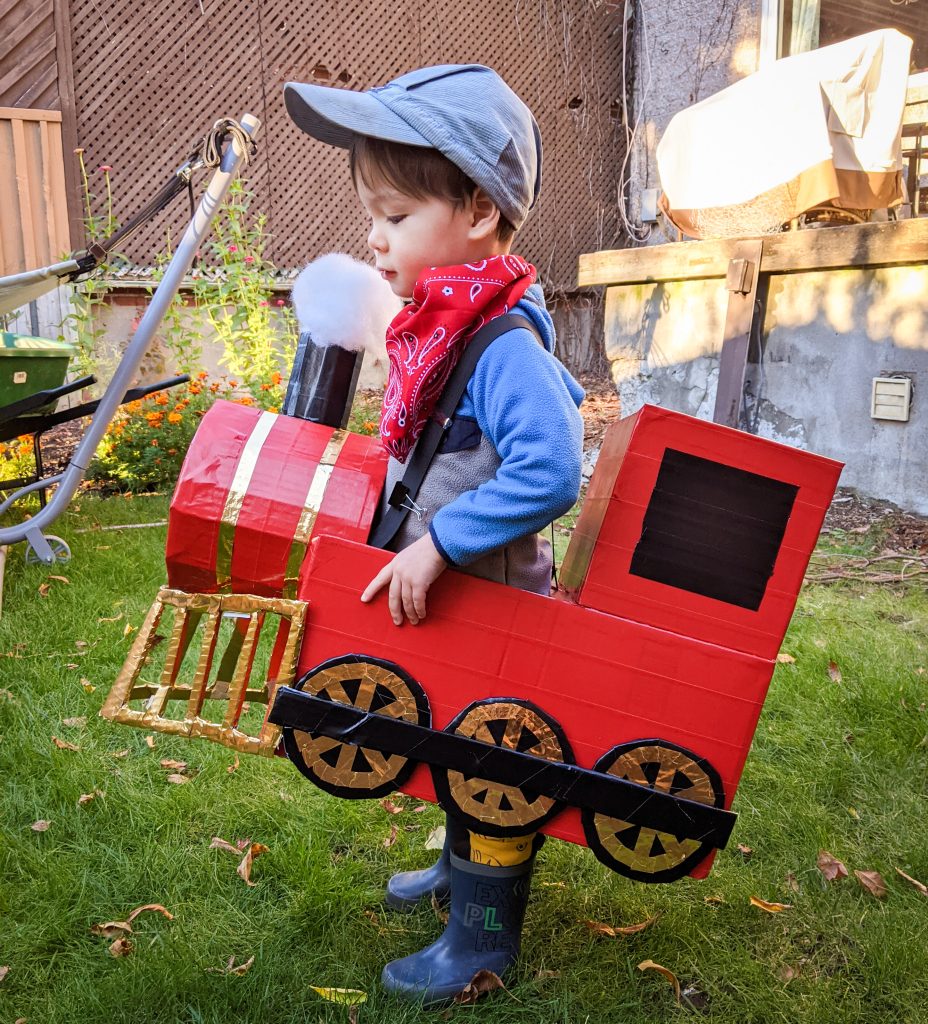
The style of train I decided to create required the use of one main box and a bunch of scrap cardboard. For the main body of the train, you have to make sure it’s a rectangular box whose shorter width will fit around the person’s torso. You also have to make sure it’s not too big, so it doesn’t end up being too heavy or cumbersome. For my two-year-old, I ended up using a box that is 18″x9.5″.
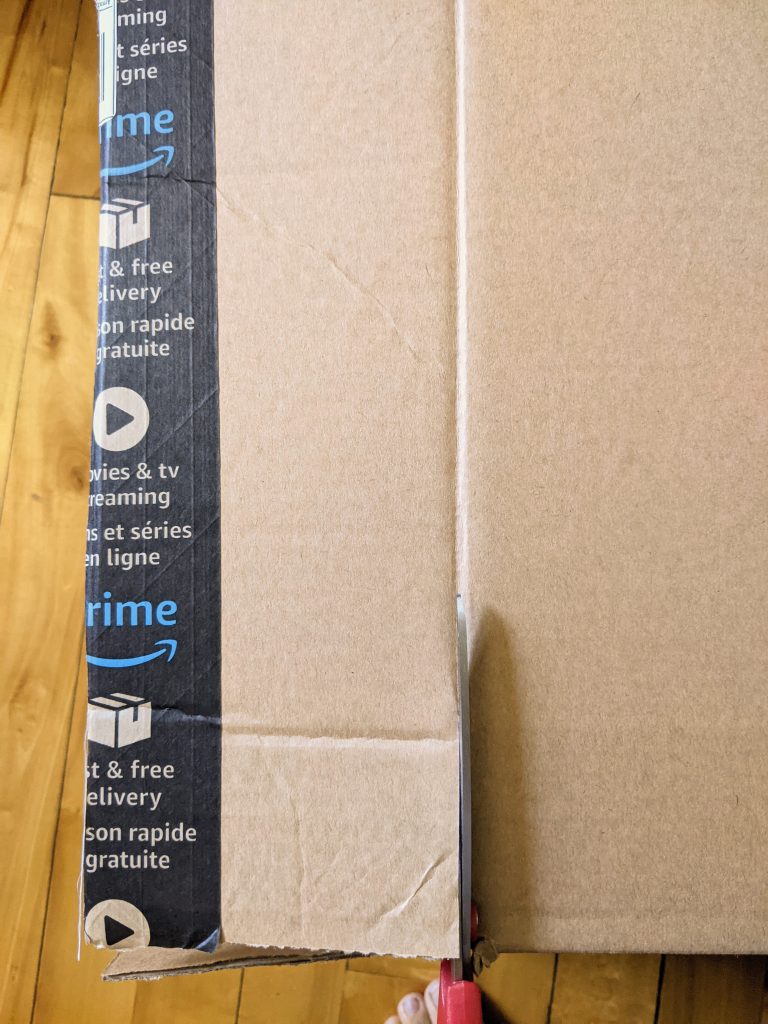
Cut off the flaps at the top, but keep the bottom flaps both taped and intact.
Then create a cylinder from scrap cardboard with one closed end. My cylinder ended up being 8″ in diameter. You can also use a tin or any other round container if you happen to have.
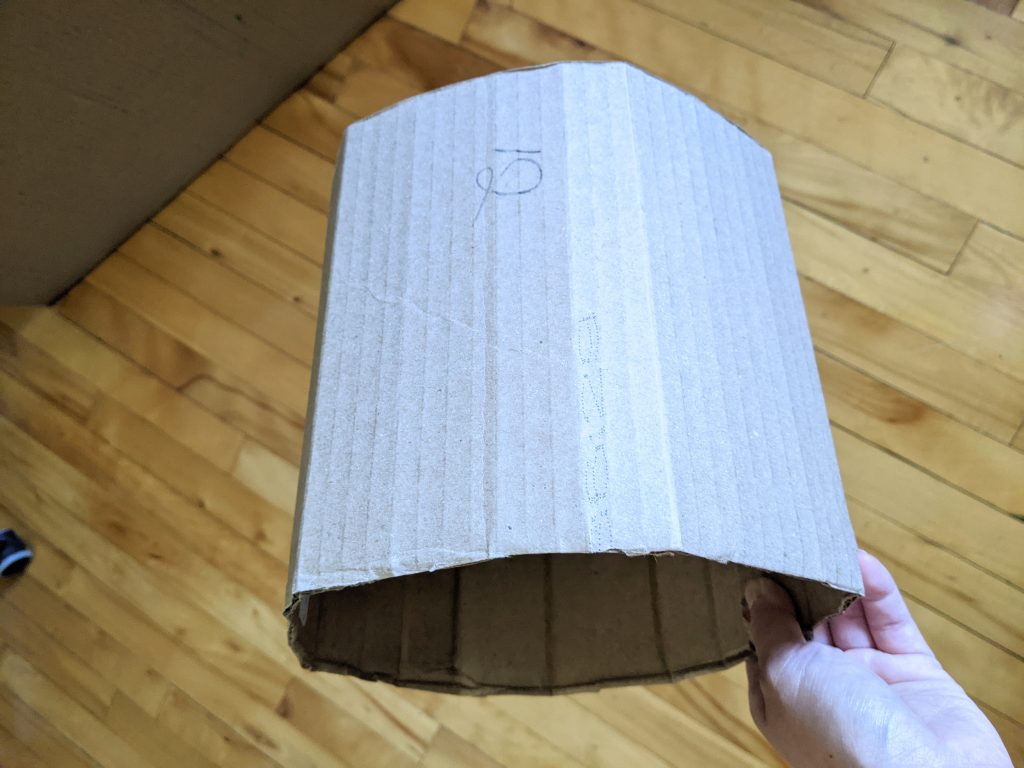
I used masking tape to hold it together and then traced one of the sides on more scrap cardboard to create a kind of lid that I also taped down. The kind of tape you use doesn’t matter if you’re using tape to cover the whole thing like I did. If you’re painting your train instead, you’ll have to used glue or only tape on the inside.
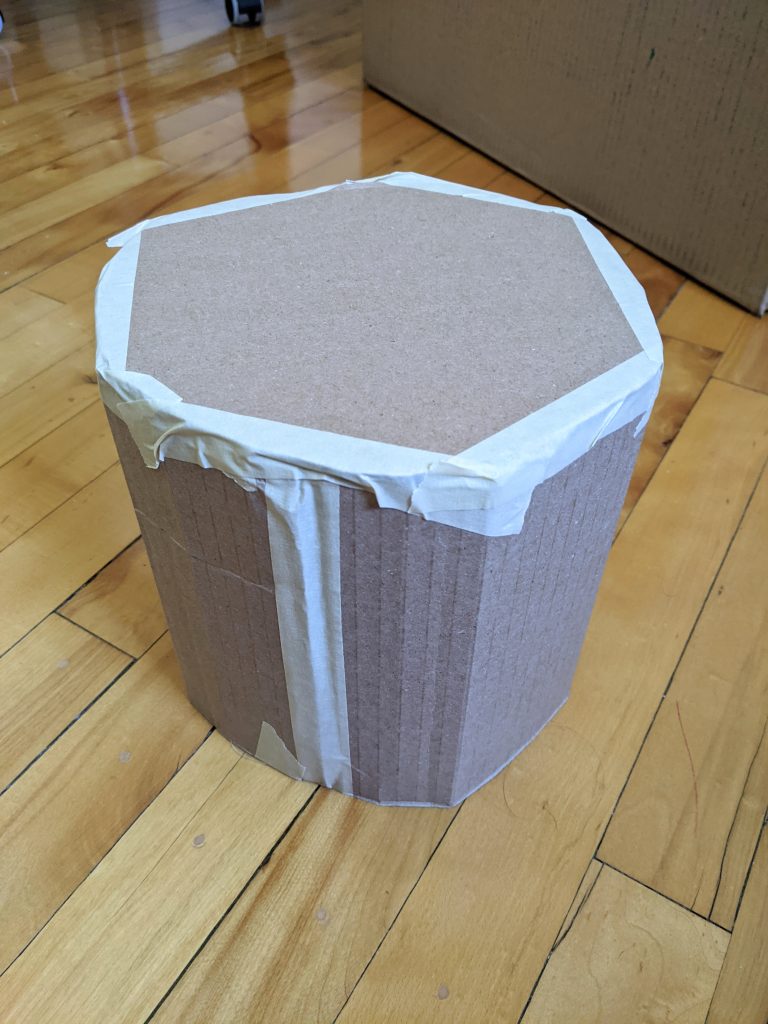
This cylinder is meant to go at the front of the train, and I had to think about how I would attach it to the main train body. I settled on using the body for support rather than just attaching it right at the front. I think it adds more stability and makes more pleasing proportions to the overall look.
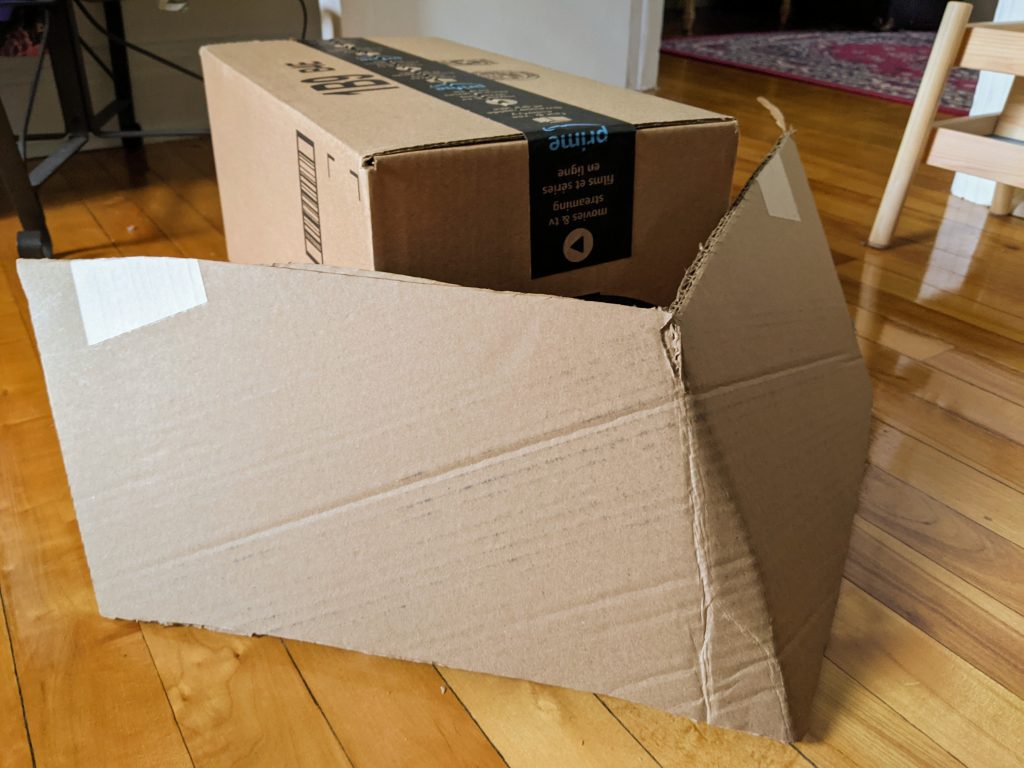
To do this, I turned the main box upside down, so the sealed flaps would be facing up. Then I placed the cylinder kind of halfway down one of the sides of the main box and traced around it. Finally, I cut out the part of the box where the cylinder would end up being inserted. At this point, you could also cut out about half of the top of the main box which is where you or your child will be standing when wearing the costume.
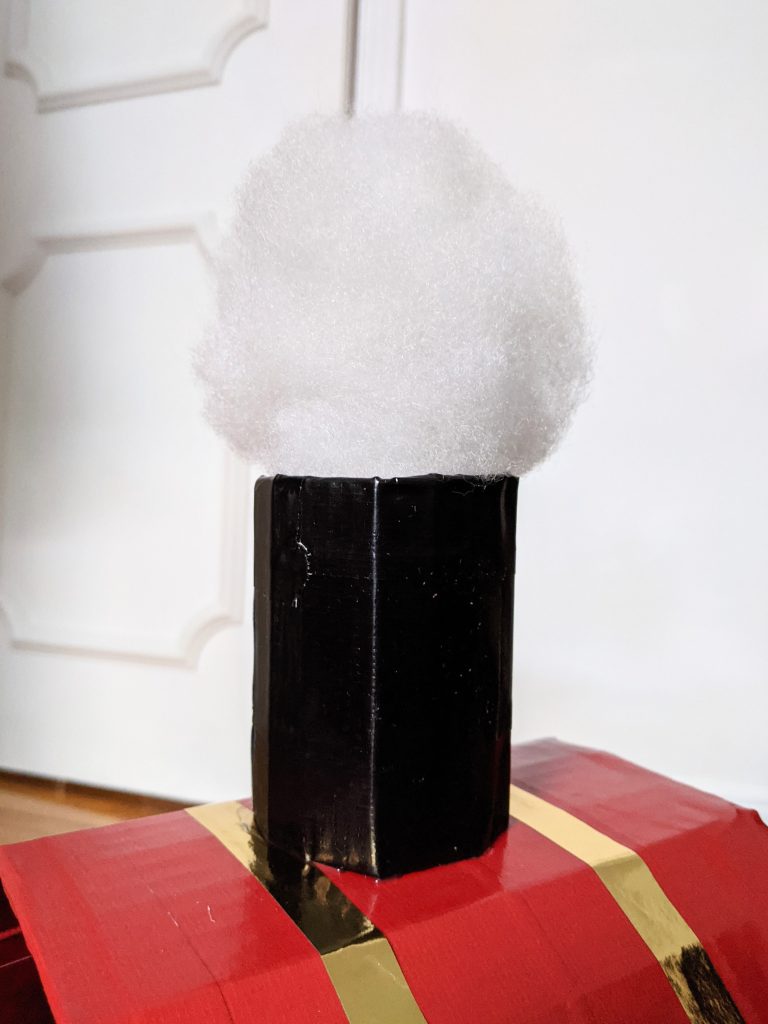
Then you have to create a smaller cylinder to be the smokestack. I made mine about 3″ in diameter. This can be open on both sides.
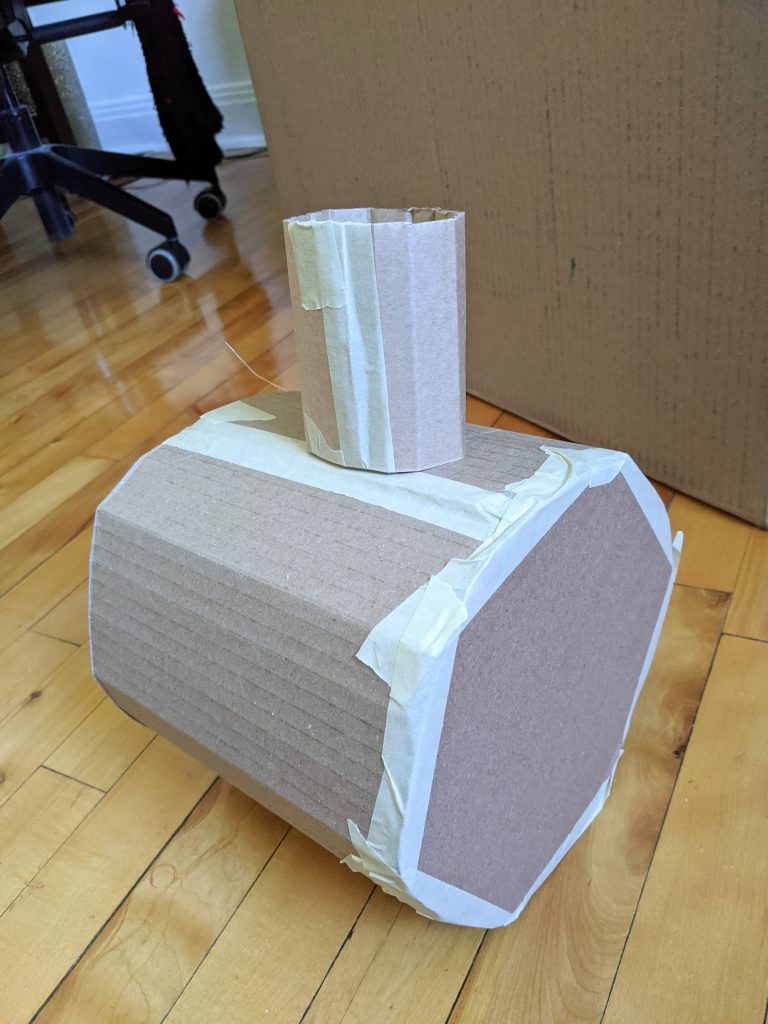
You will also need to add a smaller box on top of the main body. I didn’t have one that was the correct size, so I cut a larger box in half and closed off one of the sides with a piece of scrap cardboard. You can leave one of the sides open, as it will be hidden. The box I made was about 8″x9.5″.
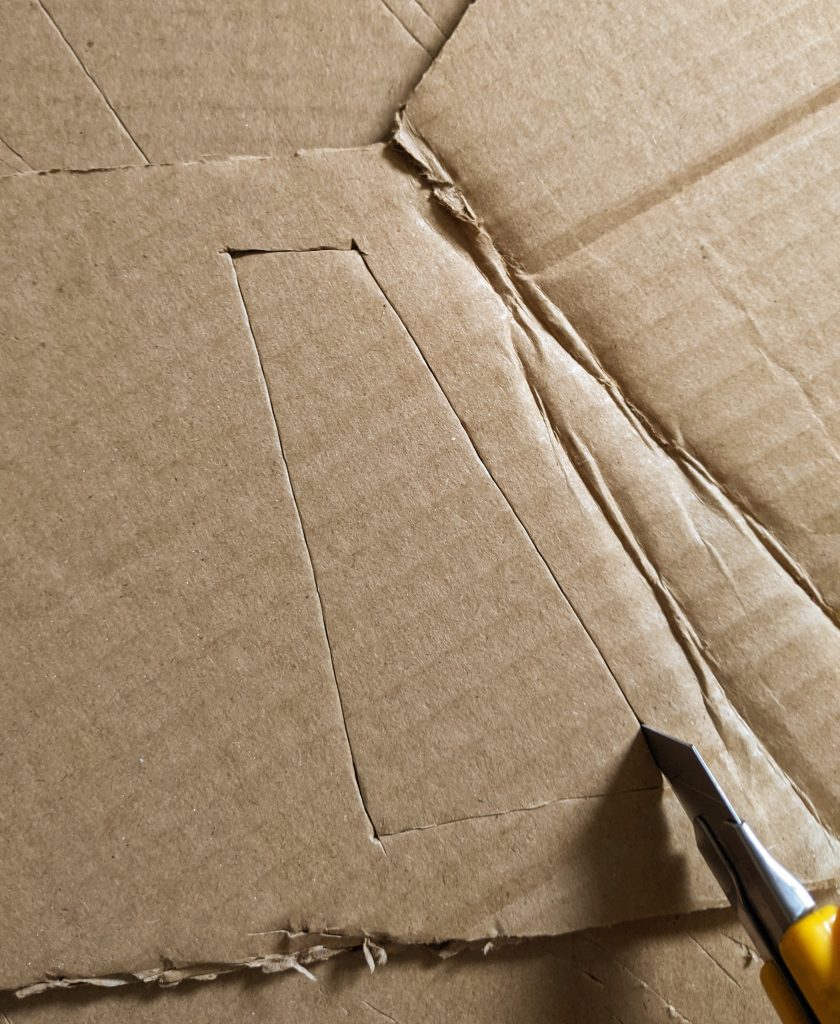
For the cattle guard, I just cut out a rough chevron shape that was much larger than I knew I needed and folded it in half down the middle. Measuring it against the main body gave me a better idea of the scale and angles it needed to be so I just cut away at it till it was the right shape and size.
Once the size is to your liking, you have to cut out some rectangular sections to create the grate effect.
It should end up looking kind of like this.
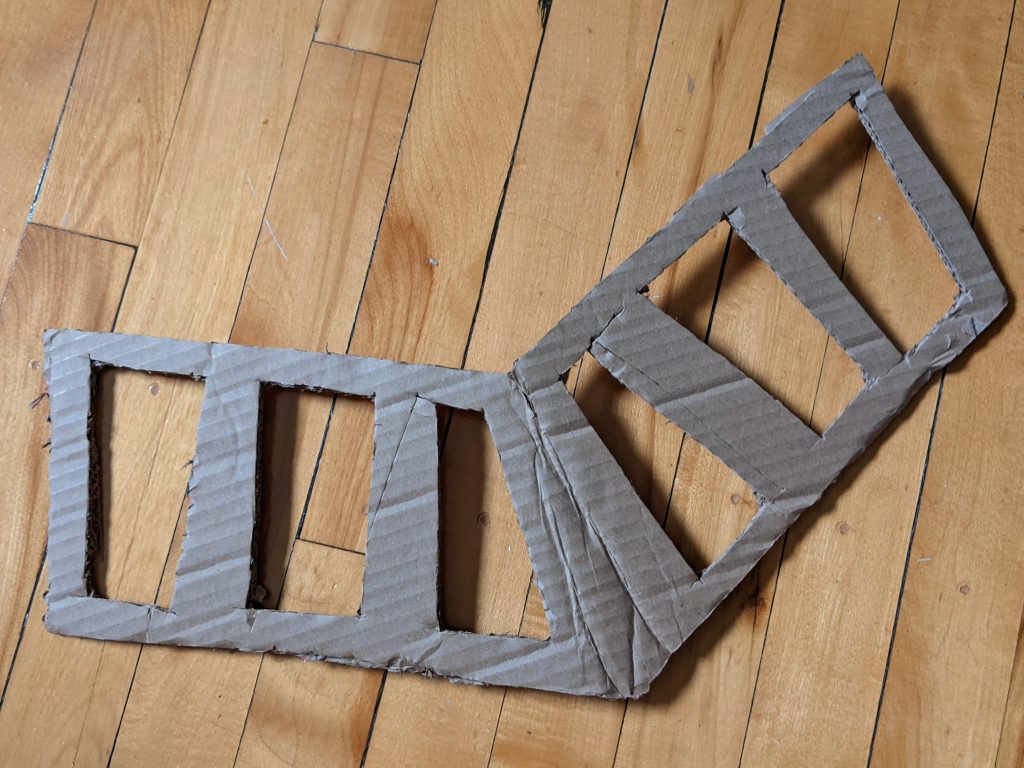
This is the first one I made that I ended up discarding because I didn’t think the six grates were enough. The second one I made had four on each side, which I think looks much better.
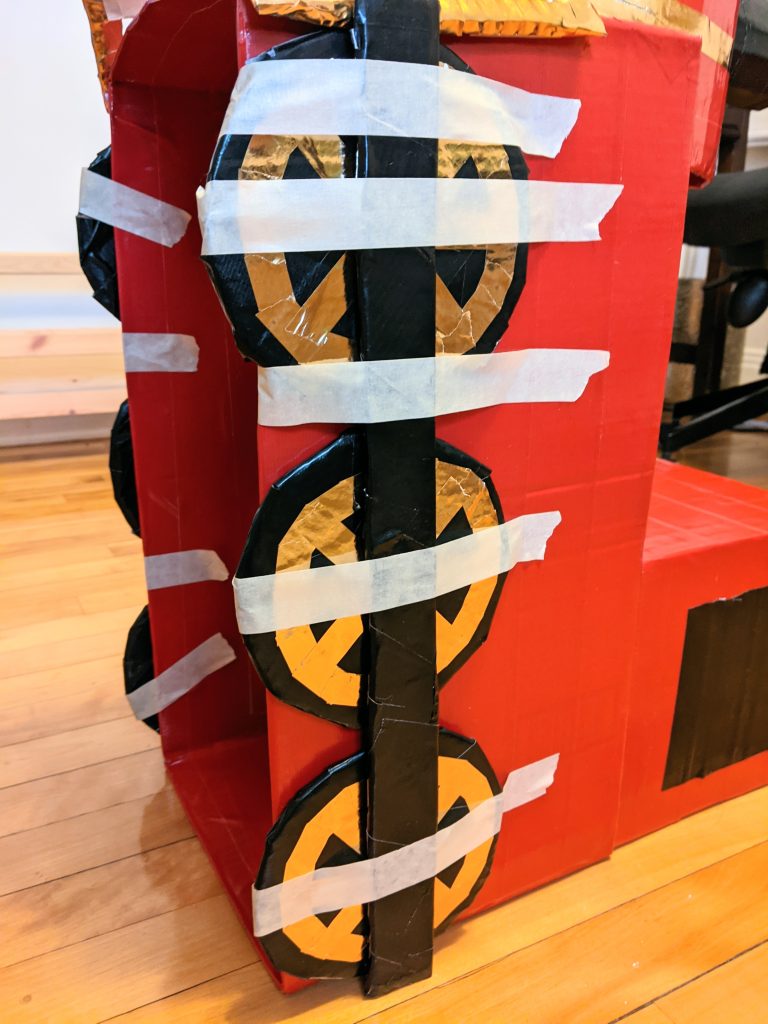
And then finally, you’ll need to cut out six, flat wheels that are about 5″ in diameter and two long rectangular pieces that are about 17.5″x1.5″.
Assemble and Decorate the Train
This part is extremely straightforward. Just tape up all the train parts in your desired colours and add any decorative elements that you want. You can of course paint or spray paint your pieces, but I think tape is better because of a couple of reasons.
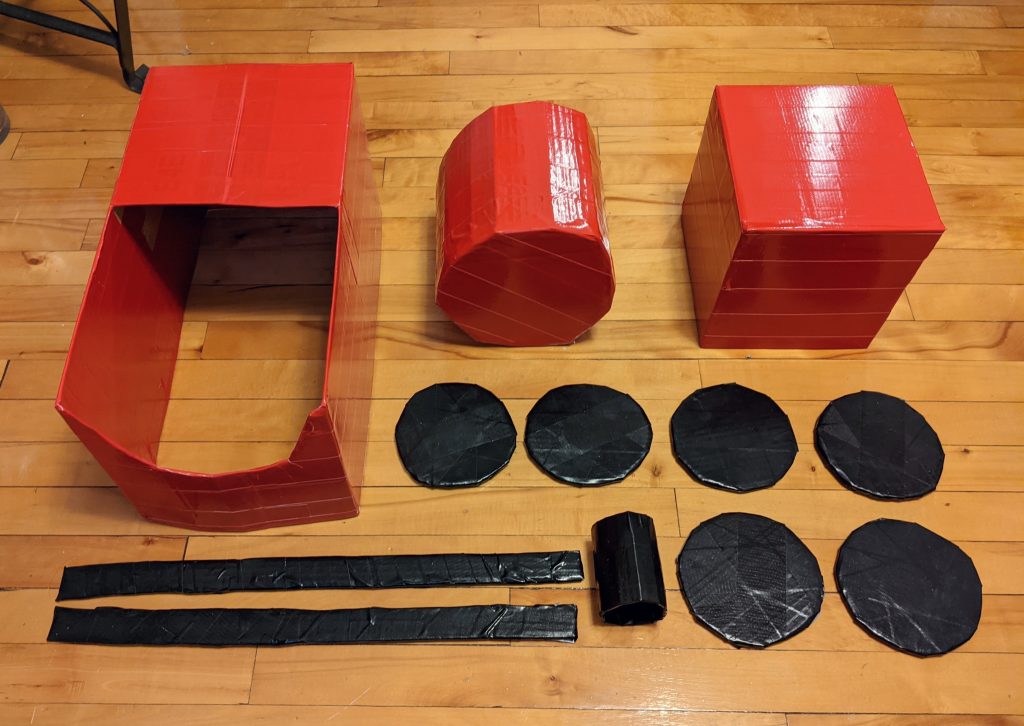
First of all, tape hides the cardboard texture really well. My cuts were extremely rough so there’s a lot of fraying edges, plus labels/tape residue on multiple pieces. Secondly, the tape provides an extra layer of stiffness and durability to the structure. Cardboard is very easily bent/misshapen, especially if it gets wet. The tape should protect against that. I know I’m not just making a costume, I’m making a toy that Theo will want to play with after Halloween is long gone. And this is something I didn’t realize till I was finished, but tape also adds a kind of sheen to the whole thing that I think makes it look more real and pleasing to the eye.
I found lots of great colours of duct tape at the dollar store! I ended up using about 35 meters of red tape and 21 meters of black tape, but that was just because I wanted it to be super durable. I covered all the fronts and backs/insides and outsides, not just the visible parts. And a lot of the tape is in overlapping layers.
For the cattle guard, I ended up using gold washi tape, which I DO NOT recommend. I had to use so many rolls to finish it and I find the stickiness of this type of tape to be lacking. It looks great, but if you can find a thicker gold tape or use a different colour all together, I would definitely recommend doing that instead.
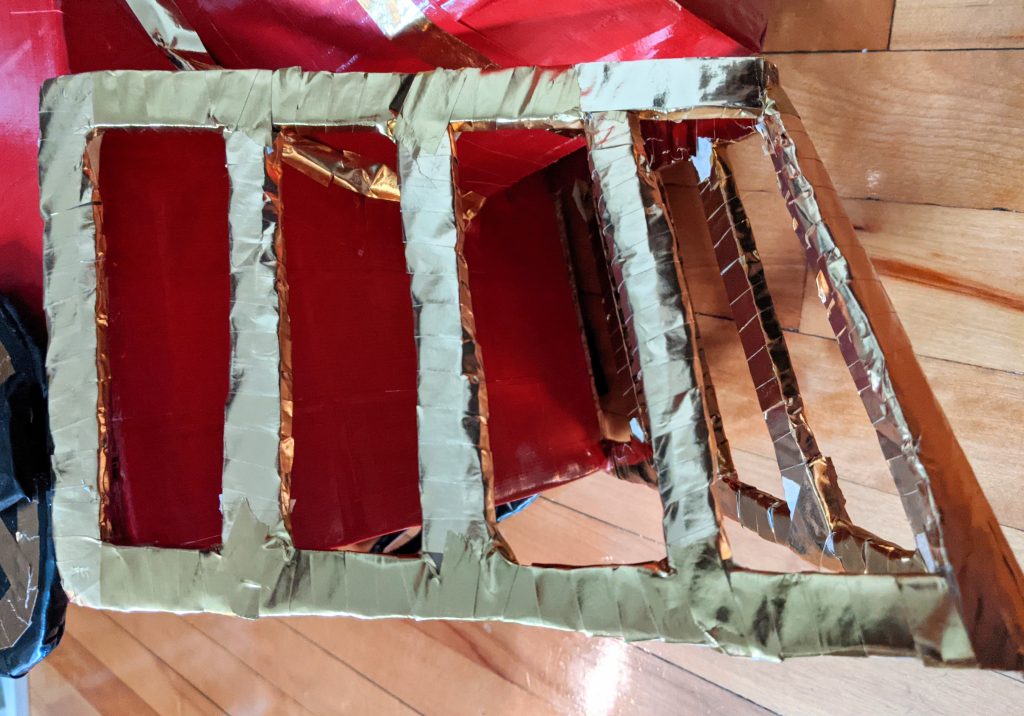
At this point you can also add little decorative elements to the pieces as well. I just added some more gold washi tape here and there for some added details.
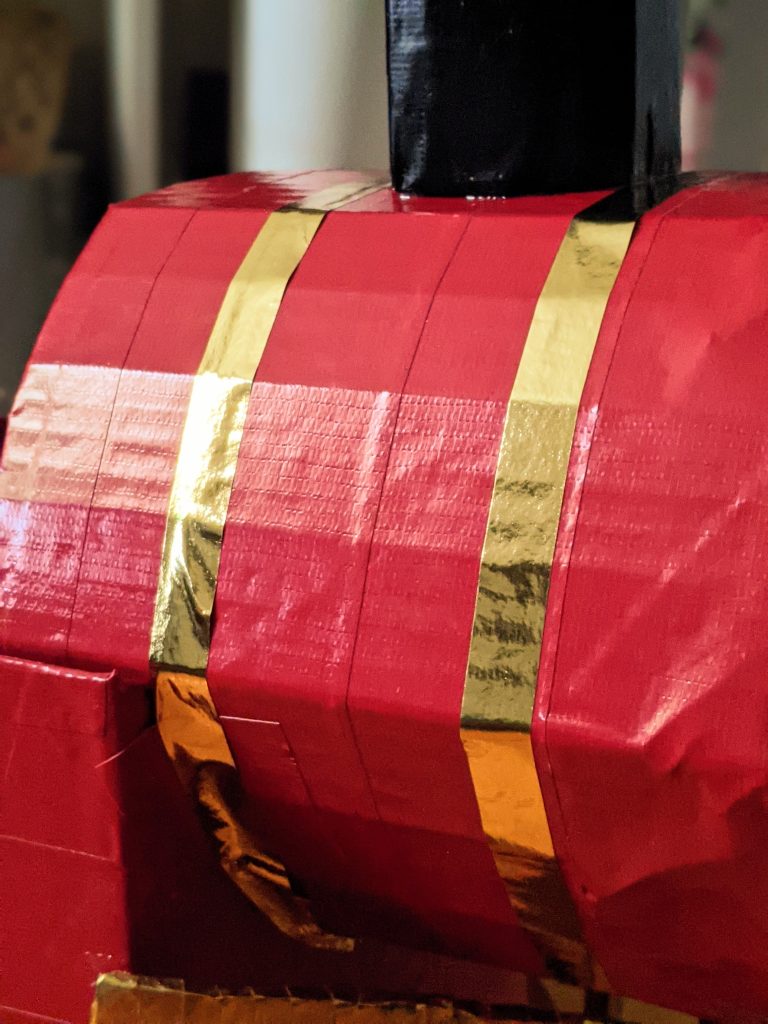
For the smokestack, I just stuffed some old pillow stuffing in the hole. You could glue it down for added security, but I didn’t bother doing that.
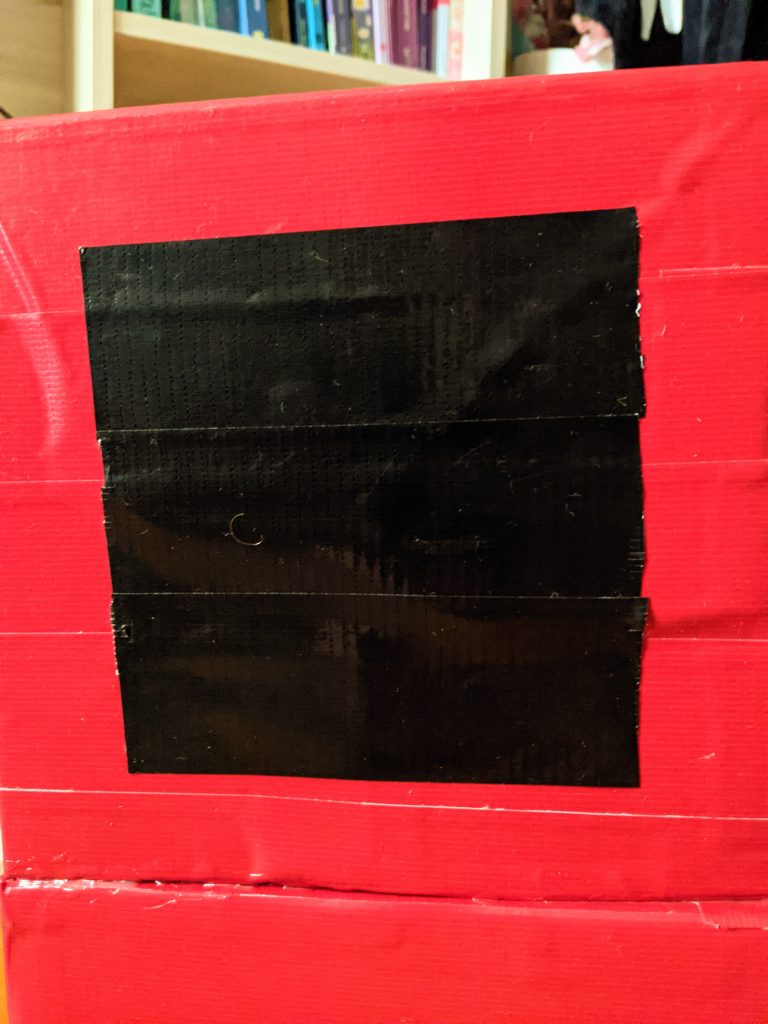
I also added some black tape to the back of the train on both sides to look like a window.
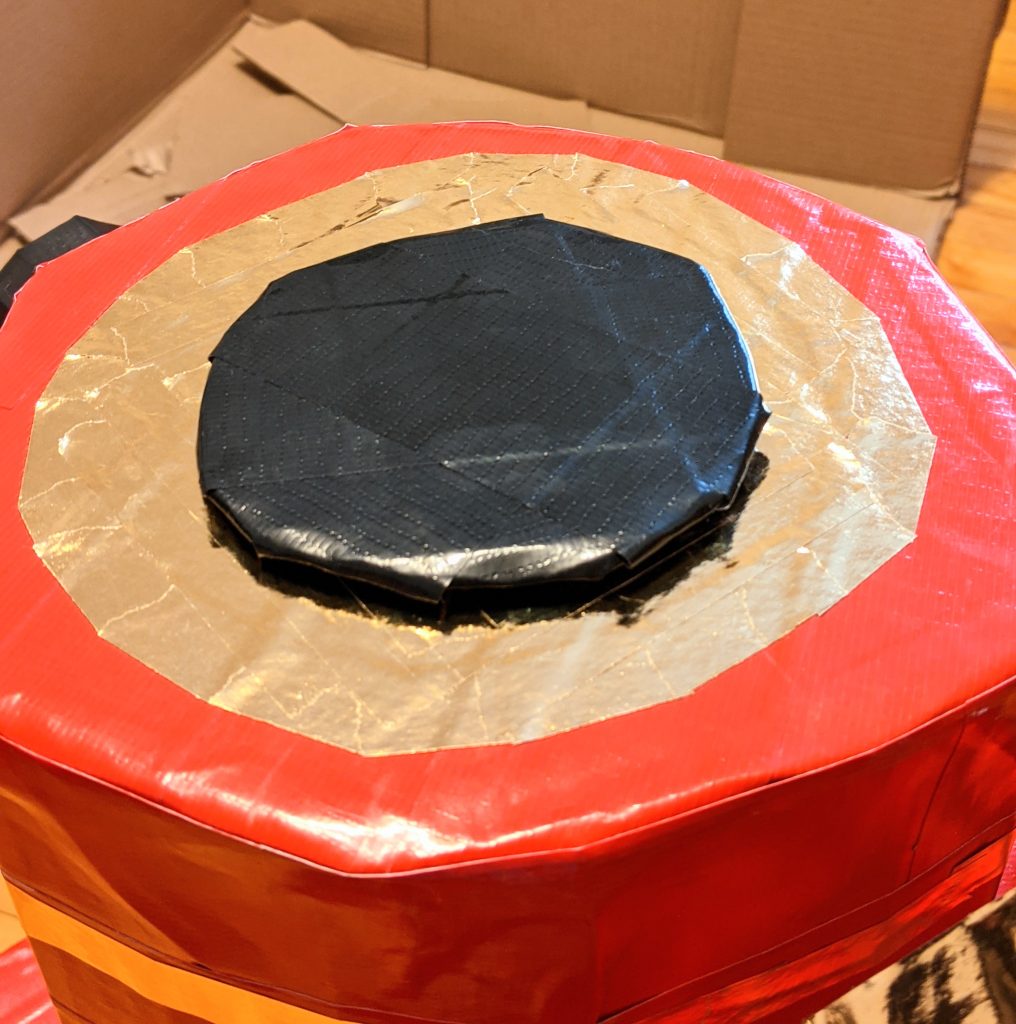
And I felt like the front of the train looked kind of bare, so I added some more gold tape and an extra black disk for interest.
When it comes to assembling the pieces, I used a lot of E6000 and more tape! I knew I couldn’t get away with just regular glue or craft glue. The first thing Theo’s gonna do is try to spin the wheels on this train! So just glue down all the pieces and wait at least 12-24 hours for it to dry before trying to handle it. I added a bunch of masking tape to keep the pieces in the correct position until the glue dried. Obviously, you should remove this later.
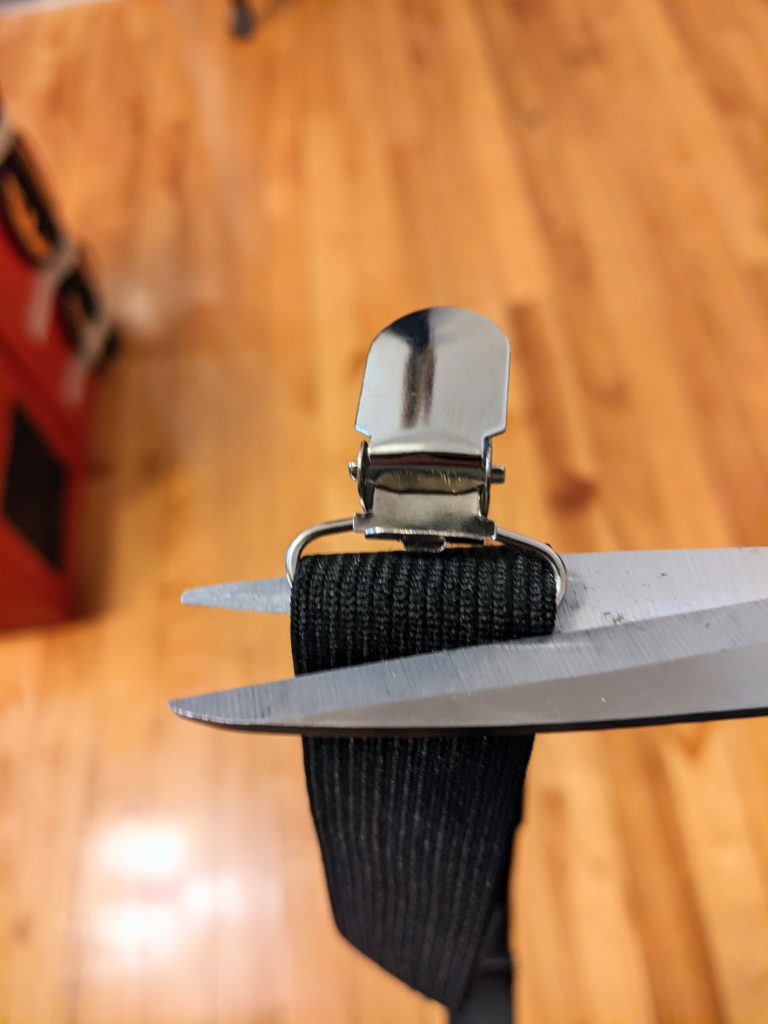
The last thing I did was attach the straps for Theo to be able to wear the train. I used a pair of suspenders I found at the dollar store (it was part of another costume). I like suspenders because they’re adjustable and relatively strong. I first removed the metal clips, because I knew I wanted to attach it in a more secure way.
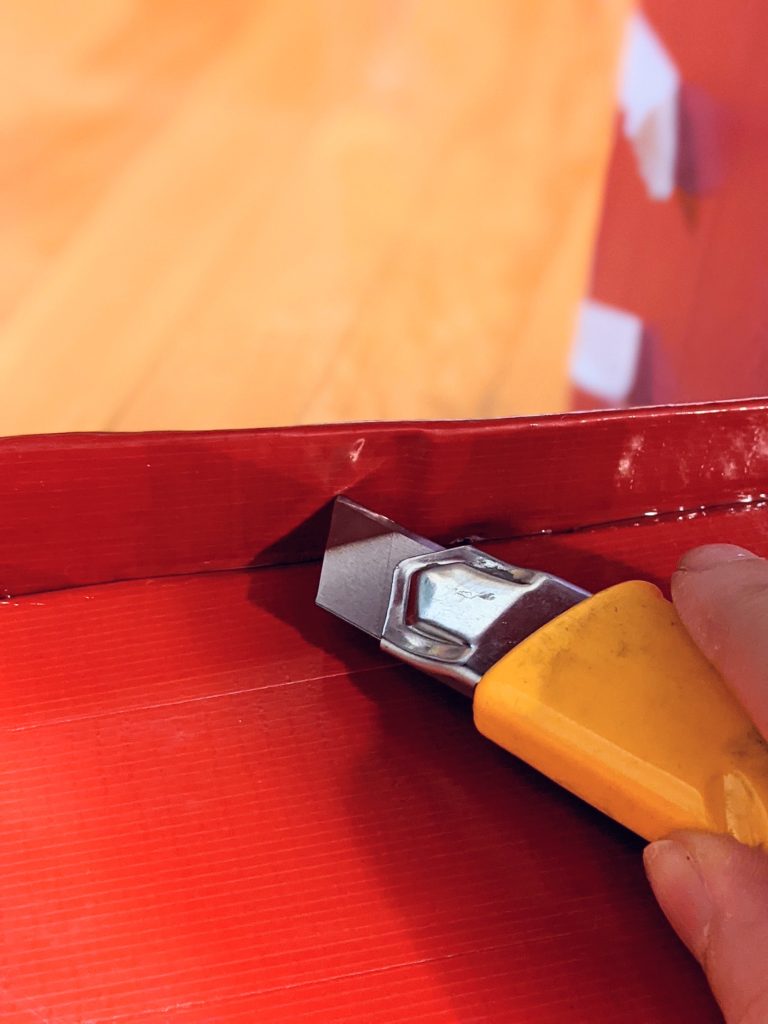
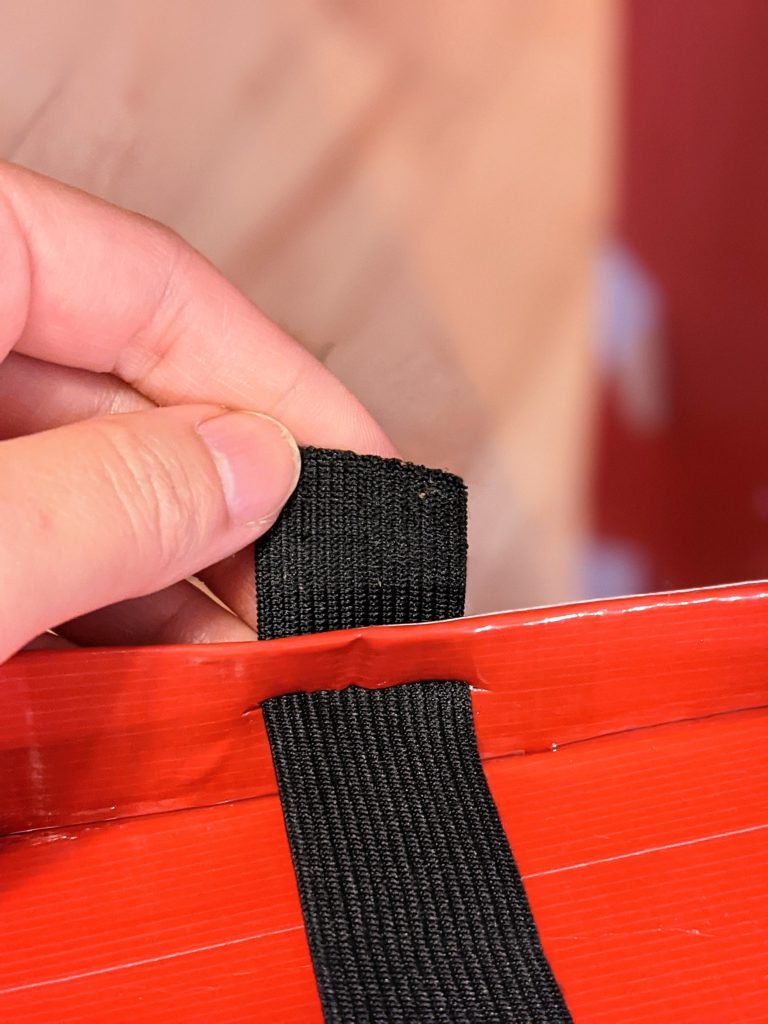
Then, I cut a slit about the width of the suspender strap on the train body where I wanted the straps to go. There were three straps so I had to make three slits.
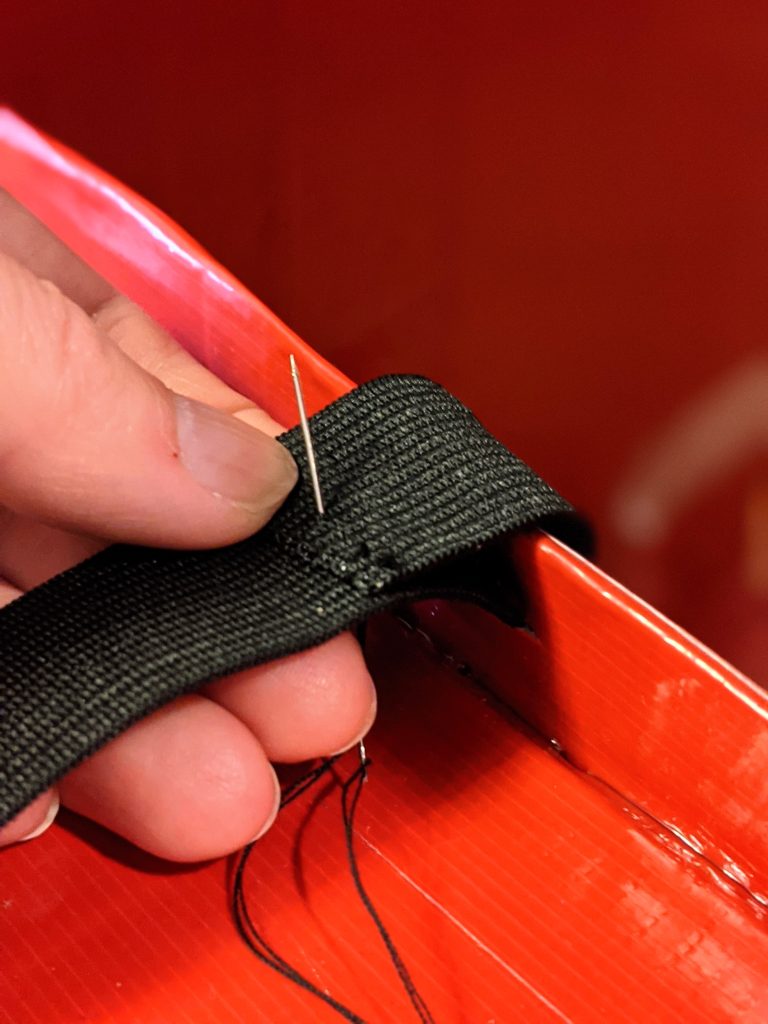
I basically threaded the strap through the slit and then sewed it closed.
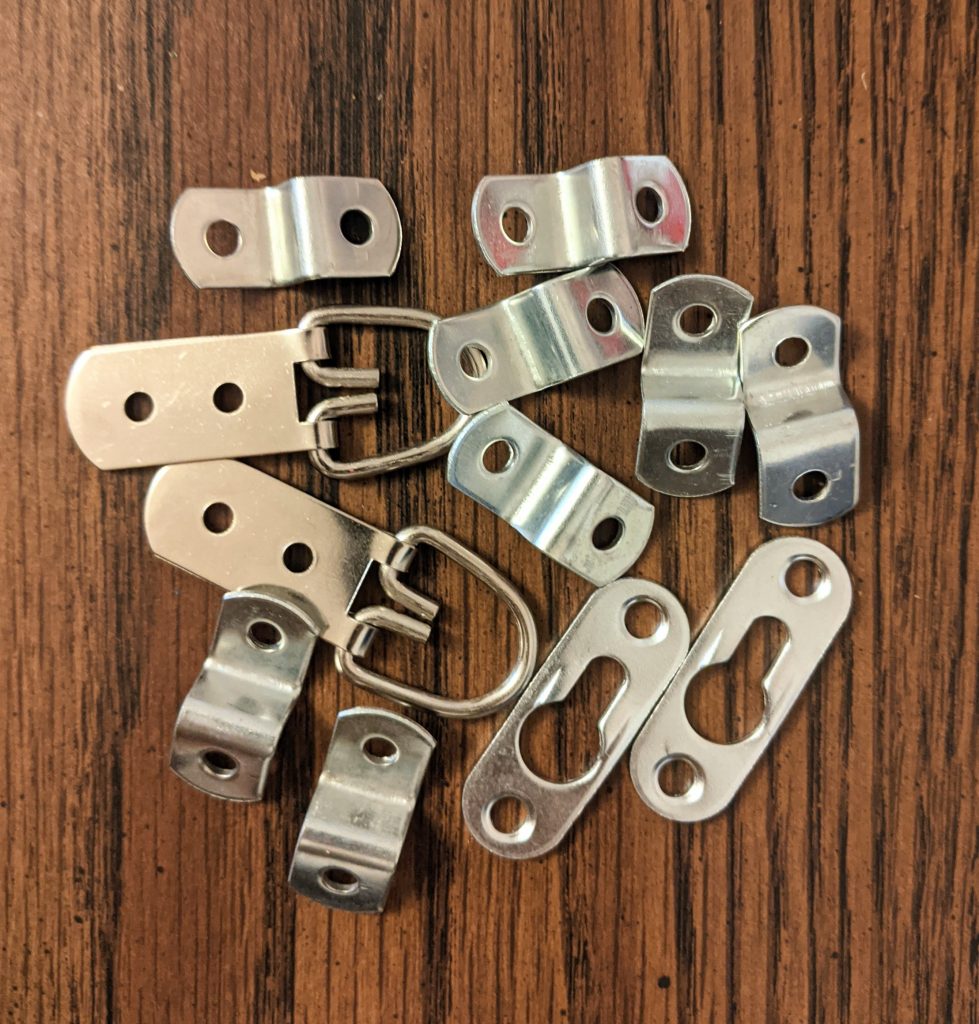
And I actually lied, this wasn’t the last thing I did. Once the straps were on and I was testing it by holding up the train with the suspenders, I realized the back of the train was much heavier than the front and it kept tilting back. So my solution to this was taping some metal bits I had lying around (from picture hanging kits, framing kits etc.) on the inside of the cylinder to add some more weight to the front.
Et voila! An adorable little locomotive for your train-obsessed Halloween-er!
And now for the bonus costume! Simply cut out a train track shape that’s slightly wider than the width of your body and cover it with black tape.
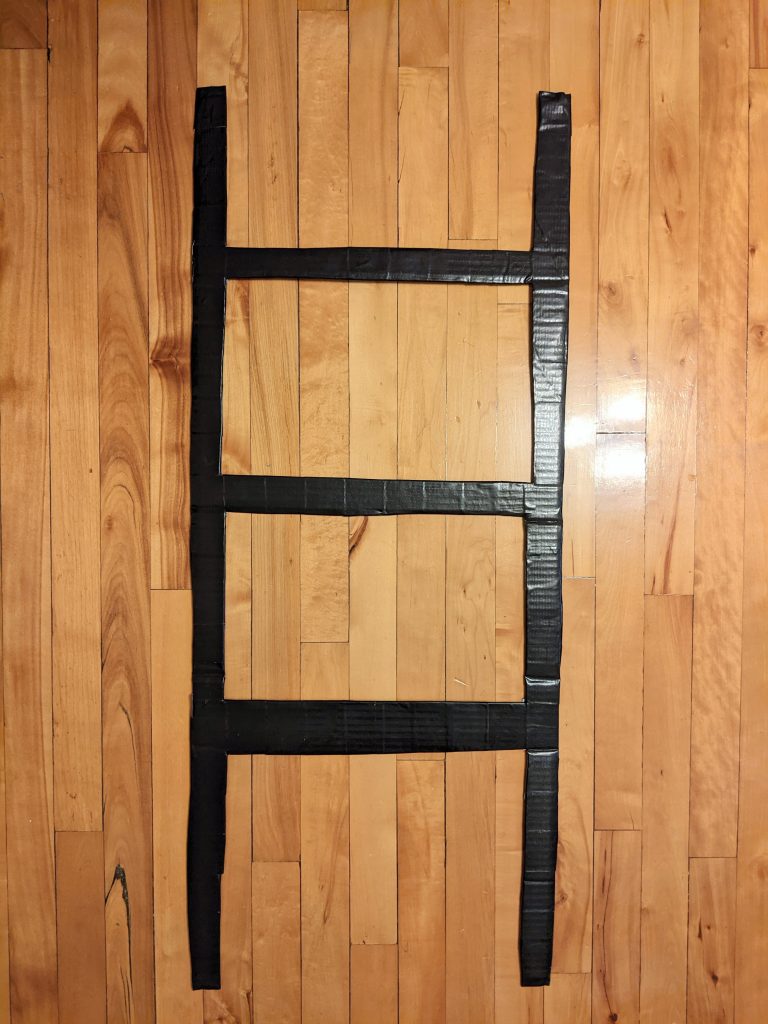
Now you can can tie yourself to the train track with some rope and be the “damsel in distress”!
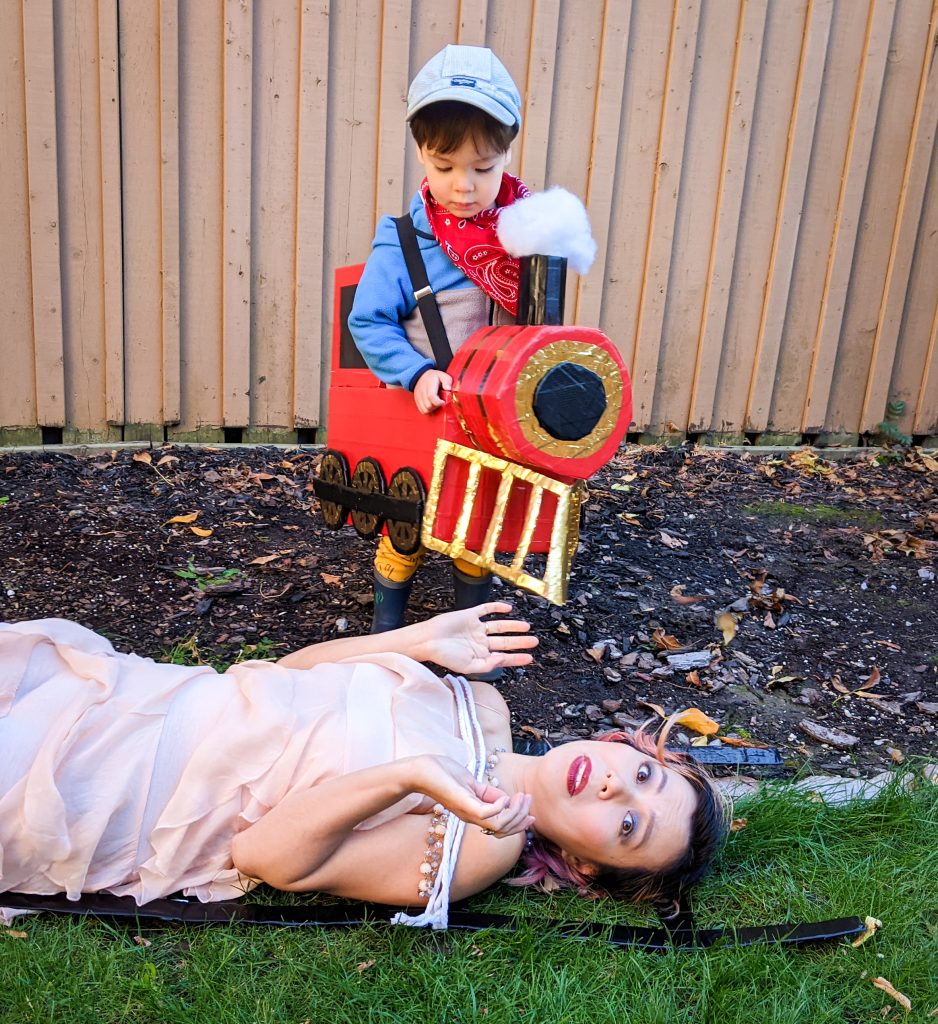
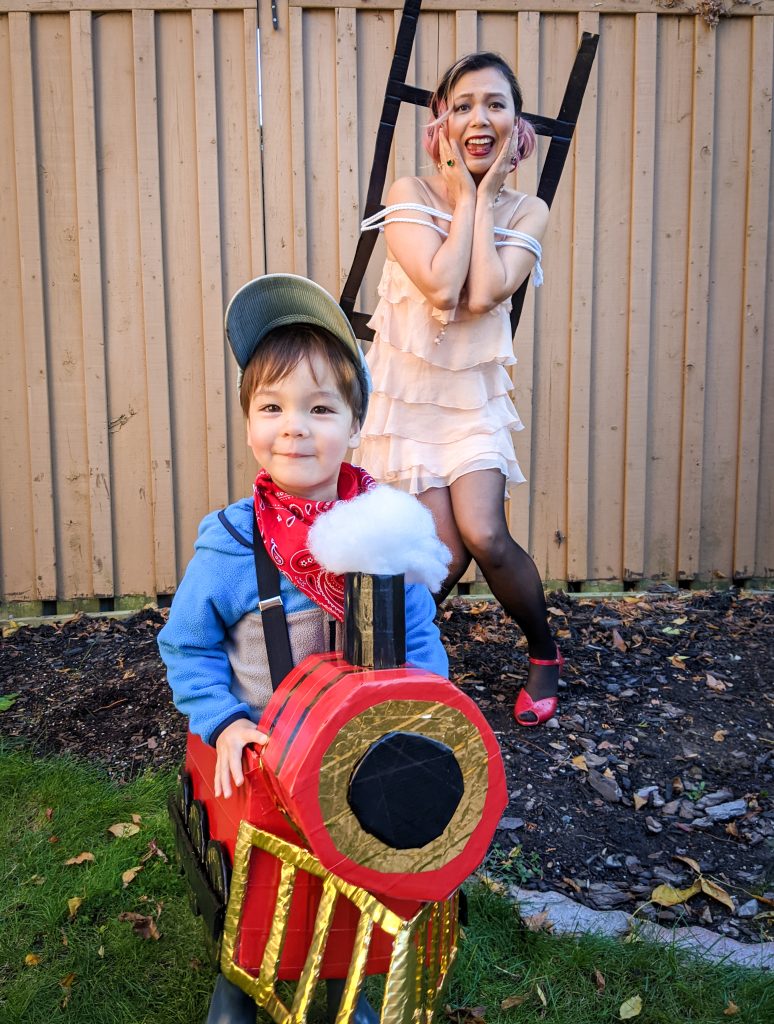
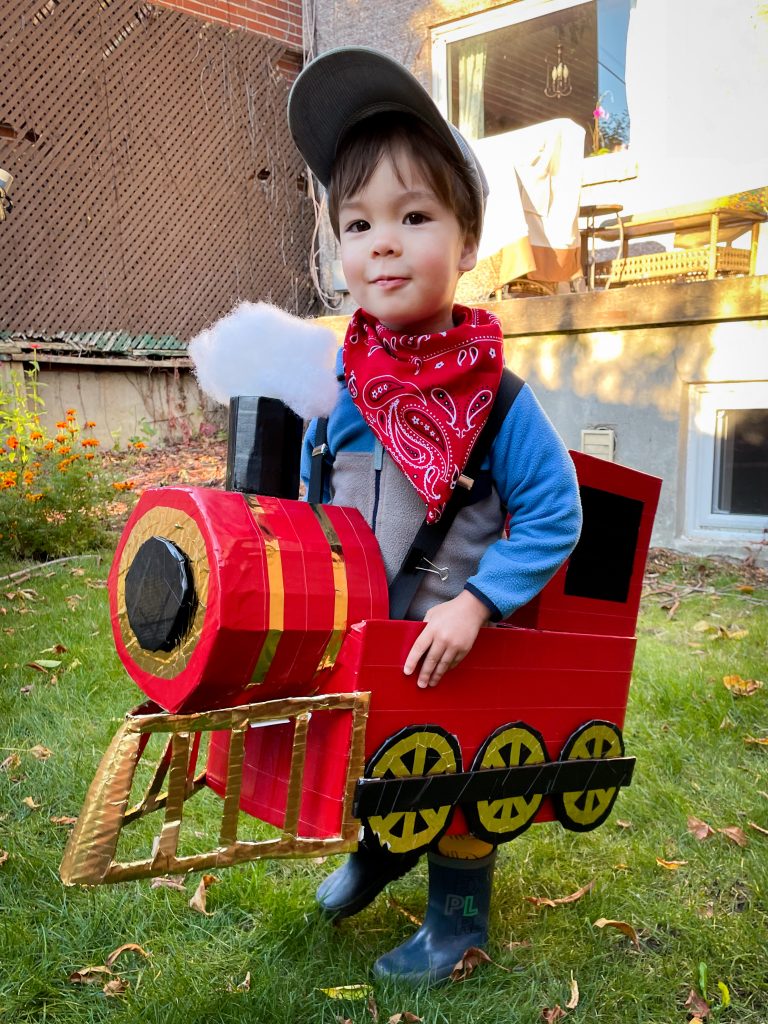
I actually can’t believe how cute this ended up being! It really exceeded my expectations. And as I predicted, Theo’s in love with it. Just not in the way I had hoped! He’s much more interested in pushing it around like his toy trains rather than wearing it as a costume. I’m not sure he understands the concept of a costume…
Luckily, it almost perfectly fits over a wagon we have, so he can push it around if he wants!
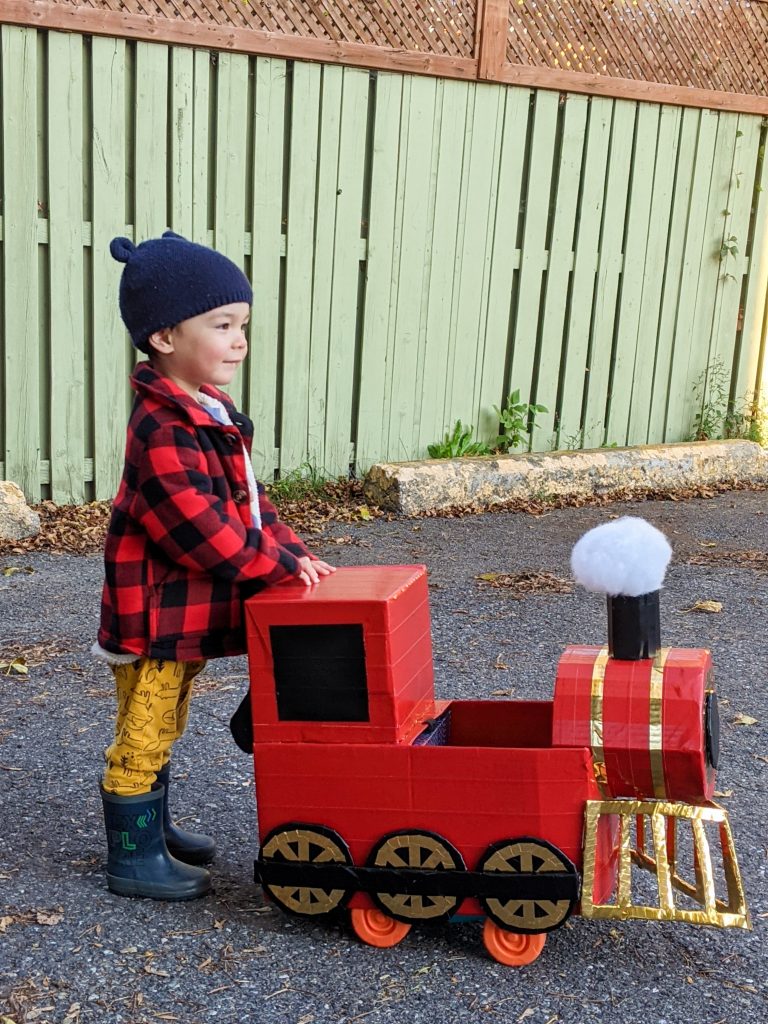
Oh, well! As long as he likes it!
Now with Halloween fast approaching, I might have to whip a backup outfit out of my ass like last year. Not only is Theo not really interested in wearing this thing as a costume, but it’s supposed to rain on Halloween and I’m not about to let this cardboard train out in the rain, even if it’s covered in tape. It did take me quite a while to finish this thing I don’t want it to get ruined immediately!
But at least Theo let me take a few cutie pie pictures of him wearing it. That’s all you can really ask for!
xoxo