
Winter always puts me in kind of a rut. It’s the drabbest of all the seasons. Between having a cold to start off the new year with, to the gloomy, frigid days where darkness descends as early as 4:30 in this part of the world, winter has been particularly brutal this year. I hardly wore any makeup, went anywhere or did anything all January.
But you know what’s great for getting yourself out of ruts? DIY projects! I have several in the works that I can’t wait to share, I’m even thinking of turning March into DIY month, so stay tuned! For now, here’s a super cute and easy way to bring a bit of boho brightness to your home to stave off those winter blues.
Materials
-assorted ribbons
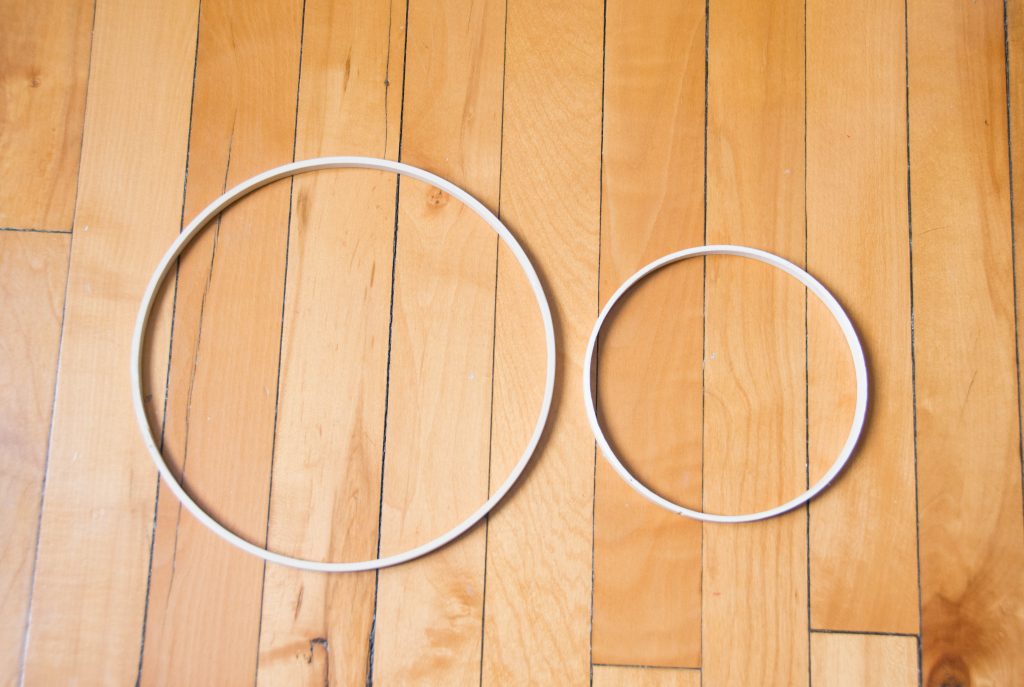
-two wooden hoops of different sizes
-twine or rope
-scissors
1. Gather your materials
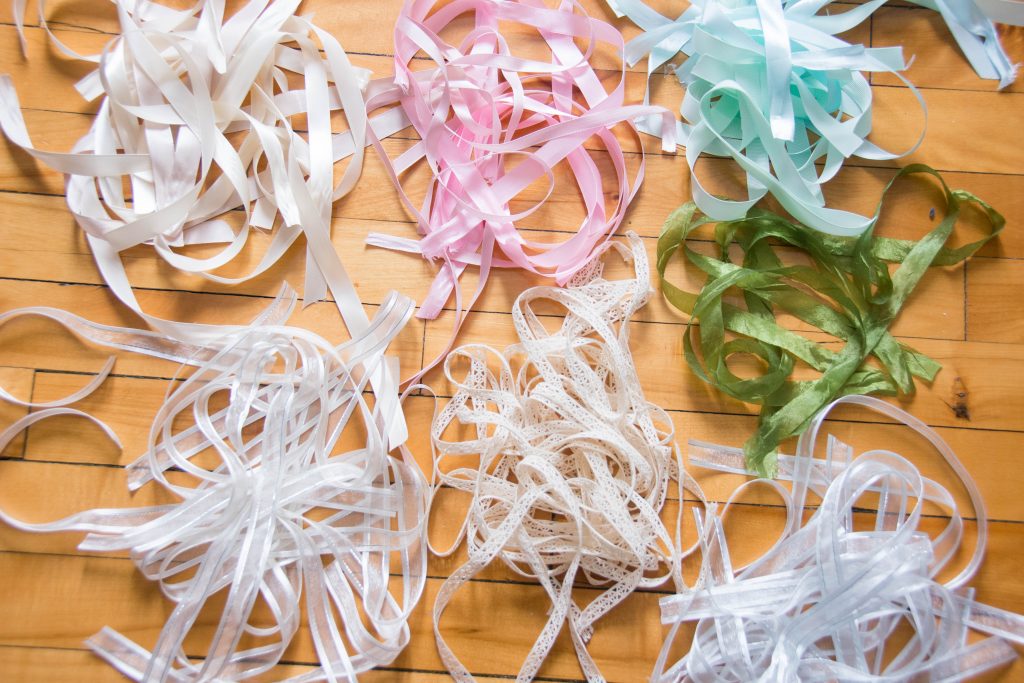
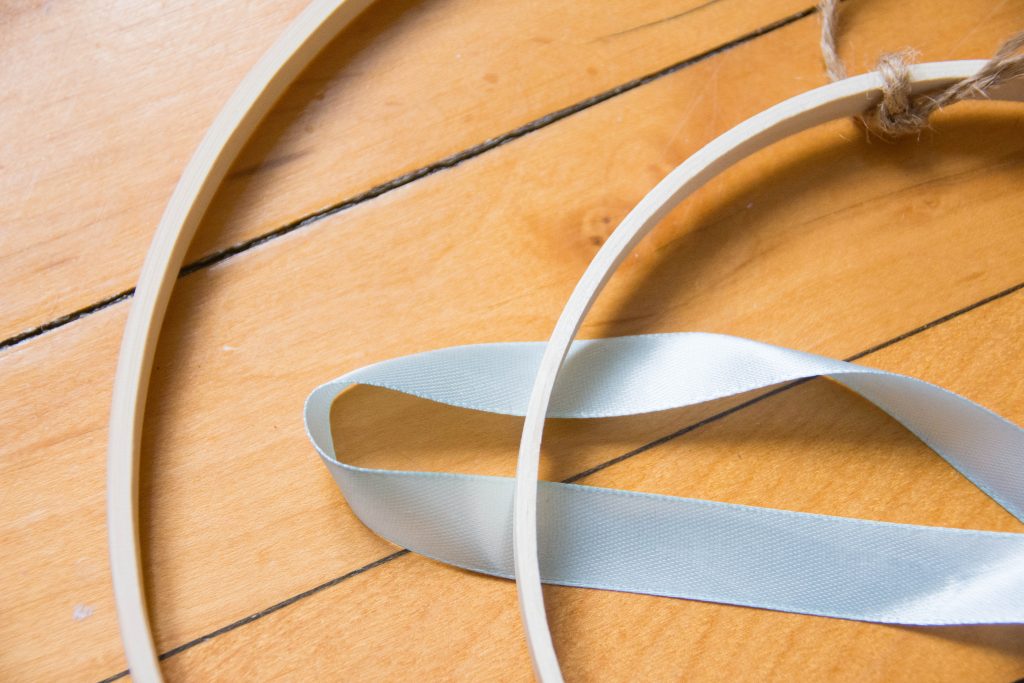
For this project, you can really use any material you want. I chose ribbons, but you can do tassels, strips of fabric, really any kind of textile that interests you. I think it looks best either in one uniform material and colour, or with many different colours and textures mixed together.
I also got two different sized embroidery hoops and just removed the inner hoop to act as the base of my chandelier. I got mine from Michaels. You can use any kind of rounded hoop for this (plastic, metal etc.) but I just like the look of wood.
2. Attach the two hoops together using twine or rope
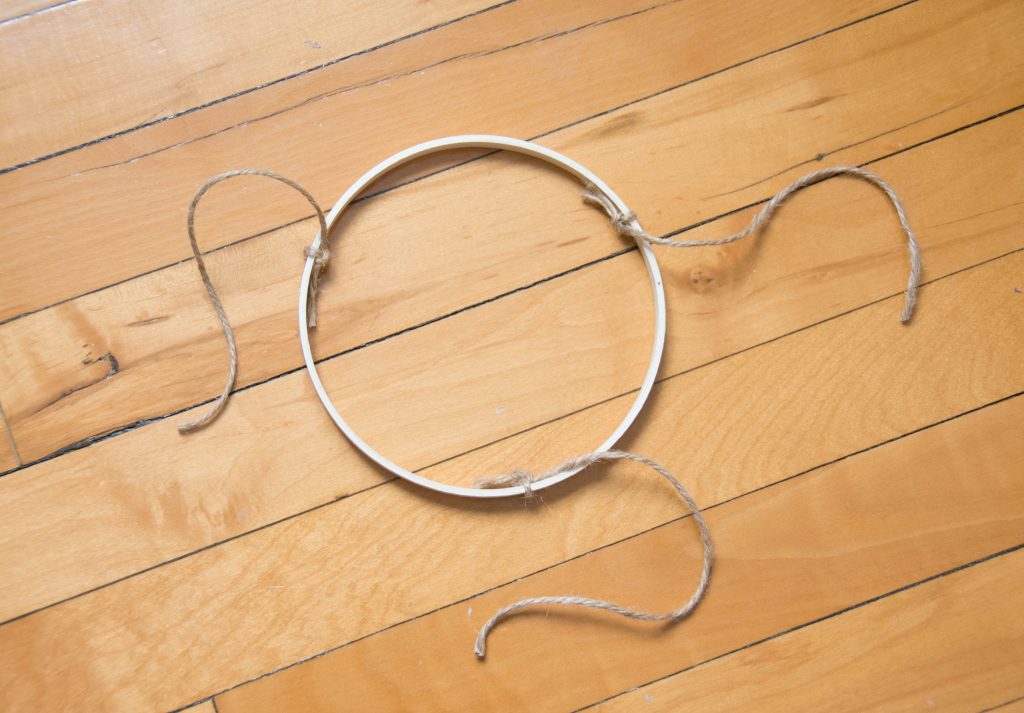
First, cut three equal-length pieces of twine or rope. The length will depend on how big your hoops are and how far you want the bottom tier to dangle from the top tier. In general, I think it looks better when the bottom hoop gets covered by the stuff hanging from the top hoop, so I recommend not hanging the bottom one too low. Take the smaller of the two hoops and tie the rope pieces to it, with roughly one third of the circumference of the hoop between them.

Then, tie the loose ends of the rope to the larger hoop. This takes a bit of finagling to get it to hang level, but you can always fix it later. You could also opt to hot glue the twine to the hoops so they don’t shift around while you’re working, but I just left it.
3. Tie your ribbons to both hoops all the way around
I opted to do a sort of over and through knot with my ribbons. You fold the ribbon in half and lay it under the hoops. Then, wrap the loose ends over the top of the loop and through the ribbon hole you created by folding it in half.
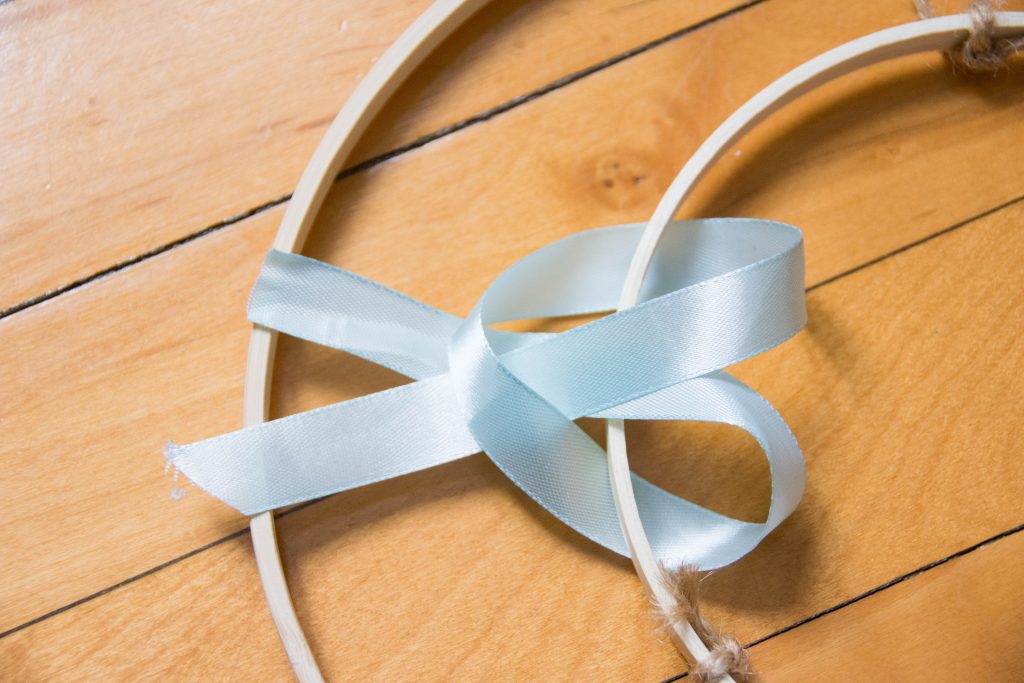
Then you just pull the loose ends of the ribbon tightly and adjust it so it hangs straight down.
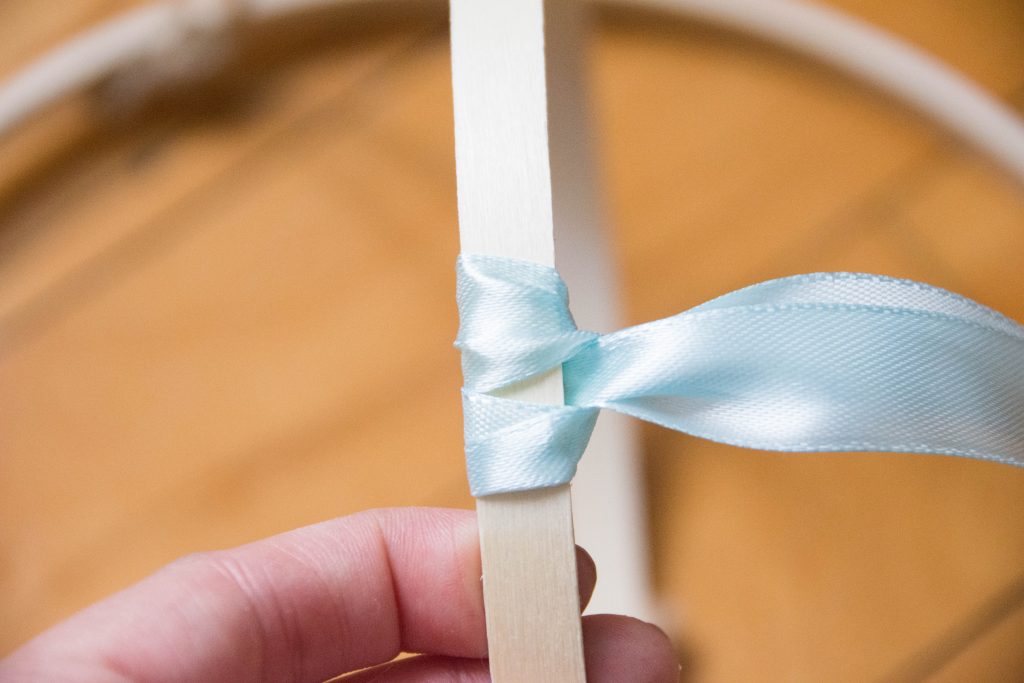
I just like the way this knot looks and it kind of doubles the amount of ribbon you end up have hanging down, so the chandelier will look fuller.
4. Tie some twine/rope to the larger hoop to hang it with
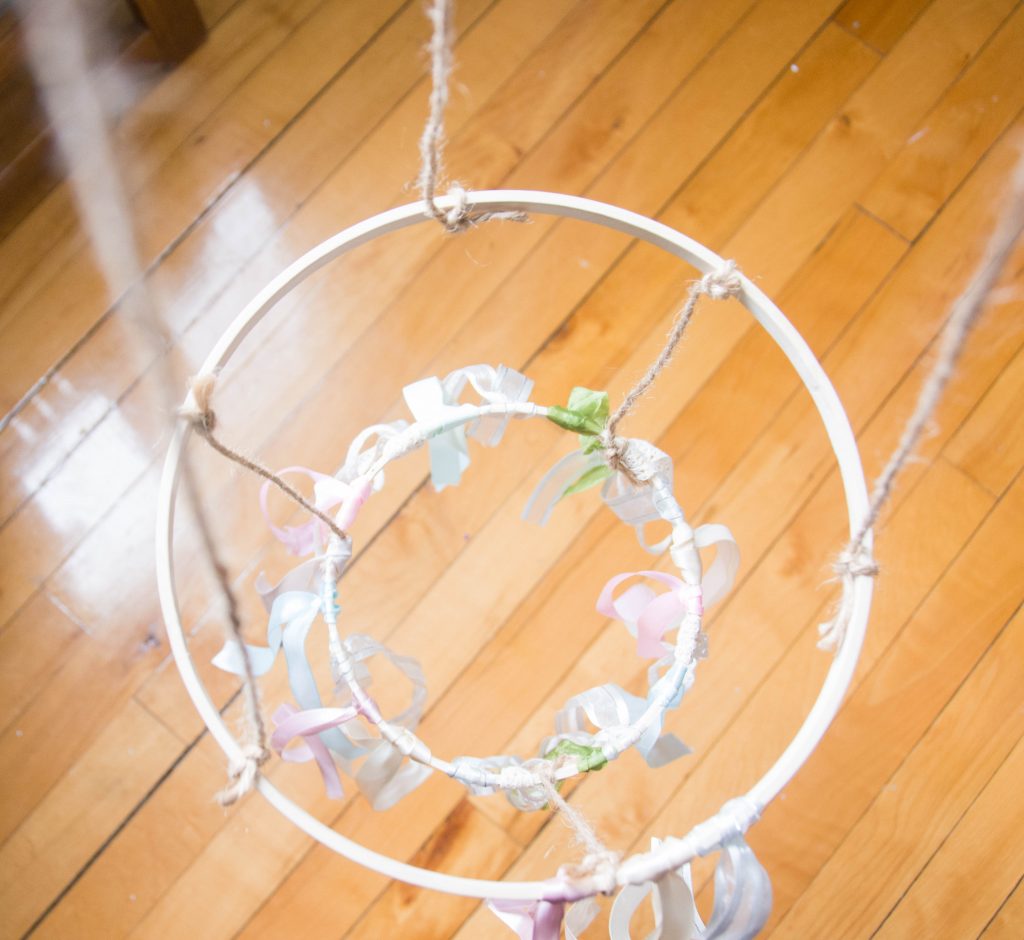
I decided to also use the same twine I had to suspend the chandelier with. Using the same method as before (cutting three pieces of equal-length twine), I tied the pieces to the larger hoop and then tied them all together in one big knot at the end. I kept these pieces quite long because I haven’t decided where I want to hang this and I want options. You can always cut off the excess later if it ends up hanging too low.
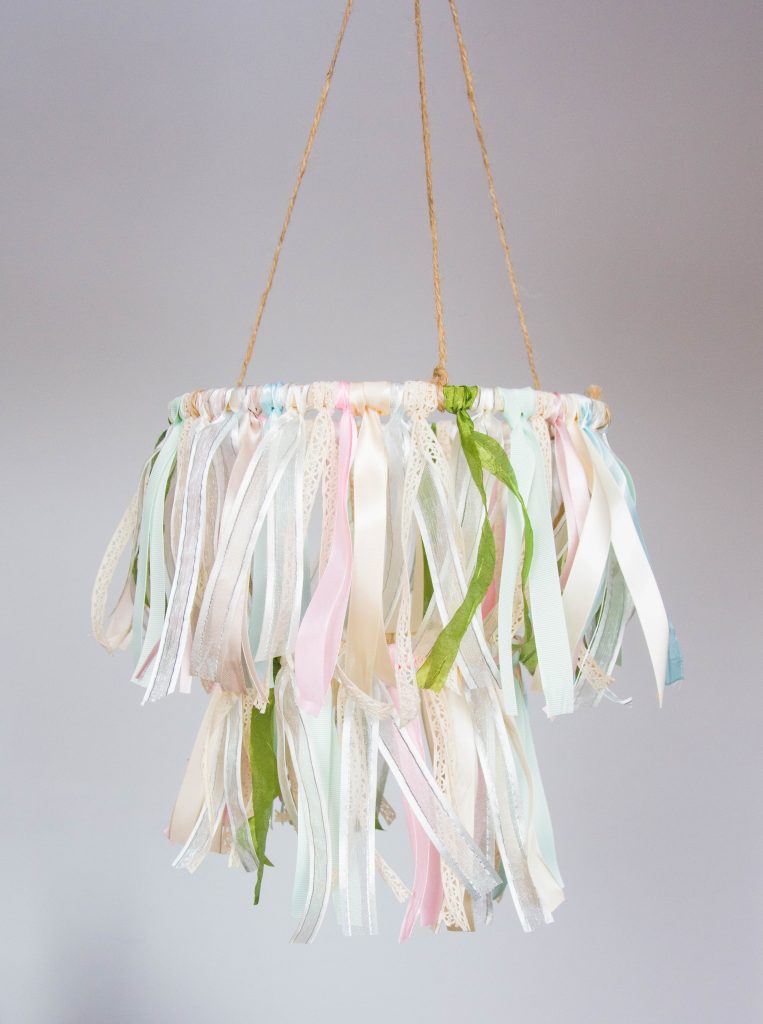
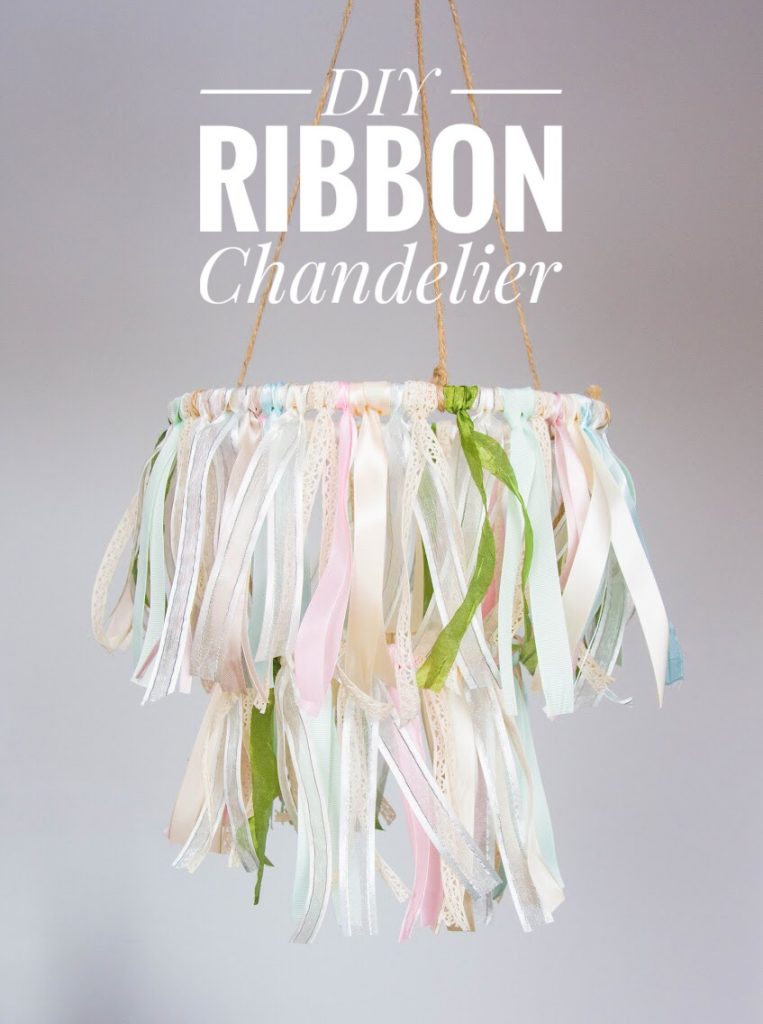
I love the way this super easy DIY ended up looking! I think it’s very boho chic. Mine ended up being pretty small, but you could opt to make a real statement piece by adding more tiers to your chandelier and using bigger hoops.
Oooh, as I’m writing this, I just thought of hanging it outside in the backyard for the summer. It already adds a bit of whimsy to any room, just imagine the ribbon ends fluttering in the breeze!
So, what do you think of my boho ribbon chandelier?
xoxo