
There’s this little part on the outside wall in our dining room that kind of juts out a bit more than the rest and I thought a console table would be perfect to house some of the prettier things we had that were just sitting inside kitchen cupboards. I’m still holding out for the perfect pre-loved hutch to complete the dining room, but as my fellow thrifters know all too well, it can be a years-long waiting game when your heart’s set on vintage furniture.

Materials

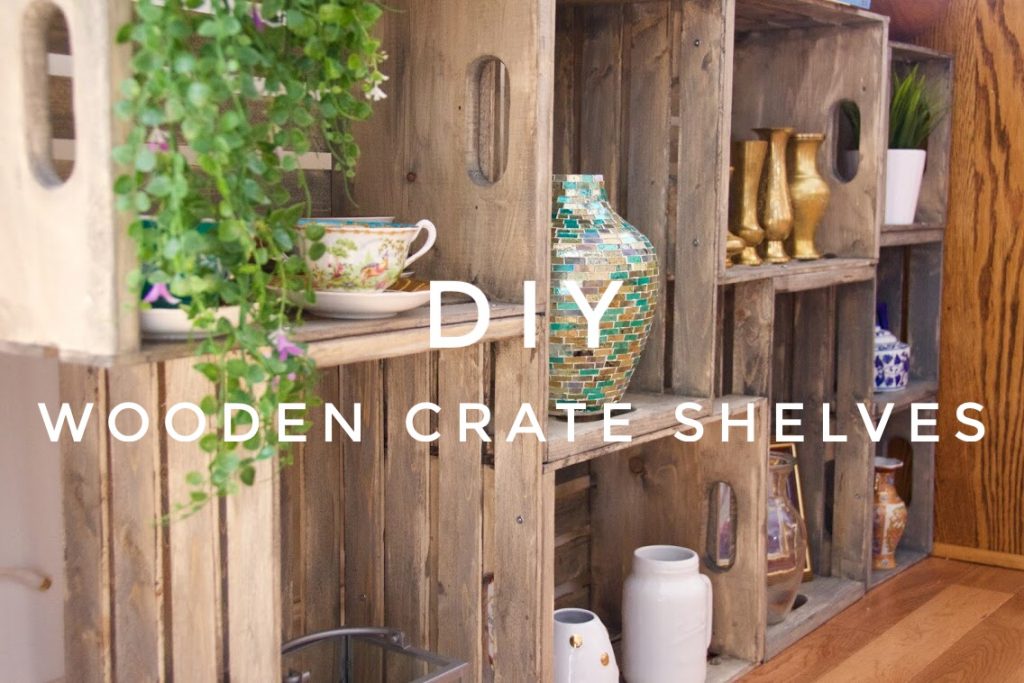
1. You want to first measure the space where you want the shelves to go and do a bit of math to figure out how many of what sized crates you’ll need, before you buy them.
I bought my crates at Rona, in both the 18″ and 9.5″ versions, but they are very basic and simple, so I’m sure many craft and home hardware stores sell similar products.
2. Prep and stain your crates, following the instructions on your stain label.
I didn’t bother sanding because the wood was pretty rough and unfinished already. I used a small 30mm paintbrush to spread the product on the wood in a thin layer and worked it in more/wiped off the excess with a painter’s cloth.
The stain colour I chose was Prestige Grey by Saman and I only did one messy layer, because I wasn’t looking to completely turn the wood grey or make it look pristine. I just wanted it to have a bit of that rustic driftwood vibe.
3. Once the stain dries and sets, line up the crates to build the structure.
Since these crates were basically just pieces of random wood nailed together, they weren’t the same exact measurements and there was some bowing here and there. I figured I wouldn’t be able to get all of the sides to be level or fit perfectly together no matter how I matched them up, so I tried to focus on getting the bottom and front parts to be pretty much level/even.
4. Once you line them up, pre-drill holes where you wanted the screws to go.
Despite this, I still got a bit of wood splitting, but it wasn’t too bad.
5. Screw the crates together in your chosen layout.
I mostly used 3/4″ screws and for the thicker portions, 1-1/4″, and made sure all the sides that touched another crate had two or three screws holding them together.
Once all the pieces are screwed together, you may want to consider anchoring it to the wall for extra security, but other than that, you’re done! This was a pretty easy project that only took an afternoon.


Let me know if you decide to try this yourself. I’d love to see how your bookcase/shelving unit turns out!
This is awesome! I love to do diy projects on the summer!😍🌸
Thanks! So do I 🙂