Our front steps have seen better days. The winter shoveling and salt did a number on the paint and some of the concrete started chipping. The biggest piece came off the bottom step and when Kyler started poking around to assess the situation, more and more kept coming off. Since there wasn’t any integral structural damage, we decided just to repair it ourselves (and by we, I mean pretty much just Kyler). Here’s how we did it:
Materials
-concrete mix
-bucket
-water
-concrete adhesive
-concrete cleaner
-wire brush
-foam brush
-cleaning brush
-masonry drill
-regular drill
-concrete screws
-small trowel
-(optional) cinder blocks, plywood, plastic sheet, tape
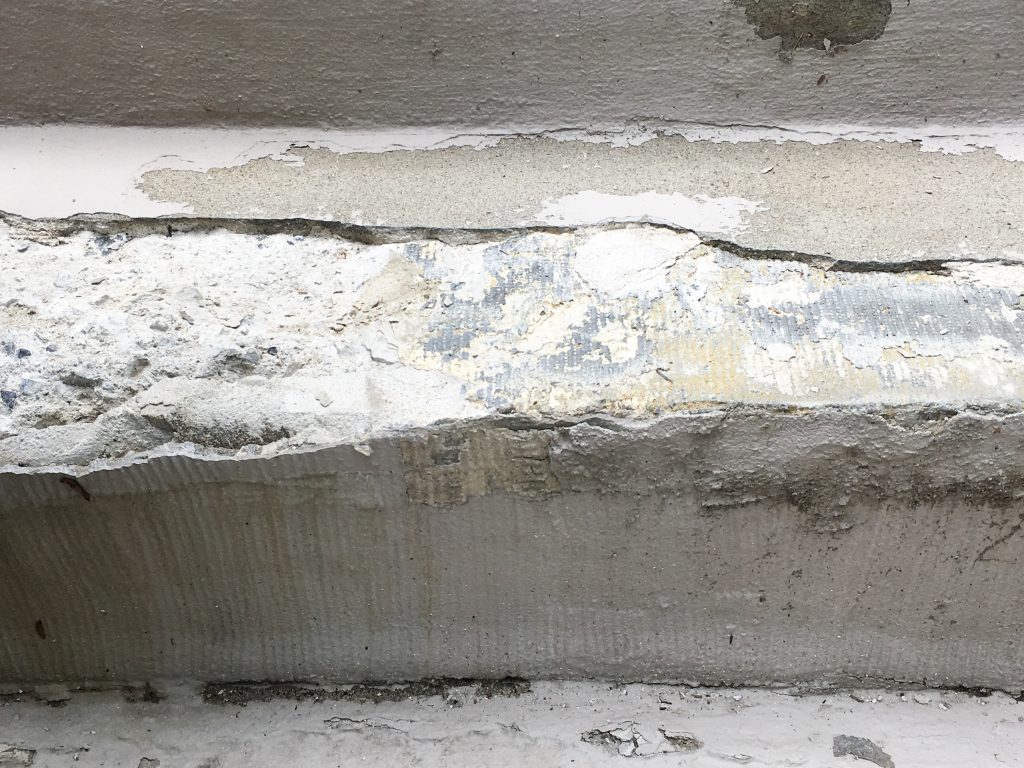
1. Break off as much concrete as you can around the damaged area.
This might be counter-intuitive, but you want to make sure all the loosened pieces of concrete are removed before you begin. You’ll end up making the damage look a lot worse than it did initially but you don’t want all your hard work to be attached to unstable concrete that might crack and loosen more in the future.

2. Pre-drill some holes on areas that are more sloped.
Step 2 and 3 are more of an optional step, but the damage on our step really sloped down and the edge was chipped off. By adding some concrete screws, it gives the new concrete something to kind of hold onto so it’s a bit sturdier.

3. Drill some masonry screws into the pre-drilled holes.
Leave a bit of the screws sticking out, again, to give the new concrete something to kind of grab onto. Make sure they are secure by trying to pull them out. You might have drilled into a soft spot and the screw will come out easily. In that case, just pick a new spot and drill again.

4. Using a wire-y brush, brush away all the remaining debris and dust in the damaged area.
Using something that can blows air (hair dryer, leaf blower etc.) really helps to get out the dust in all the crevices.

5. Use concrete cleaner to wash the damaged area really well.
We used Quikrete Concrete & Asphalt Cleaner and a cleaning brush to really scrub it.

6. (Optional) Using a piece of plywood and cinder blocks, create a sort of barrier/form along the edge of the step to make sure the concrete sets in the correct way.
This isn’t necessary if there’s no damage to the edge of the step. Also this is definitely not the best way to do this if you do need to. Building an actual form for the purpose of molding the concrete, is the more “professional” way to do this. We just used what we had and didn’t worry about it.

7. Using a small foam brush, apply some concrete adhesive to the damaged area.
We used Quikrete Concrete Bonding Adhesive. Make sure you don’t over-saturate the area because the adhesive needs to be a bit dried/tacky in order to do anything. If it pools in certain areas, just use paper towel to soak it up a bit.

8. Mix up some concrete following the instructions on the bag.
We used Commercial Grade Quikrete 5000 High Early Strength Concrete Mix.

9. Apply concrete with a small trowel and smooth it over.
You could be all professional and use those special brushes to get those groves in the finished concrete, but we really didn’t want to be fancy about it and the rest of the steps don’t have that texture so we just made it match.


10. (Optional) Apply some plastic sheeting over the finished concrete and wait for it to dry.
Apparently, humidity really helps strengthen drying concrete, so misting it with your hose and applying a plastic sheet over it kind of retains some moisture. I don’t know if this really did anything or how big of a difference it makes, but we tried it and it seemed to work well! Also as a bonus, people won’t step all over your hard work before it dries.

It only took about a day to dry and feel pretty sturdy, but we left it alone for several days before taking off the plastic and walking on it. It feels just like a regular step you guys! I’m pretty impressed by how not complicated it was.
Of course it’s not perfect, there are a lot of imperfections, but our giant busted step is fixed and safe to walk on. And as you can tell by our many photos, our steps still need a ton of work. Just getting the bottom step functional again was step one.
Let me know if this helped you with your household repairs at all, or if you would suggestion doing anything differently!
xoxo

1 thought on “Fixing Front Steps Part I: DIY Concrete Repair”