
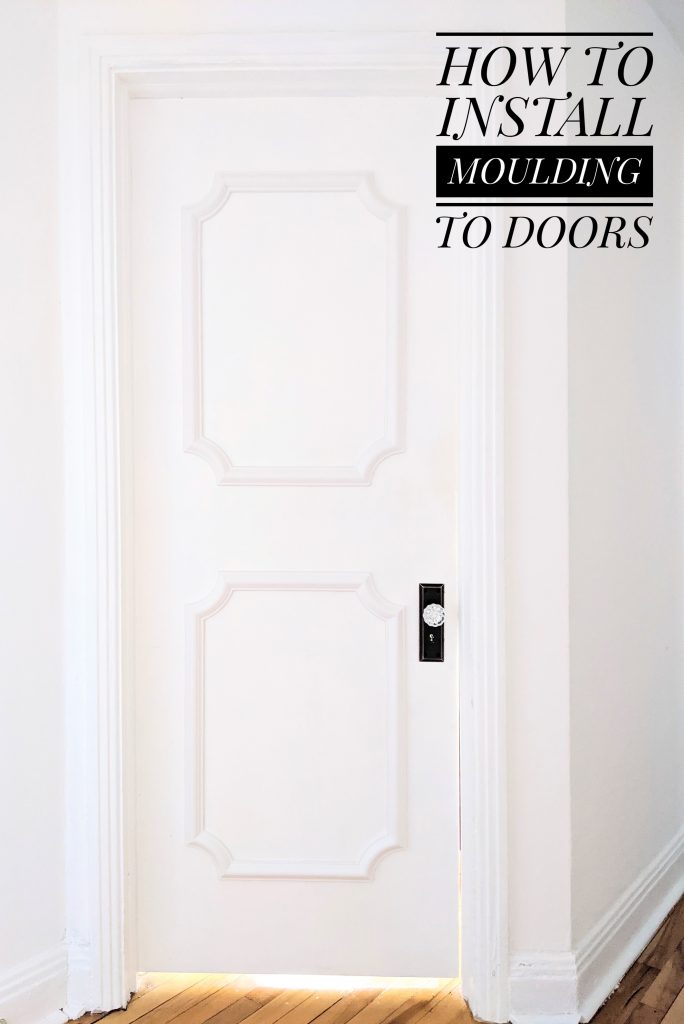
When we last left off, our hero was attempting to beautify (and functionalize) some lame doors in her weird-ass house. Well, after finally fixing the doorknob problem (which you can read about here), it was time to add some romance to the ordinary.
I was originally going to just get some panel moulding at the hardware store to make some rectangular frames, but then I saw this Ekena Millwork Scalloped Picture Frame Panel and I just couldn’t stop thinking about it. I found it very expensive for the amount of doors I had to do, but in the end, it was still much cheaper than to get all new doors hung (you can read about all our door problems in the previous post linked above), so I bit the bullet and ordered them. And I have to say, I do not regret it at all!
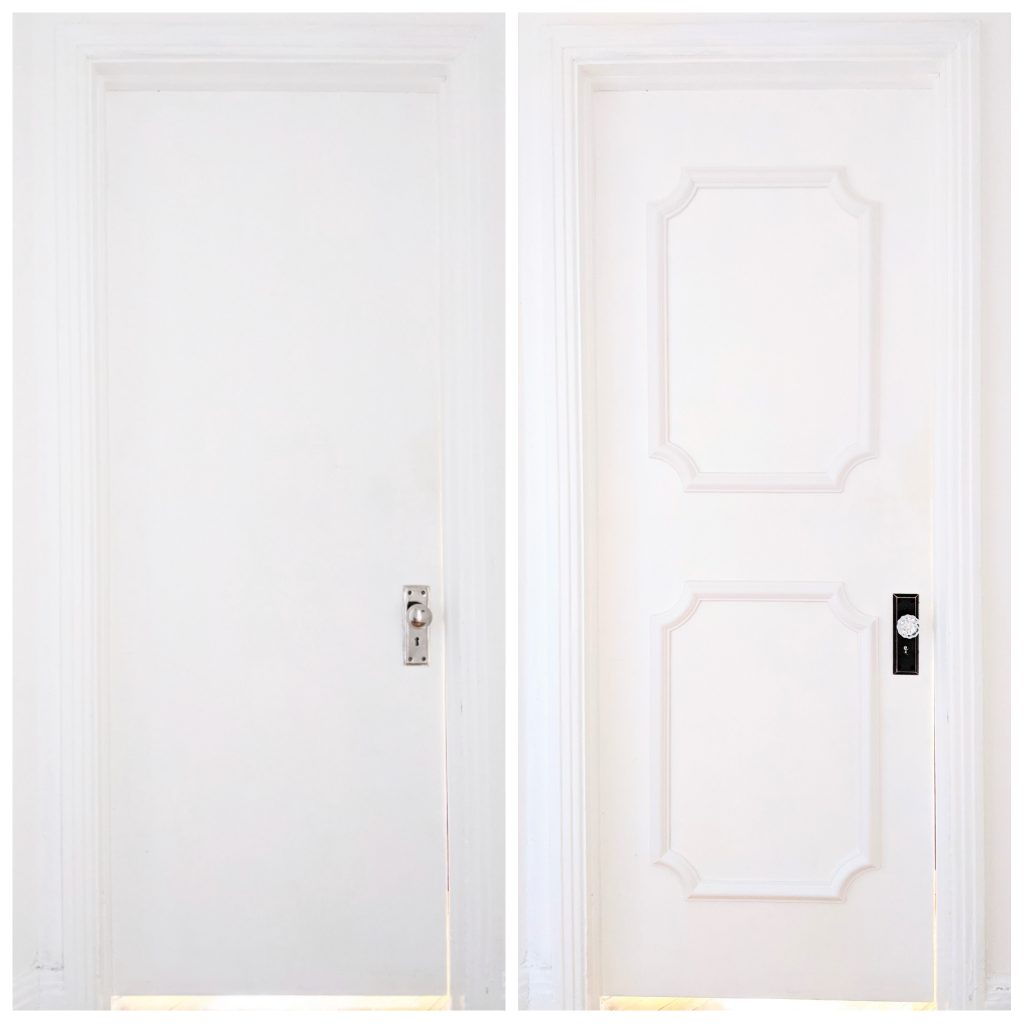
Here’s how I beautified our ancient, hollow, boring upstairs doors!
Materials
- 4 pieces of frame panel per door (I used 16″ x 28″ panels for the linen closet and 20″ x 28″ panels for the rest of the doors)
- masking tape
- strong adhesive
- level
- pencil
- measuring tape
- box cutter or some kind of sharp knife (for gluing mistakes)
- protected gloves
Decide Where You Should Adhere The Panel
You would think it was pretty easy to figure out where to put the panel pieces, just measure the door and divide by how big the panels are. Well, the doorways in our lovely 80-year-old home are not perfectly square, so the doors are either not hung perfectly square, or like in my office, part of the top is simply sanded off to fit in the jam. So it pretty much looks like the top of the door is slanting down. Just look at how not level this door is on top….
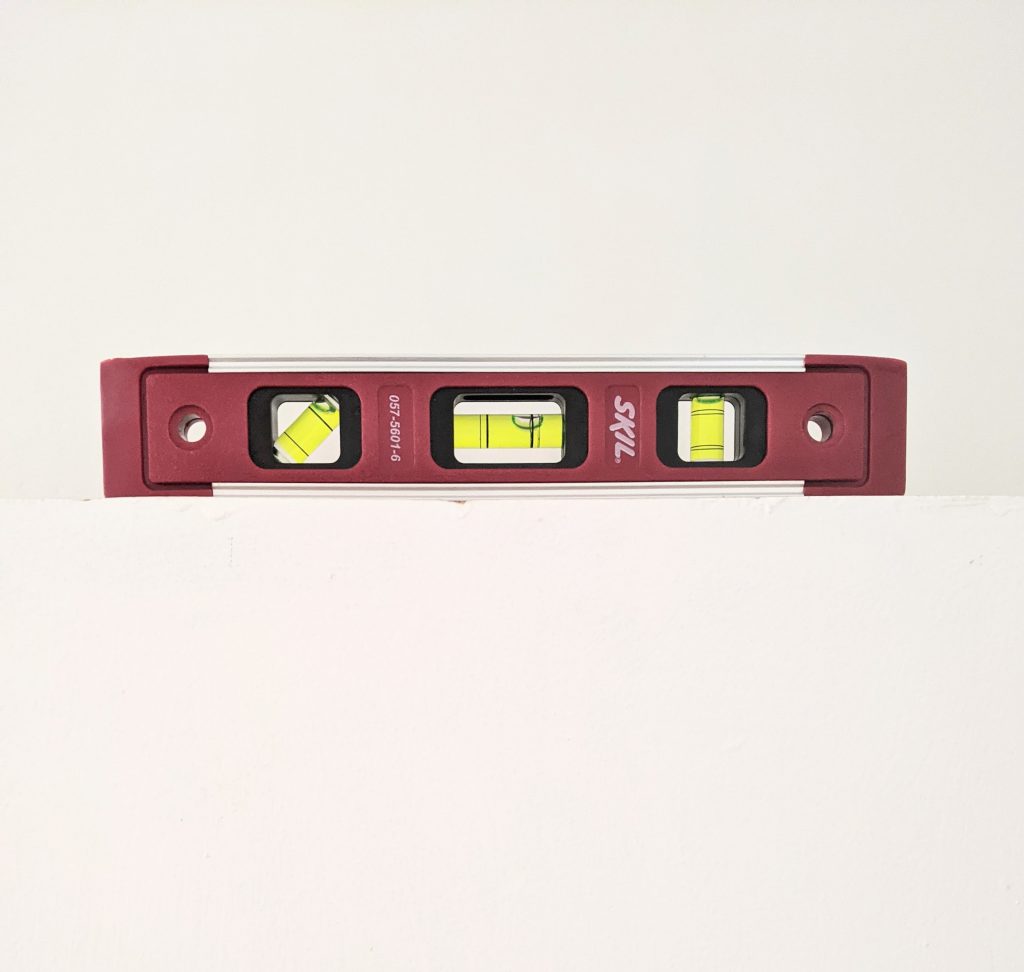
And on the side….
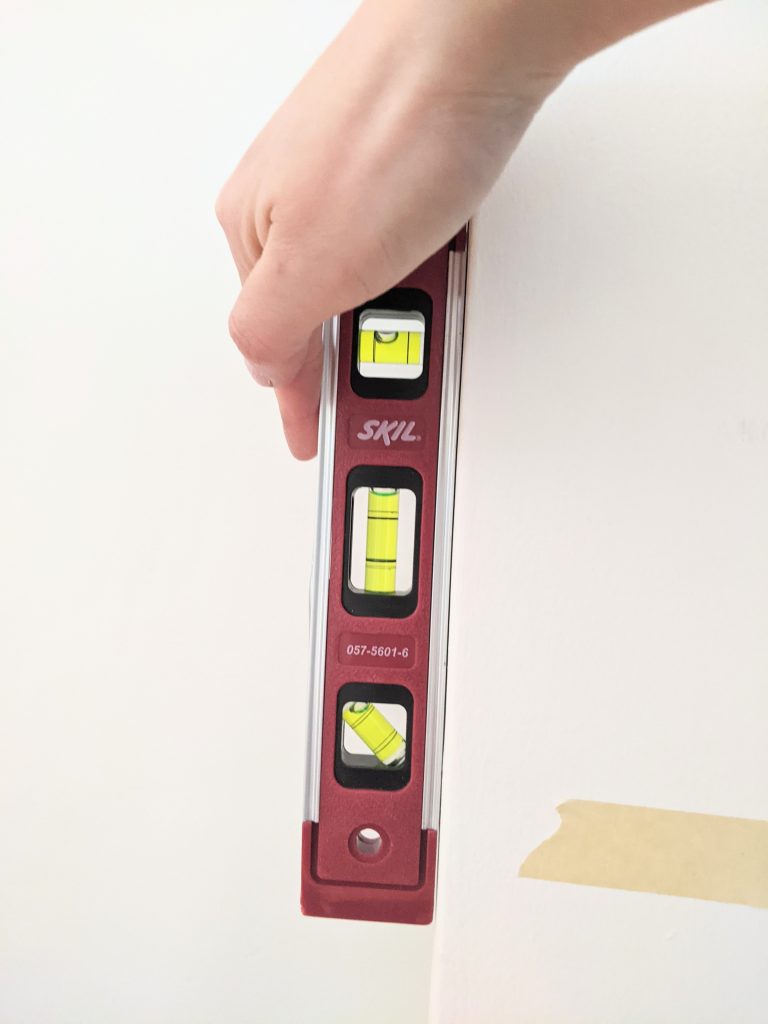
That basically means that the panels need to either be square to the door itself (in other words, crooked to the eye) or actually level, and therefore crooked when compared to the door. Quite a conundrum!
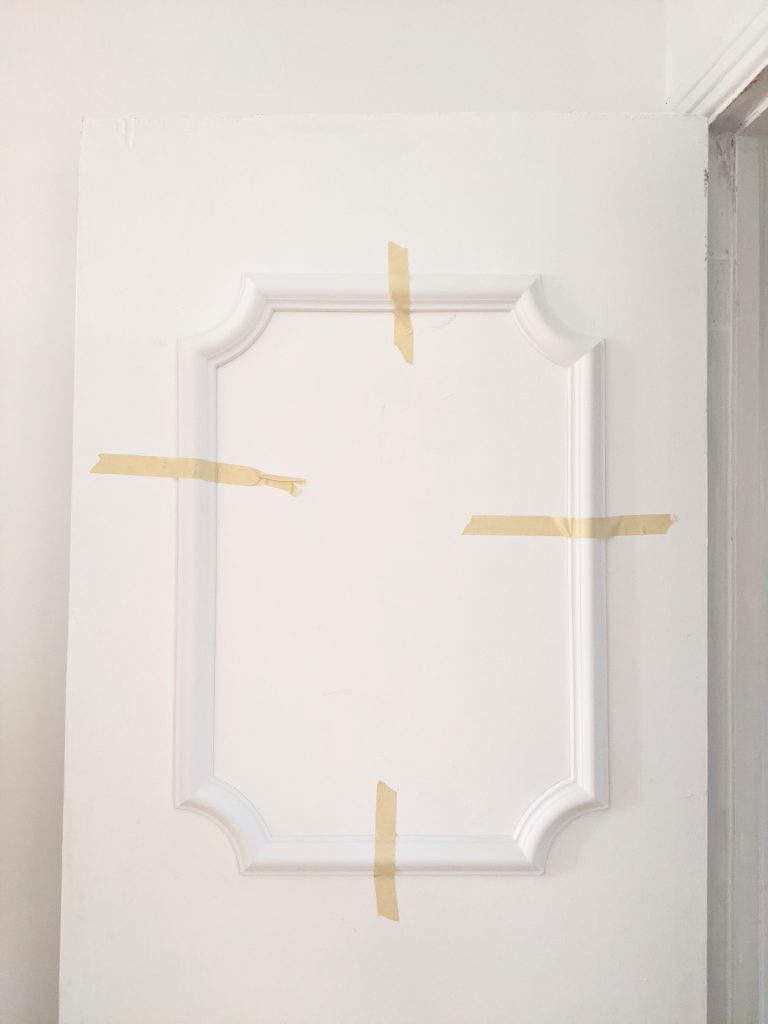
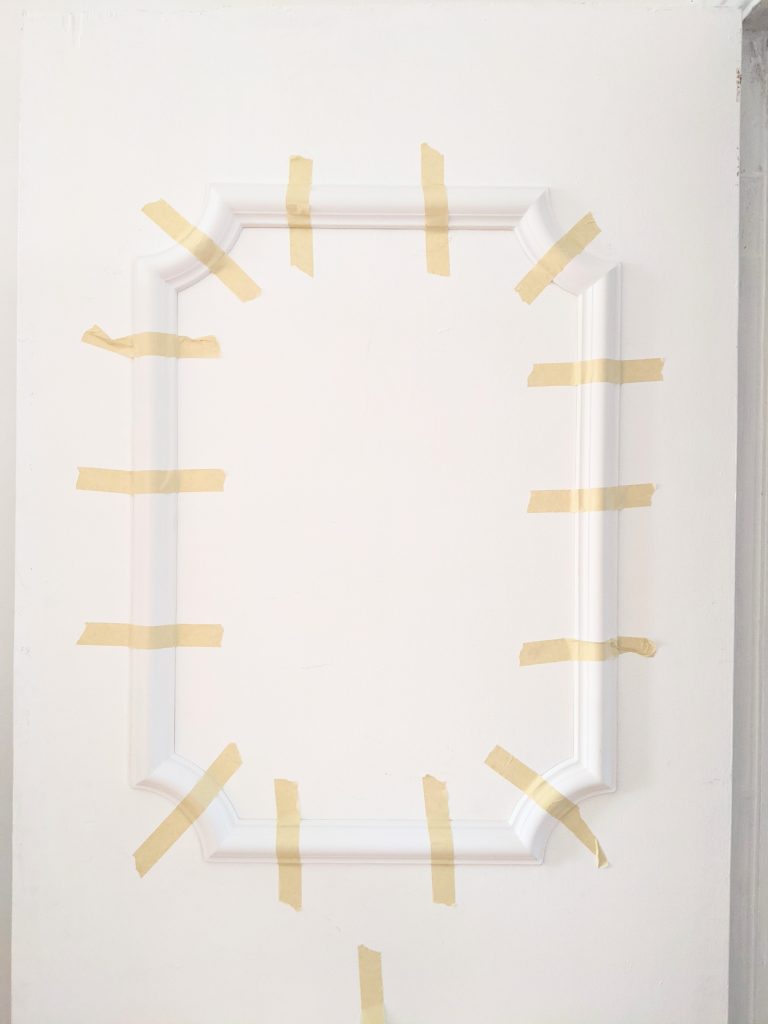
Using some masking tape, I kind of eyeballed where I thought a panel should go and taped it to hold it up against the door. Then I stepped back to see what it looked like and then made adjustments until it looked as good as I thought it would look. (By the way, eyeballing things is much more difficult than you imagine if you actually want something to be level. I had to remove it and replace it, like, 20 times the first time I did this!)
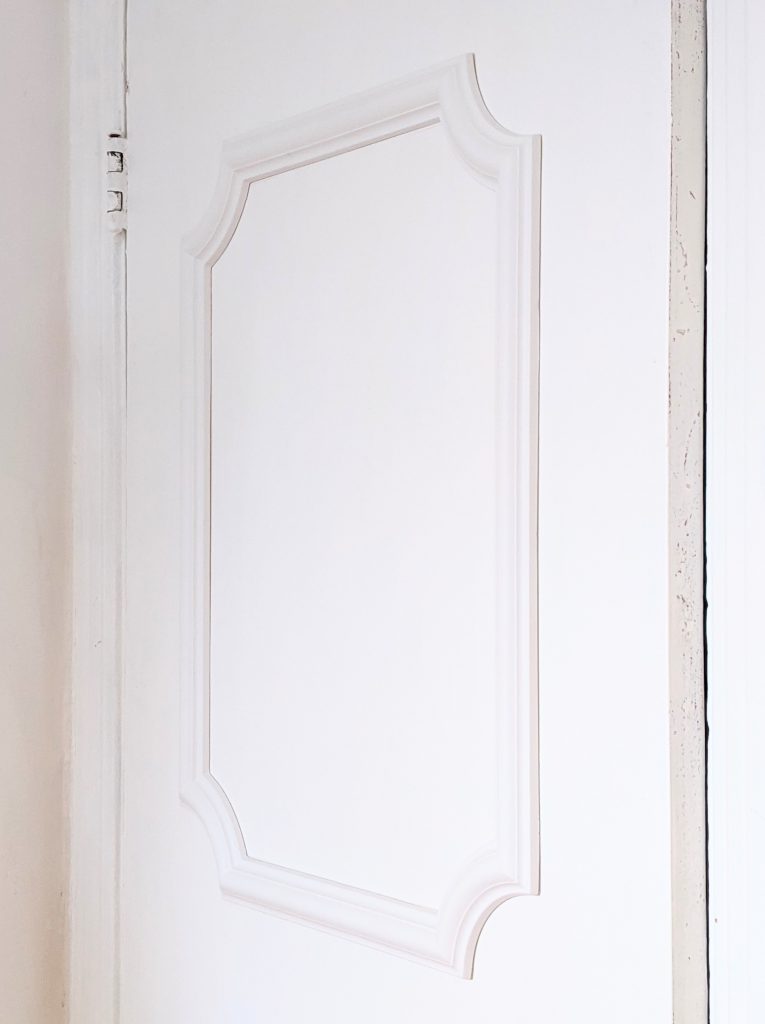
For my office, I ended up making the panels aligned with the vertical edges of the door, but then it’s not lined up perfectly with the top of the door. I used a measuring tape to check to make sure the empty space on the sides were more or less even. I ended up with 5″ on either side of the panel and about 7.5″ of door above the panel.
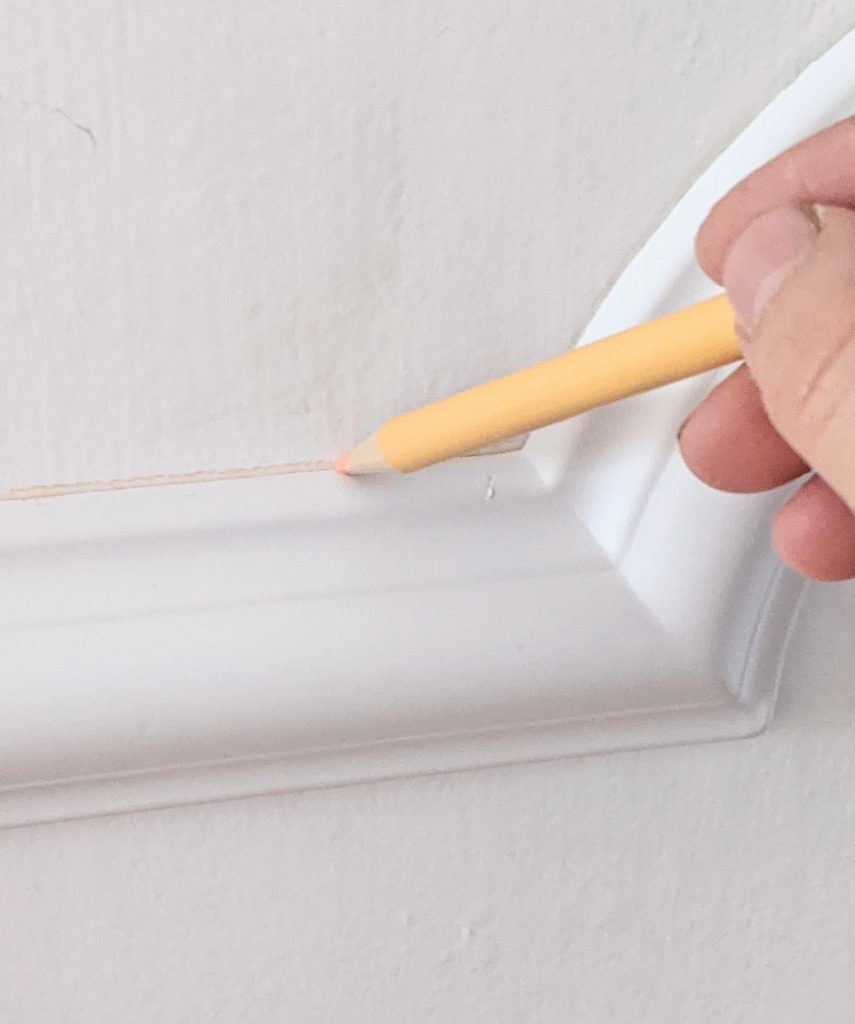
Once I was happy with the placement, I marked a rough outline of the panel on the door with a coloured pencil and removed the panel.
Adhere The Panel To The Door
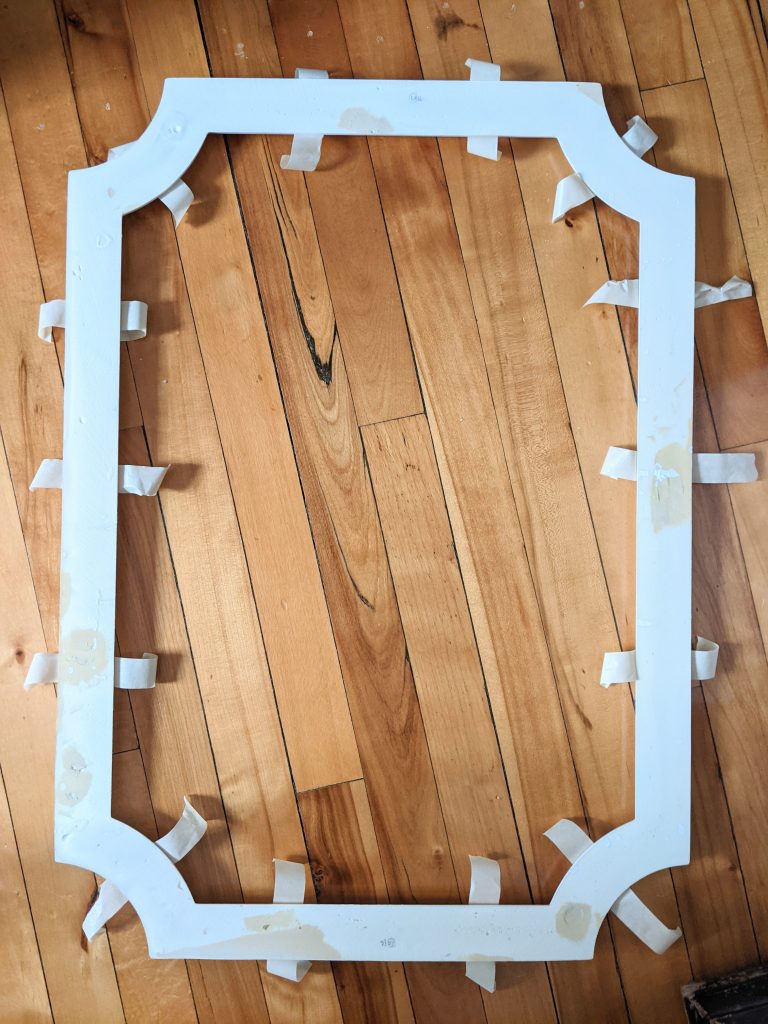
I first applied some more masking tape to the front of the panel, like a lot more than when I was figuring out the placement. Once you stick the panel to the door, you don’t want it to move or slide or fall, not to mention, you want all parts of the panel to adhere evenly to the door without any gaps anywhere.
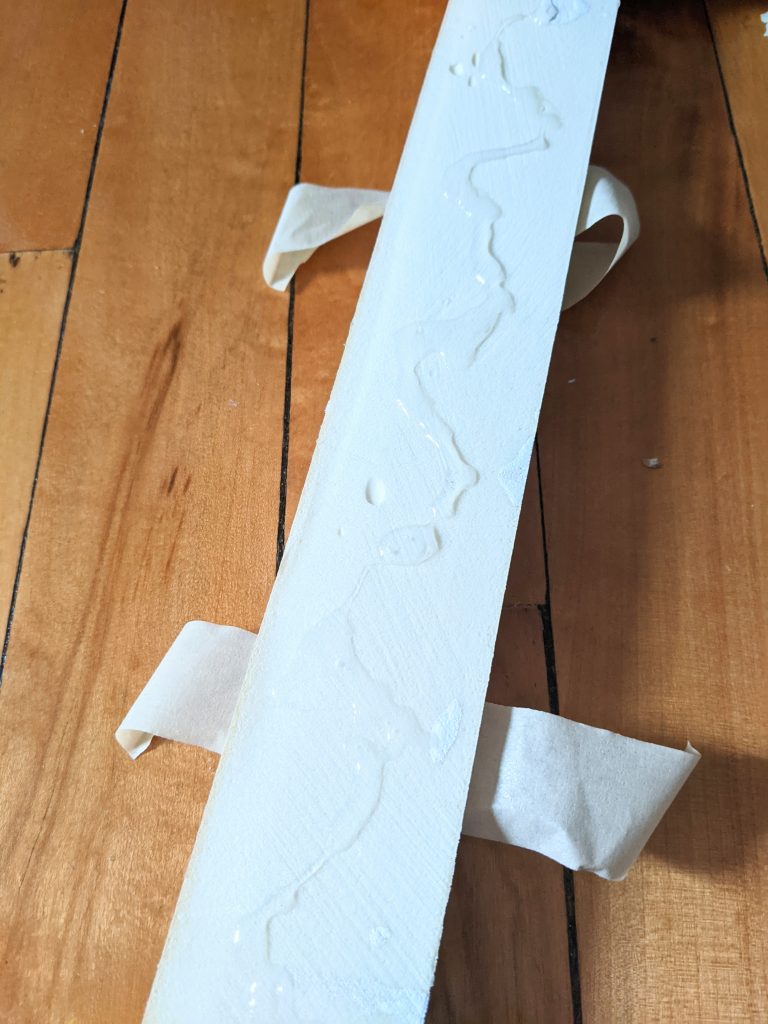
I then applied some strong adhesive to the back of the panel, all the way around. I used E600 at first because that’s just what I had on hand, but I don’t recommend doing that. Not only is it very messy and smelly, but the tube is so small, you would probably only be able to get through three panels before needing another tube. Not very cost effective. I’ll talk more about this later.
Once the glue is applied, I very gingerly placed it on the door, lining it up with the outline marks I had made earlier. Then, I smoothed down the already-applied masking tape and let the glue dry.
You could also use a nail gun in addition to or instead of the glue, but our door is hollow, plus I don’t have a nail gun. And I find filling the holes to be kind of fussy and time-consuming.
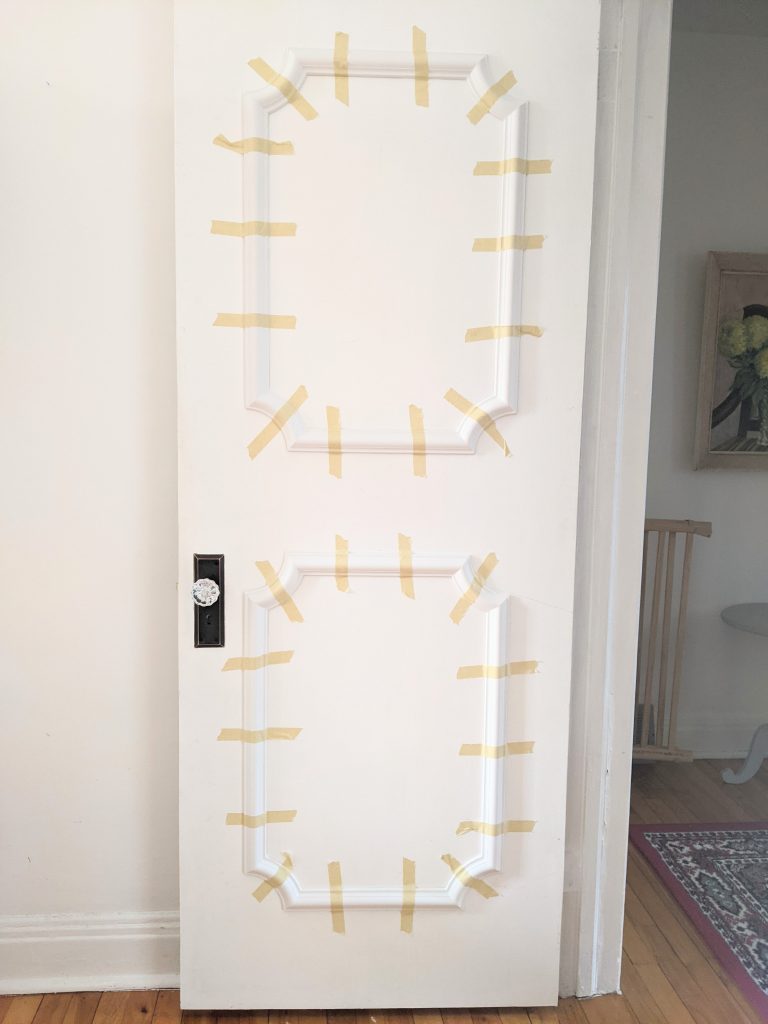
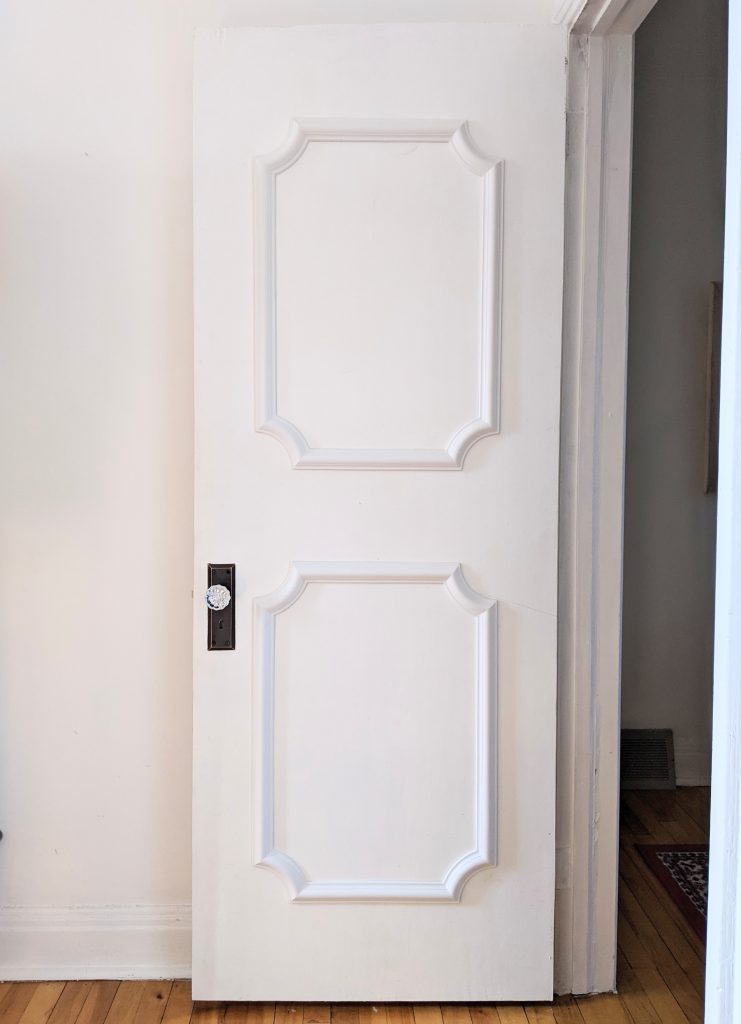
Once you’ve applied the first panel to the door, repeat the same steps for the second panel. I ended up having a gap of about 7.5″ between the two panels, with an approximately 9″ gap from the bottom of the second panel to the bottom of the door. I thought it just looked better to have a smaller gap between the top of the first panel and the top of the door, and the two panels themselves. You don’t really notice the extra 1.5″ at the bottom.
A Word On Adhesives
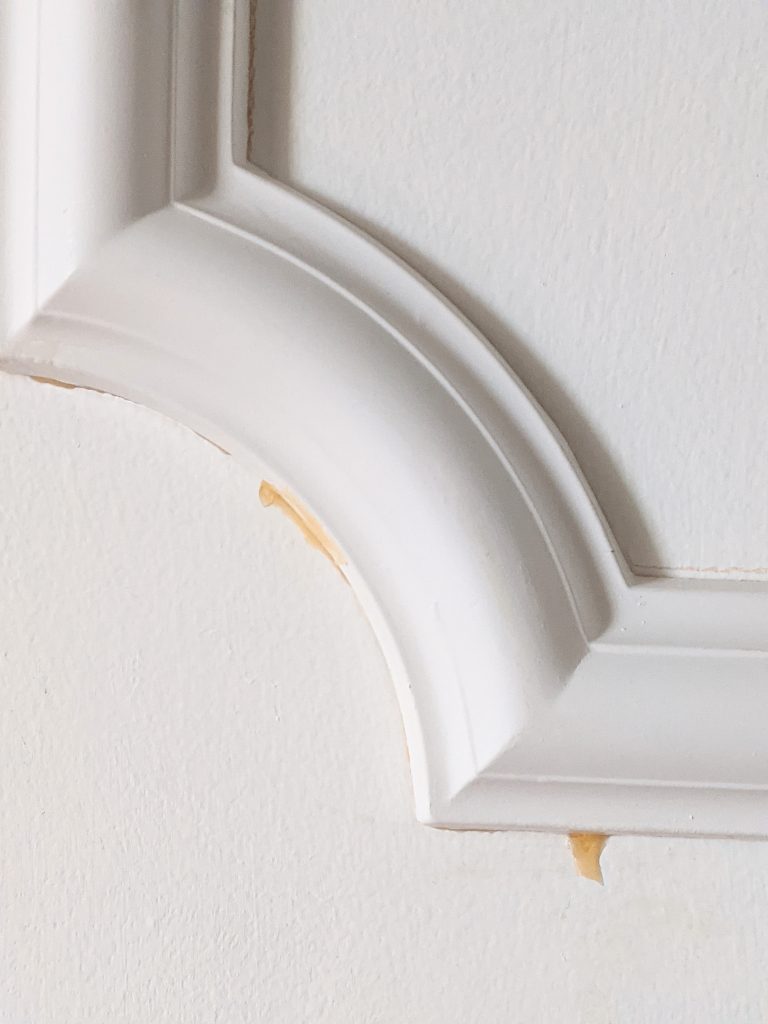
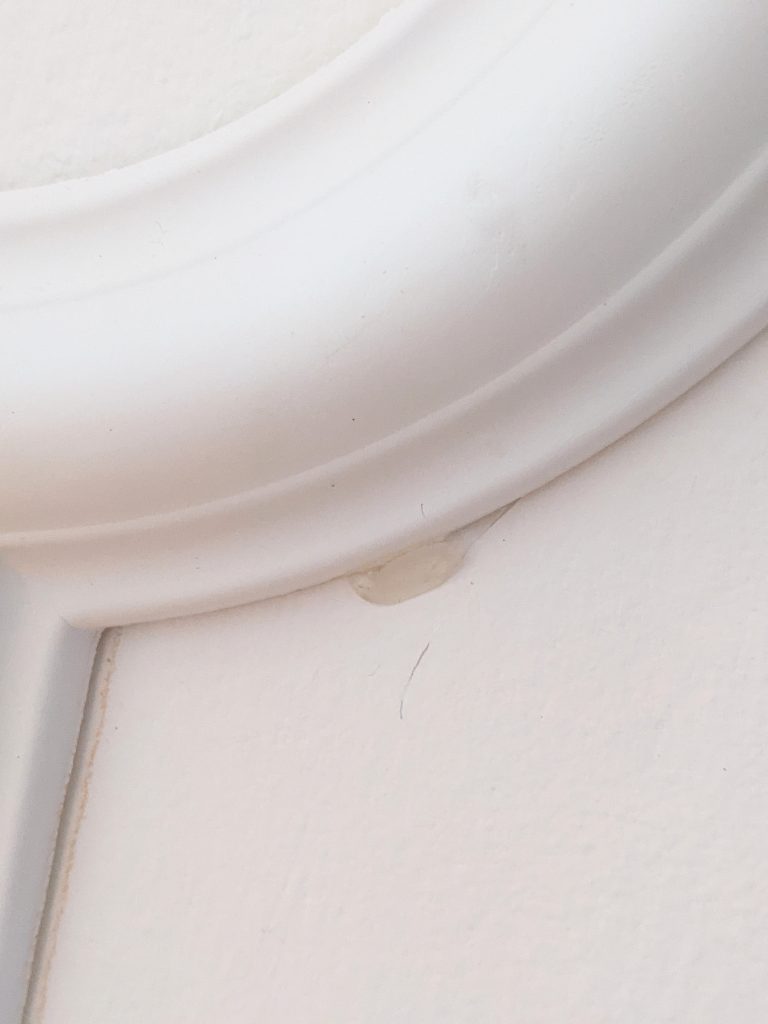
After I did my first two test panels on my office door with E600, I went to the hardware store and picked up some Lepage All-purpose Construction Adhesive and Gorilla Wood Glue. This is gonna turn into a mini adhesive review for a second, because let me just say, DO NOT USE the wood glue for this project! Although it was not smelly (unlike the E600) and pretty easy to work with, once you get it up on the door, the glue will drip everywhere.
The wood glue and the E600 are both on the liquid-y side, so no matter how much you tape up the panel or press it into the door, it will start to loosen enough for a bit of the glue to run down before it’s dried. The wood glue was especially messy and problematic in this way.
These drip marks kind of go hand in hand with another problem. Long drying time! On these projects where you have to adhere vertical pieces to another vertical surface, I think the fast-acting adhesive is really the way to go, ’cause you are really fighting gravity.
I liked the construction adhesive and ended up using it for the rest of the panels because it is extremely thick and not runny at all, plus the bonding time is literally 5 seconds. You have a few seconds to move the panels around to get them positioned correctly and then you do not have to worry about them sliding around or dripping glue. I actually don’t even know if masking tape is necessary to help hold them up until the glue cures completely, but I used tape anyway, just to be safe.
This specific construction adhesive I got also has no smell, which is great!

The only thing I’ll say is I got the easy-squeeze tube and it was actually quite difficult to get the product out, because it was so thick. A different dispenser might have been better. Also be sure to wear gloves when using it!
Apply Finishing Touches
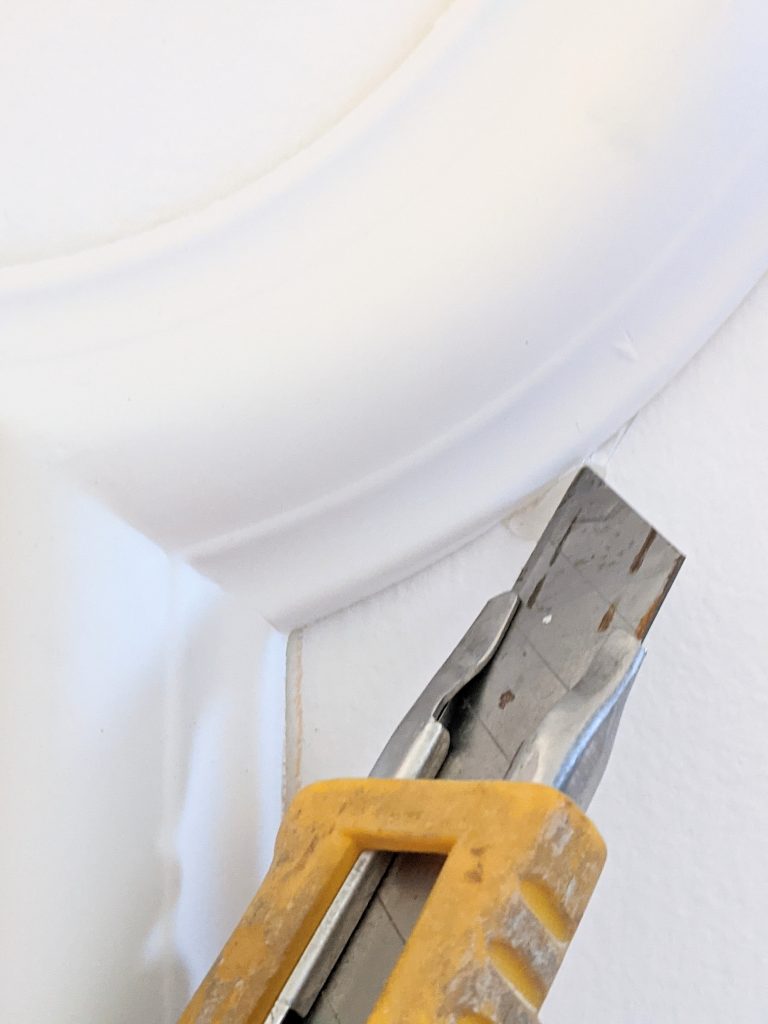
Once the glue dries (I would wait at least 24 hours), remove the masking tape and add any finishing touches. This is when you can cut off the dried drip marks from where the glue started running down the door. I used a box cutter, and was very careful to not cut the door itself. Of course it’s easier just to wipe away the drips as they happen, but I wasn’t about to watch all the doors for 24 hours. Some drips just escaped my notice!
If you used a nail gun, fill the holes with wood filler or something similar. You can also fill any gaps between the panel and the door at this time.
Although I wouldn’t say that the panels are completely flush against the door, there really is only about a millimetre gap. Even if you press the panel into the door more, it’s not like it fills the gap. I think that’s just the way our doors are. Honestly, the tiny gap doesn’t bother me and I don’t think I’m going to do anything about it.
You can also paint the panels to match your doors at this time. They already matched with our doors pretty well, so I didn’t bother doing this.
Maybe some day I will add some filler to the gaps and paint all the panels (which is technically “the proper way” to be doing this project), but I’m tired of thinking about and working on these doors. Any kind of meticulous, detail-oriented work like this is actually incredibly time-consuming and this is an extremely busy time of year for me, so I’m just gonna leave it like this.
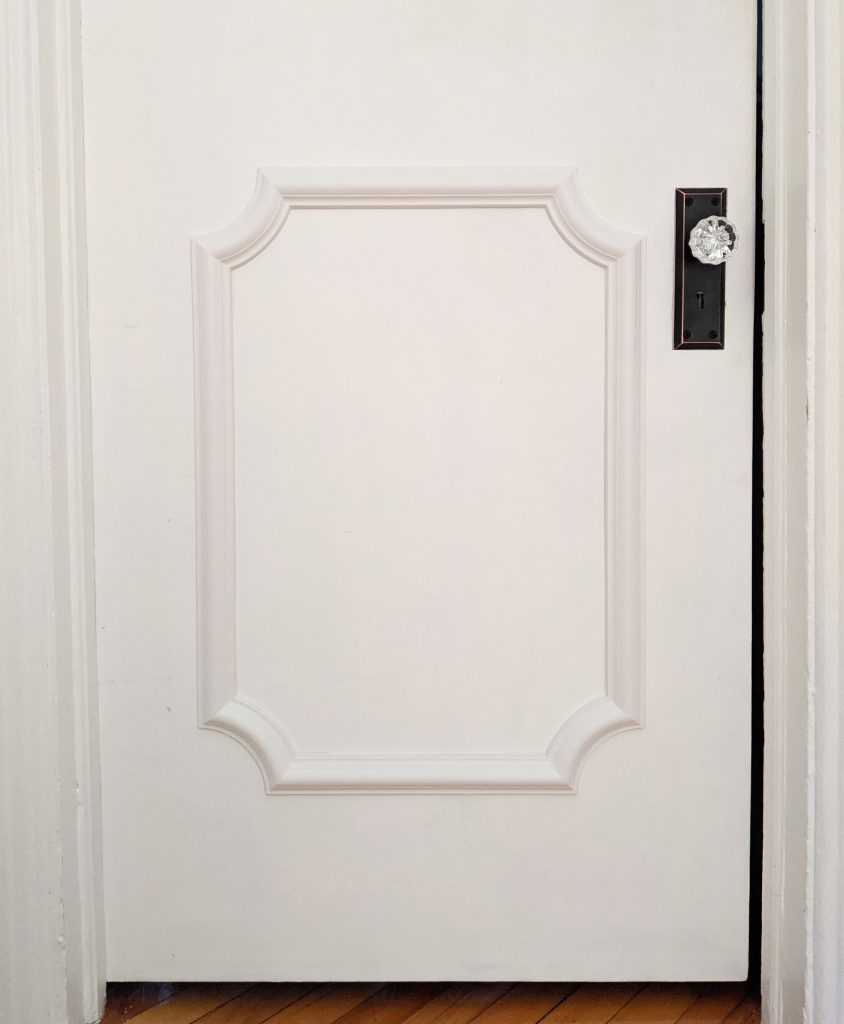
I think it looks great regardless (especially with the new doorknobs)! I feel like I’ve effectively conquered our upstairs doors and made them infinitely less lame and more functional!
What do you think?
xoxo