
If you’re anything like me (ie. not super into the overly cutesy or loud baby stuff), it can sometimes be a challenge to find baby decor items that are baby appropriate, but still somewhat chic. Not to mention affordable. So of course, I’m making my own!
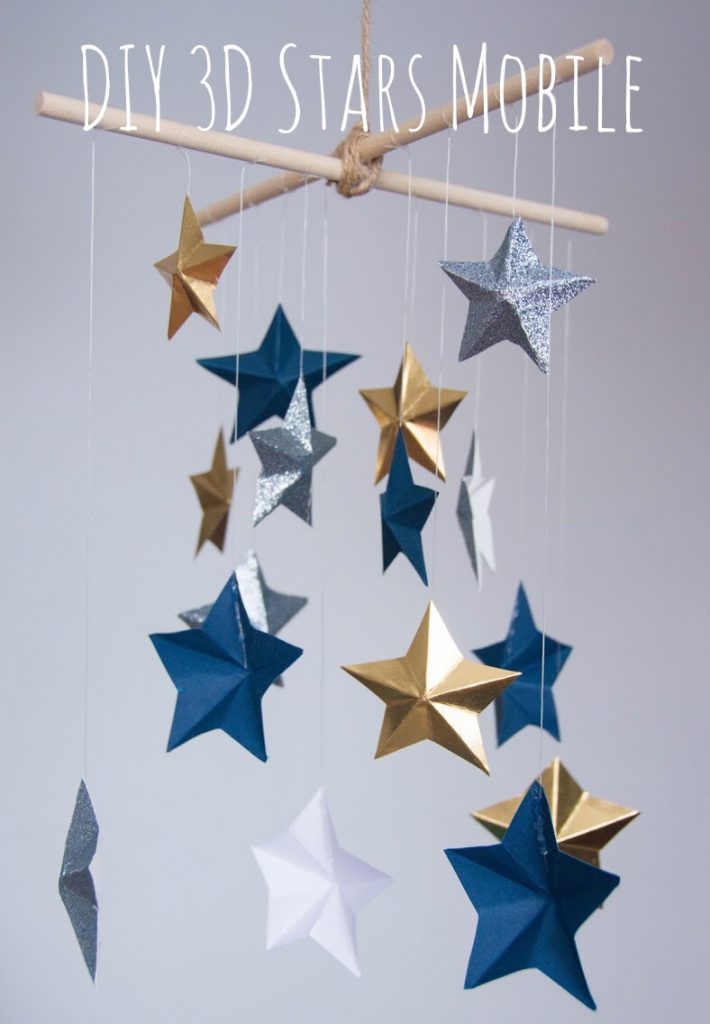
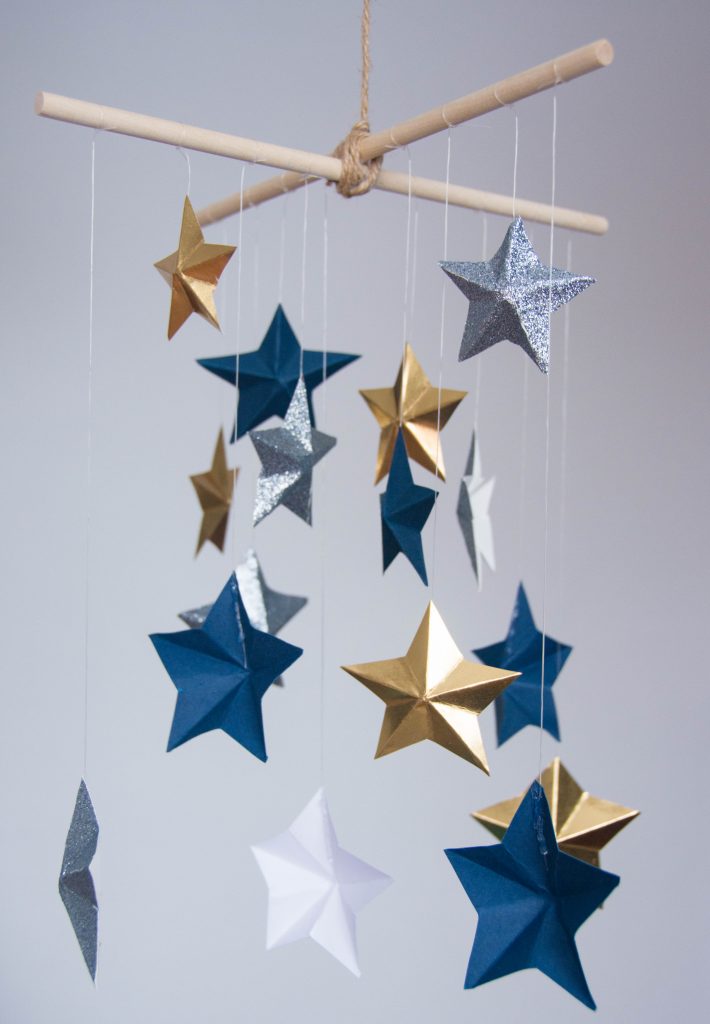
This is a pretty simple, unisex mobile idea that I had that incorporates one of my favourite symbols: stars. I think it strikes a good balance between cute and chic, and only cost me about $5 to make. Granted, I only had to buy the paper and wooden dowels because I have everything else in my DIY closet, but still. Here’s how I made this 3D star mobile!
Materials
-card stock or any kind of paper
-scissors
-twine
-clear string/stretchy cord (the kind used for beading)
-wooden dowels
-hot glue
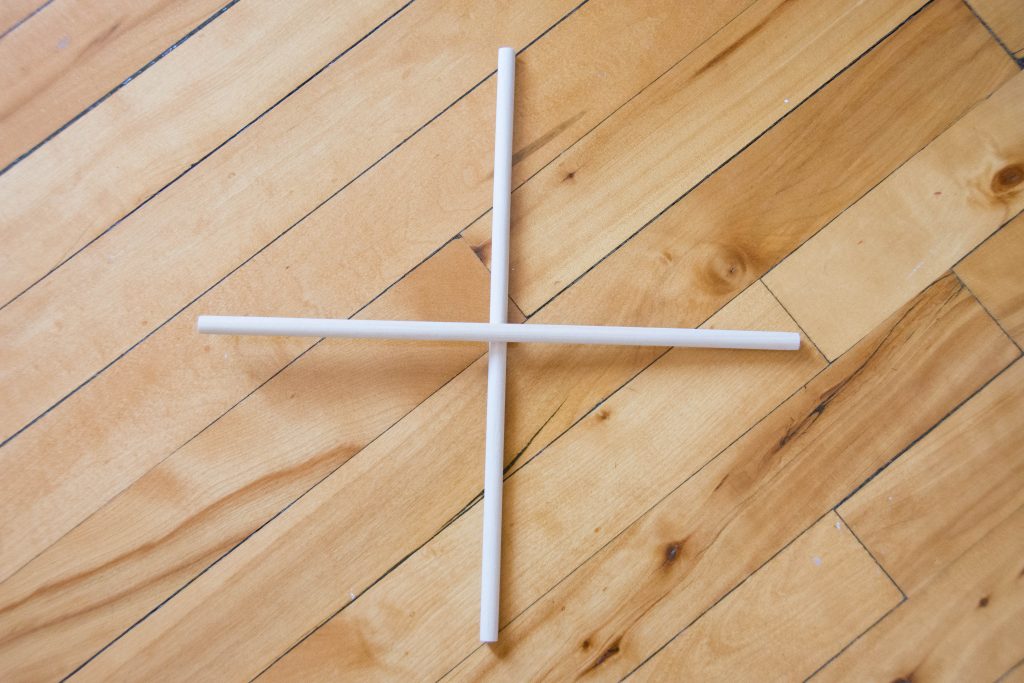
1. Create the mobile frame from two wooden dowels
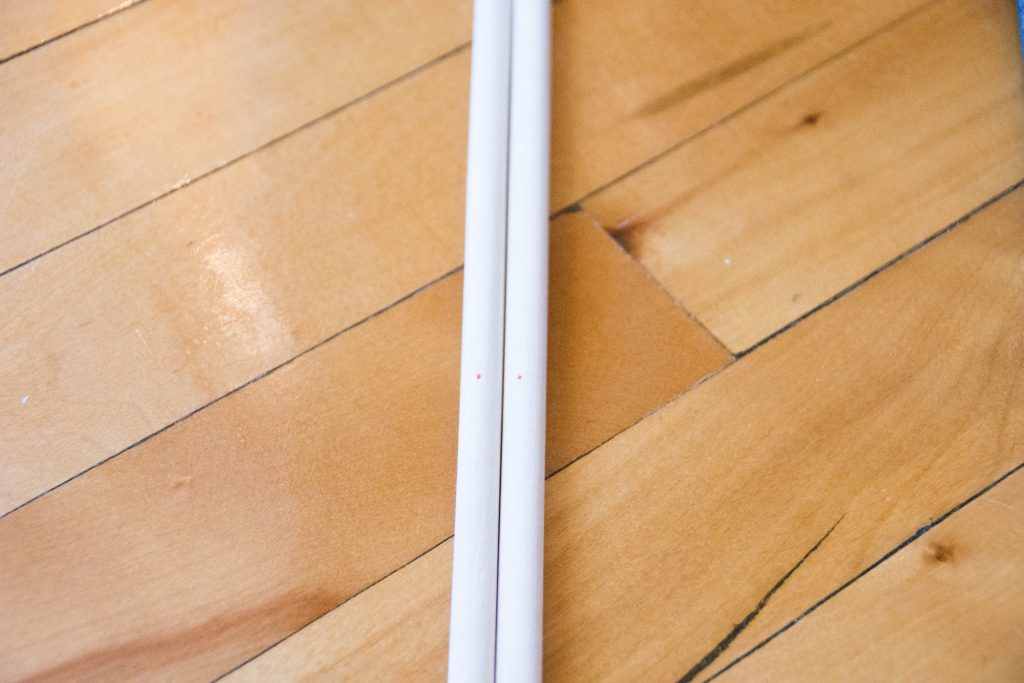
In order to get an even cross shape, I marked the halfway point of each dowel with a red marker before attaching them together with hot glue. If you don’t want to do the cross-shaped mobile, you could also use a wooden hoop or any other shape you want.
2. Secure the frame with rope or twine
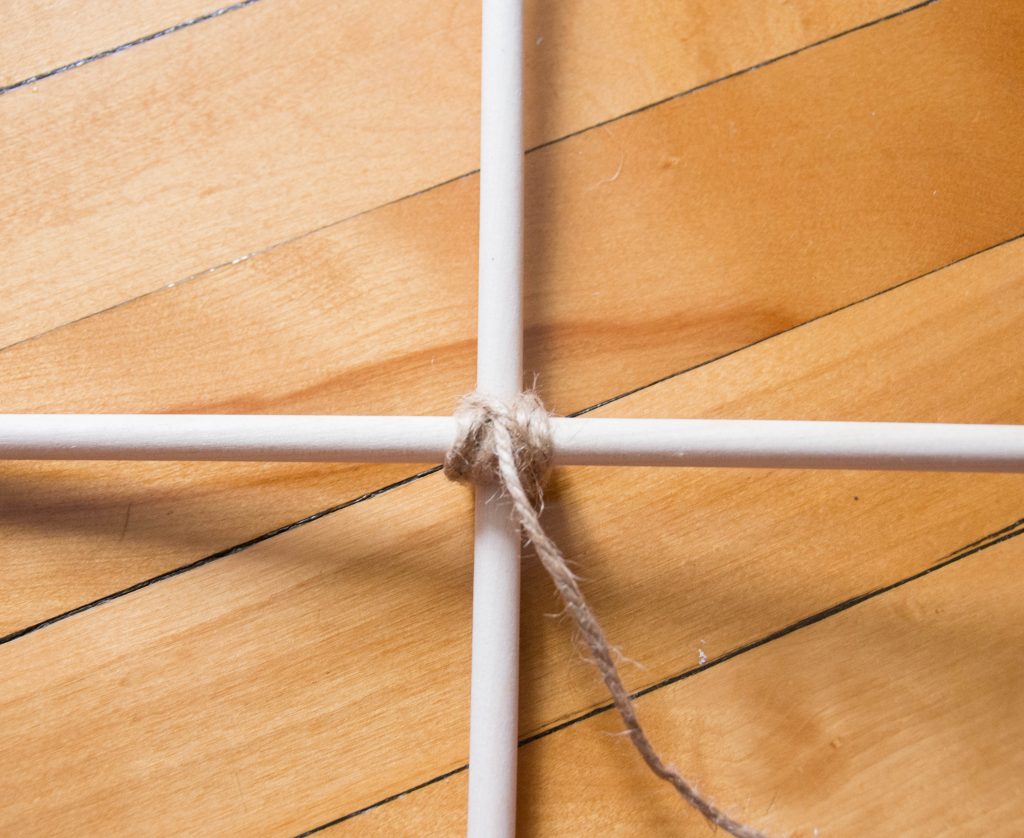
To make the frame even more secure, I wrapped some twine several times around the middle and then secured it with some more hot glue. This can also act as the thing your mobile hangs by, depending on how you decide to hang it.
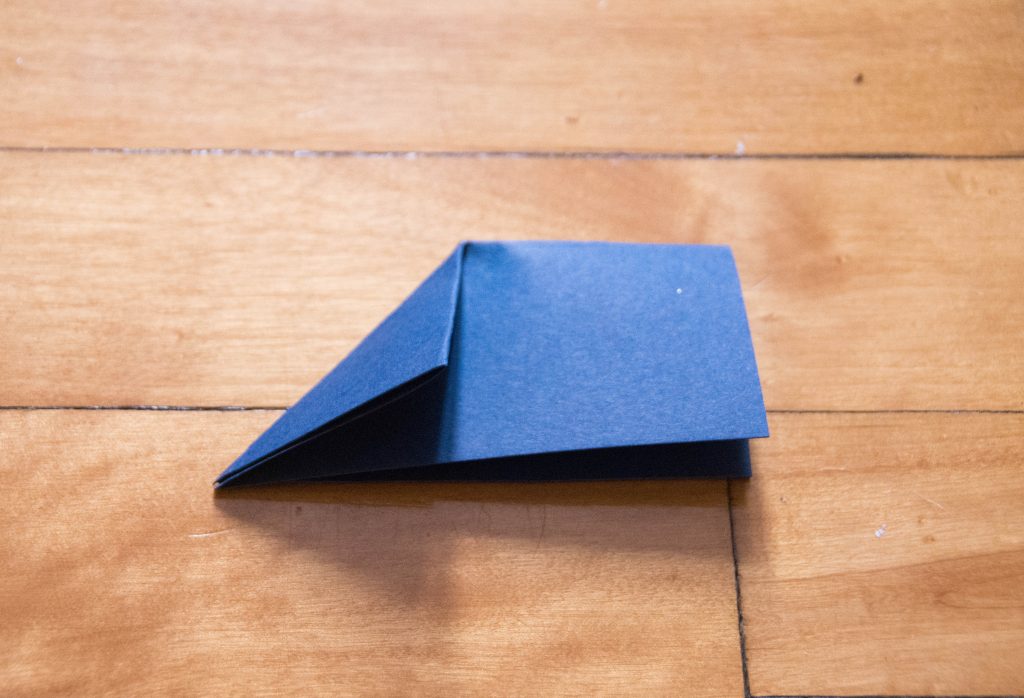
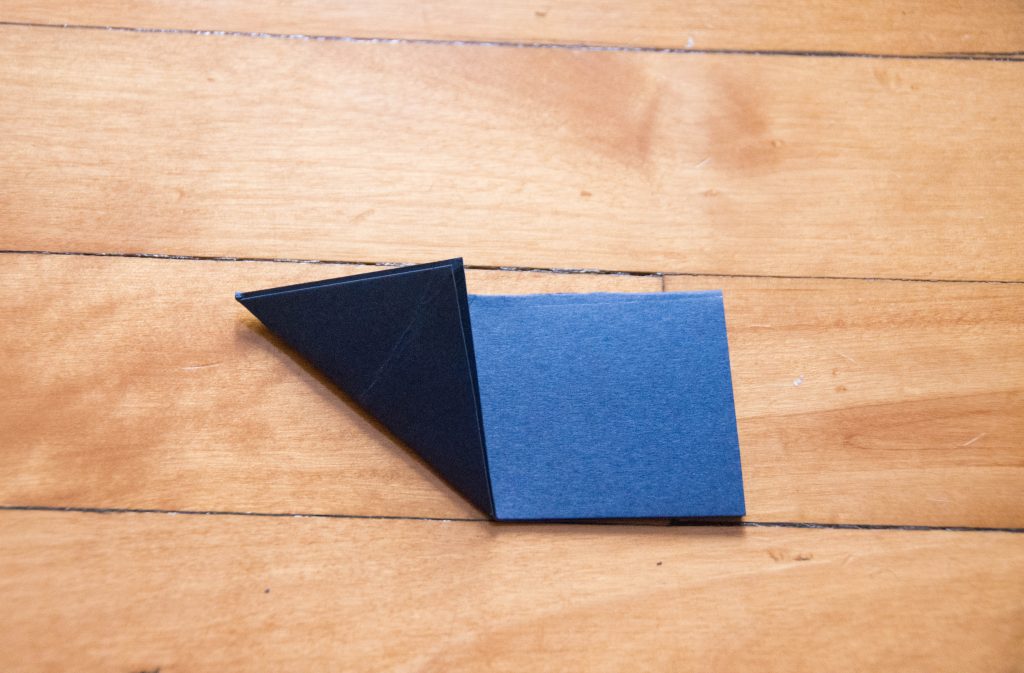
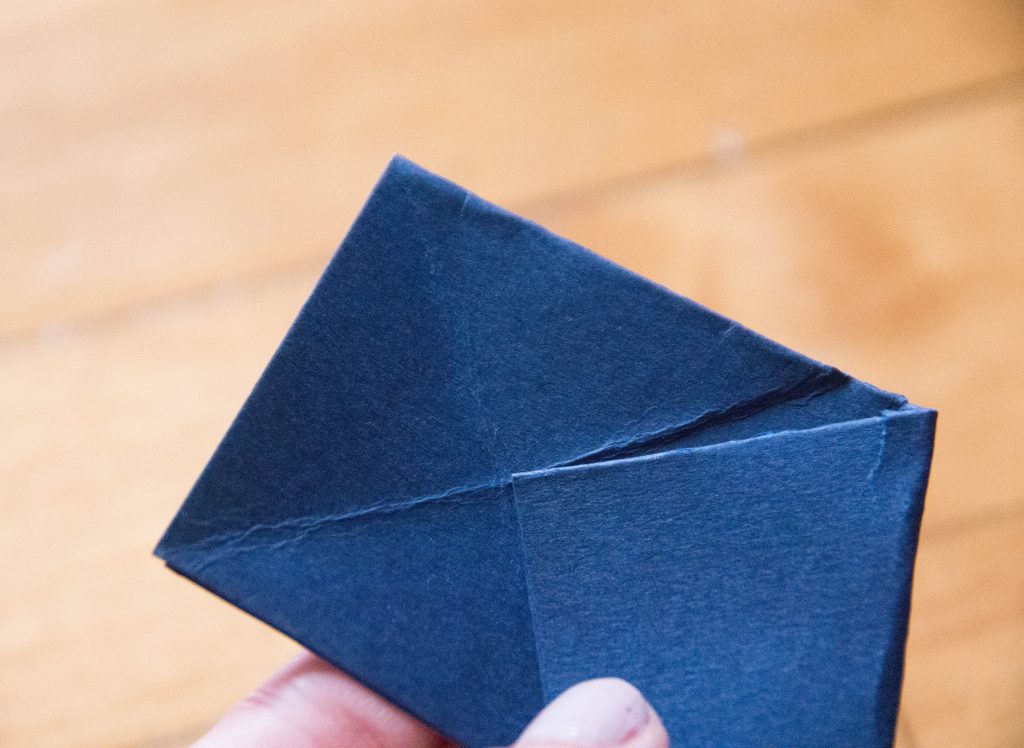
3. Fold your card stock to get the 3D star shape
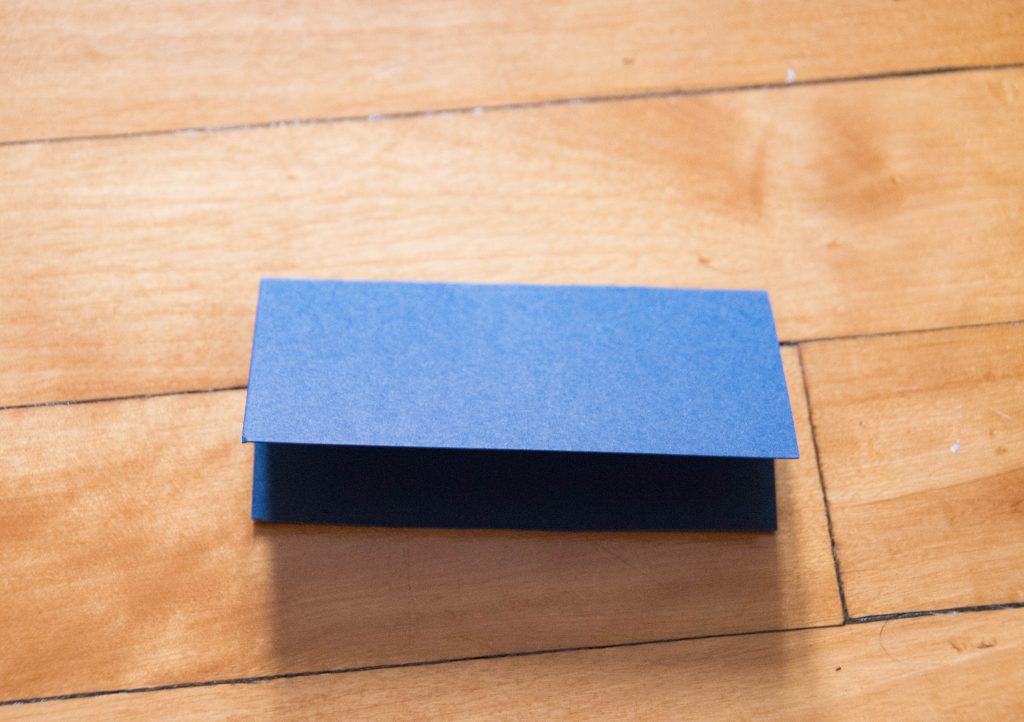
Start with a square and fold it in half.
Fold down the left side so the bottom edges meet.
Unfold what you just did and fold it in the exact same way in the opposite direction (up).
Unfold what you just did and then fold the right side over so that the corner touches the intersection of the creases you just made.
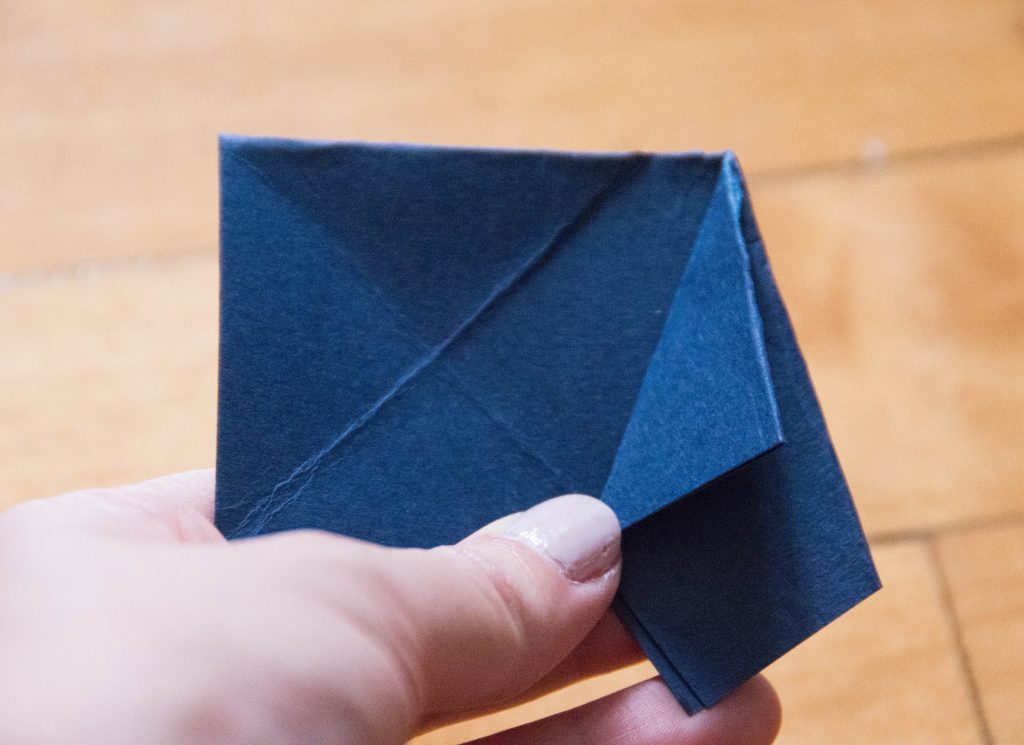
Fold the flap you just made halfway back so the outside edges line up.
Fold the left side of the paper down so the vertical edge meets up with the vertical edge in the middle.
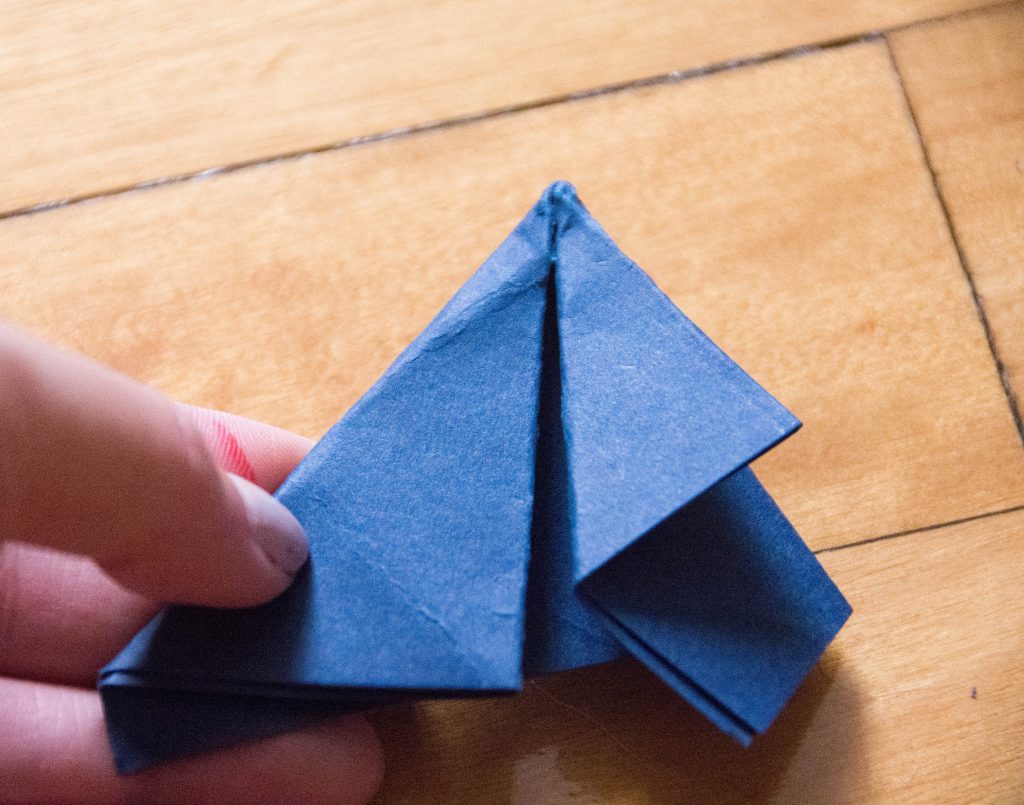
Fold the whole thing in half backwards where the two vertical edges meet.
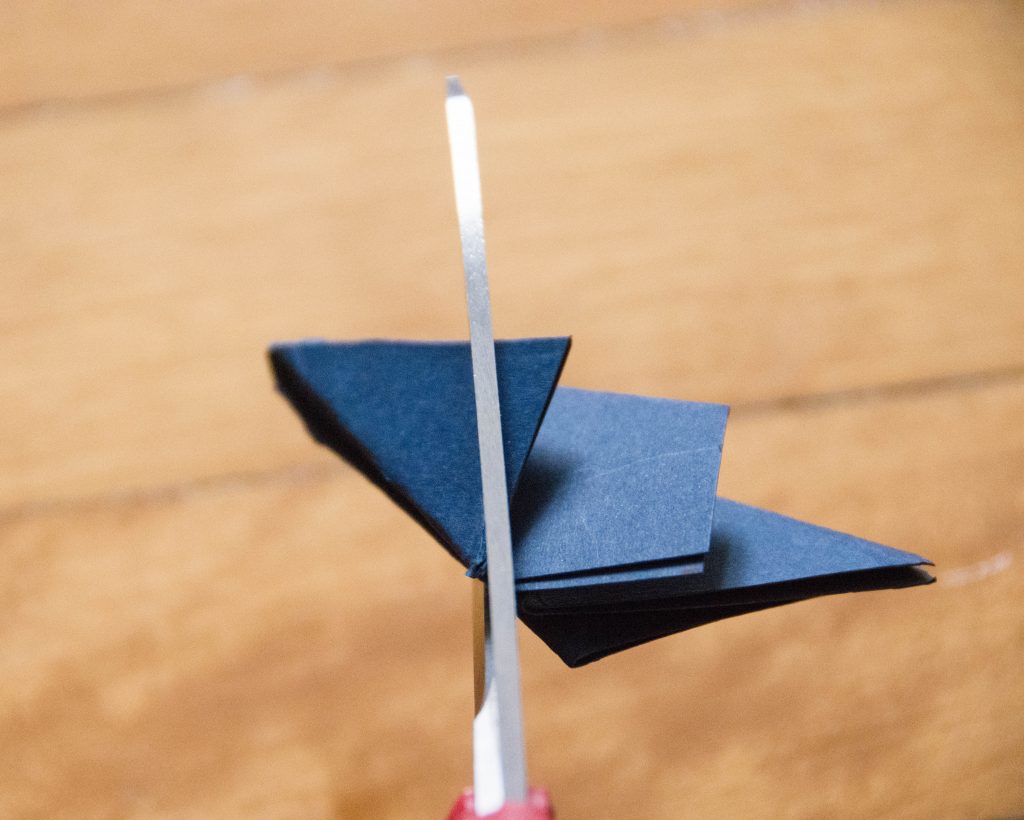
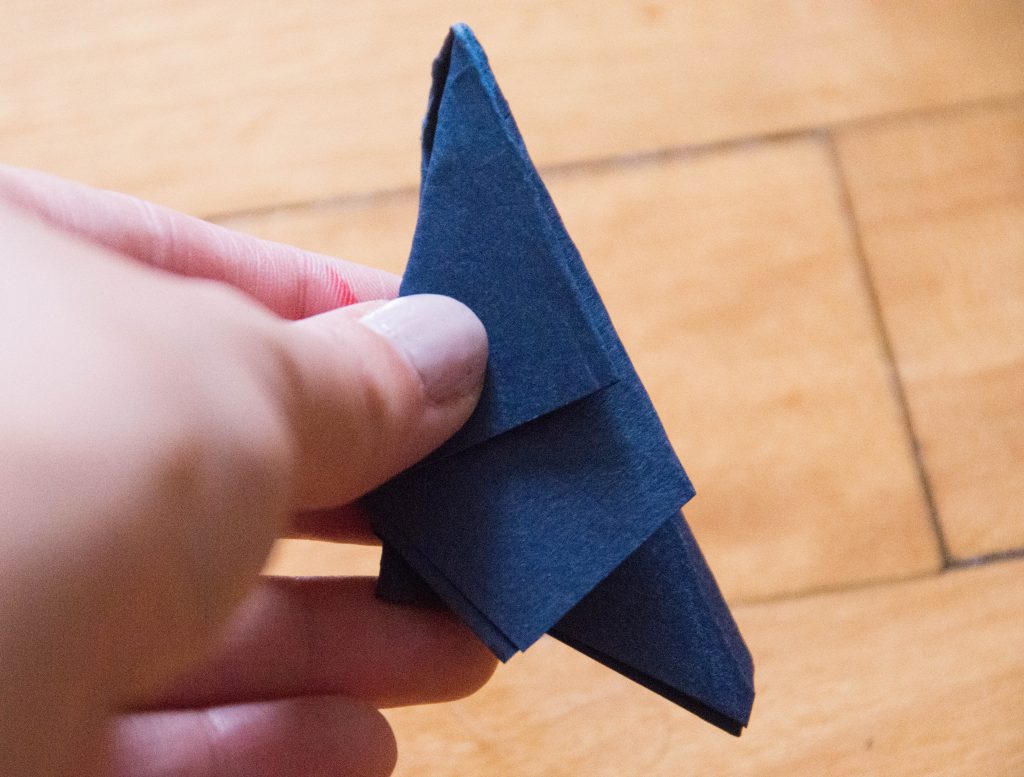
Cut off the excess paper (everything below the top flap). The steeper the angle of your cut, the skinnier the star points will be.
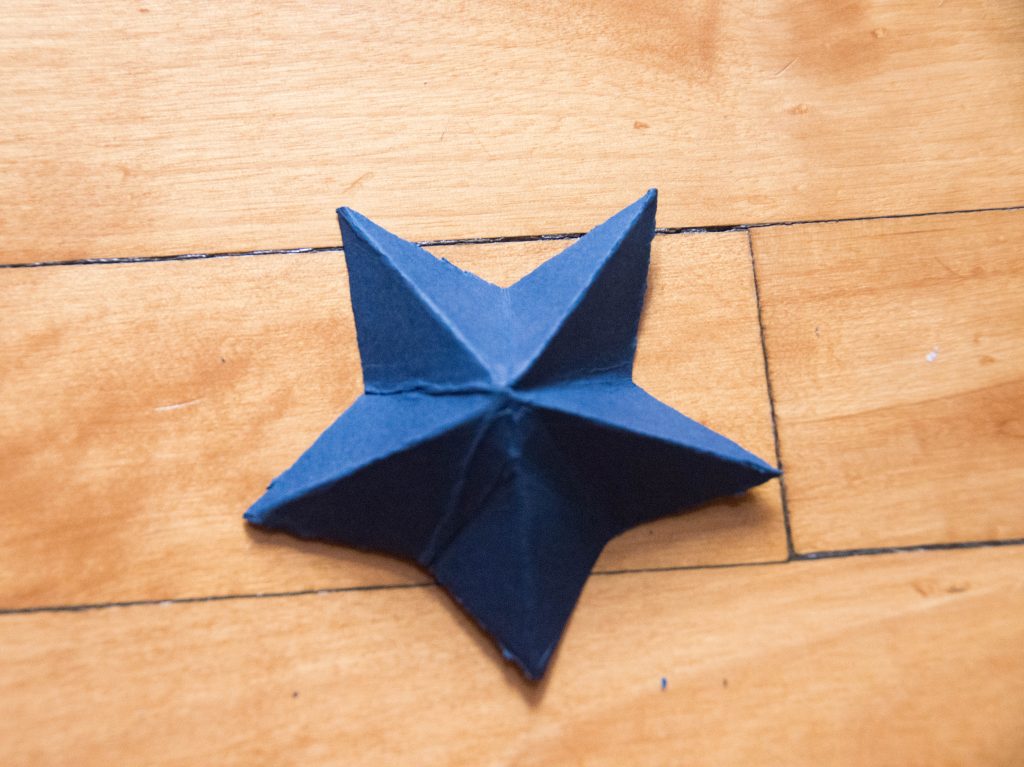
Unfold your star and fix the creases so that the long creases of the star points are folded out and the shorter creases are folded in.
After I made an initial few stars and got the size and shape that I wanted, I ended up just using the finished star as a template to cut out the rest of my stars with rather than doing the whole folding thing every time. Once you get your star cut out, it’s just a matter of folding in the creases you need to make the star 3D. I just found it a lot easier than doing all that folding over and over.
4. Attach some stretchy cord to the back of the stars
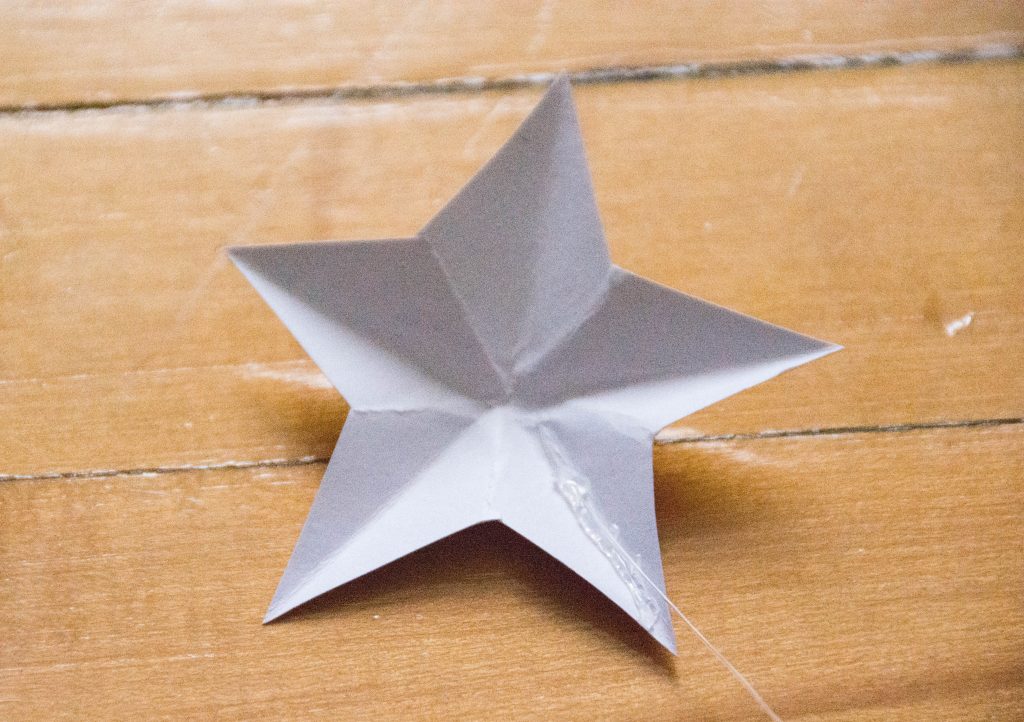
Use hot glue to attach some kind of clear string or cord to the back of the stars. Make sure the lengths of cord you are using are different so that the stars don’t all hang at the same height. Then, tie the ends of the cord to the wooden dowels.
If I were smarter, I would figure out a good way to make fully 3D stars so you can’t see the white backs of some of the paper or the hot glue on the stars. But I can’t think of how you would add a 3D back to them without it getting really messy. Overall, I’m pretty happy with the way this turned out!
By the way, when you’re selecting your paper, I recommend getting different textures and finishes. I really like mixing the matte blue with a metallic gold and glittery silver. I think it adds so much more interest to the piece as a whole. If I had to do it again, though, I would not go with card stock, I’d just go with regular paper. It’s so much easier to fold and cut thin paper than thick card stock!

To be honest, I think that this could easily be turned into a regular decor piece (not necessarily a baby mobile). Instead of hanging the stars on a mobile frame, you could suspend them all on a string that you hang on the wall or across the ceiling or window, to spruce up any room or for a party or just as holiday decor.
So, what do you think of my 3D star mobile?
xoxo
Lovely starry mobile. I think I’d be making one as well as a bigger star to top my Christmas tree. I imagine making two stars to glue together back to back would give a full 3D effect.
Oooh, turning this into a Christmas tree star sounds lovely! Let me know if you end up gluing two stars together to make it, I’d love to know how it turns out. I was worried it would be too messy.