Beaded Capelet DIY

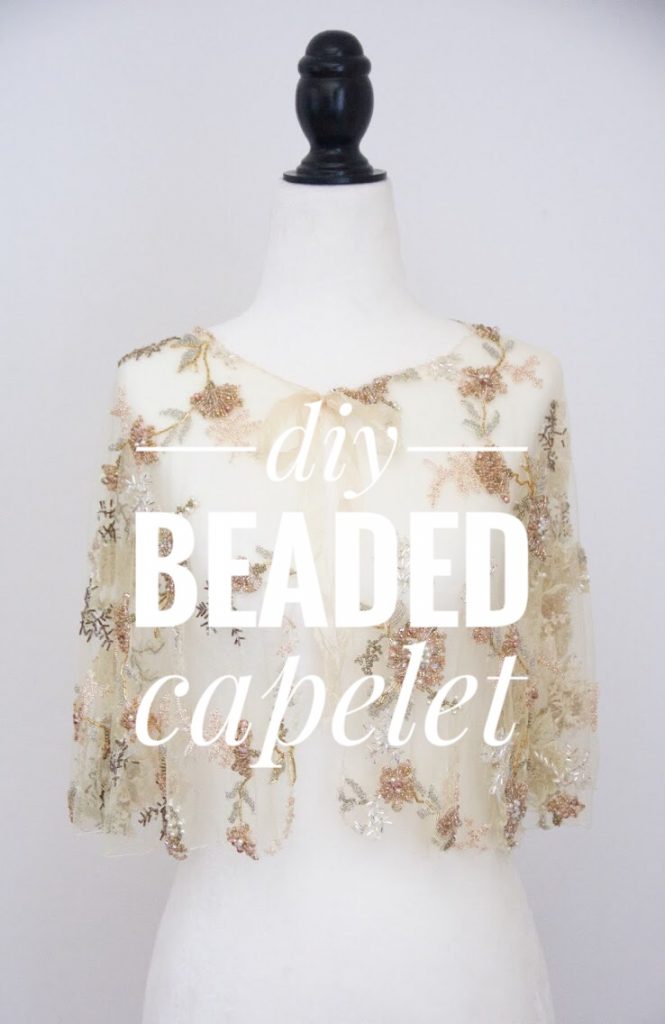
There was a beaded capelet I really wanted from BHLDN for my wedding, but it was sold out. I thought about it for months. It just mesmerized me, the way it completed the look of other brides with the lightest kiss of whimsy and delicate elegance. I decided I would just have to make my own.

beaded capelet DIY wedding bolero cape 1

In the end, the one I made didn’t end up looking much like the one from BHLDN, but there’s something about creating, especially when the process is so long and grueling, that makes you so attached and proud. It may not be the most beautiful or perfect baby, but it’s yours!

Materials:

-lace capelet
-beading needles
-nylon thread
-assorted beads/rhinestones/pearls etc.

1. Purchase a lace capelet or make your own.

To make the process easier for myself, I bought a lace capelet from Etsy, removed the lining and clasp and just used it as the base.

2. Decide on what design your capelet will have.

I used the existing lace pattern as my guide for where to bead, but you can definitely make up your own design. I decided to use bugle and seed beads, crystals, rhinestones and pearls, in a mixture of silver, gold, copper, pink, ivory and blush. I got my materials from several different Etsy sellers, Michaels, even the dollar store. One thing I underestimated was how many beads I’d really need to complete the whole thing. It was probably three times more than I thought it would be.

3. Start beading!

I used nylon thread with beading needles (both from Michaels) to thread a few beads through at a time. It’s definitely tempting to thread more all at once to make it go faster, but then your strand of beads will end up being really floppy and I find that to be less attractive of a look. Be sure to tie off the threads on the underside of the capelet and knot it several times to make sure it won’t come undone.
I have no tips or tricks on how to do this or make it go faster. This probably took me two or three months to finish, working several hours a day. I would definitely suggest starting this project well in advance of the day if you are new to beading like I am.

4. Sew two pieces of ribbon on the front top corners to tie off the capelet.

This was a bit sloppily done on my part. And the ribbon I chose was very delicate and kind of flimsy. It didn’t feel the most secure while wearing. Attaching clasps to it instead, or along with the ribbons, probably would have been a better idea. We didn’t have any dancing or strenuous activities at our wedding so it was fine for the day, but if you will, definitely secure it better than I did!

beaded capelet DIY wedding bolero cape 2
 beaded capelet DIY wedding bolero cape 4

I’m pretty happy with how my beaded capelet turned out. It was playful, feminine, pretty and best of all, one of a kind! My only regret was that it was too cold to wear it much on the day.

beaded capelet DIY wedding bolero cape Stanley Park Vancouver wedding photo

Check out my anniversary post here to see more photos of how it looked on. If you end up trying this, let me know how it goes!

xoxo

Leave a Reply

Your email address will not be published. Required fields are marked *