
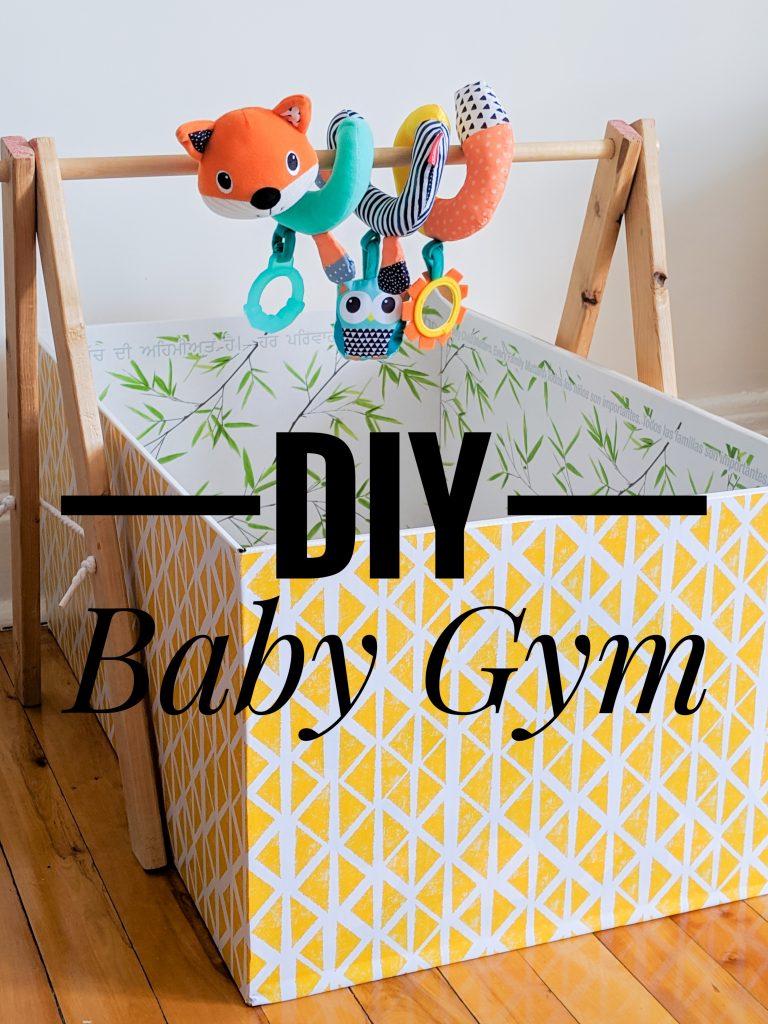
Hey, guys, did you know that baby stuff is frickin’ expensive?? And you know me…I would much rather make something, even if it’s a long, annoying process, if I can save a few bucks! When I saw that these elaborate baby gyms, designed to stimulate your baby, run upwards of $100, I scoffed in indignation and said what I always say…”I COULD MAKE MY OWN.”
Here’s how I made a simple baby gym out of some scrap wood and rope!
Materials
-4 pieces of wood
-rope
-wooden dowel
-drill
-sandpaper
1. Gather your materials
I recently found these random 1.5″ x 21″ pieces of wood in our entryway closet that I’m pretty sure have been here since we moved in (no idea where they came from!) and I thought to myself…this would be PERFECT for a baby gym. Granted, if I were to go to a hardware store, I probably would have gotten pieces that were very slightly wider and longer just to have some more room for error while working/added stability when finished, but these random pieces of wood did the trick.
I had to buy some rope and the dowel, but they are pretty cheap and easy to find. I got them at the dollar store and Michaels respectively. The dowel I got is around 1.6cm long and I do recommend getting a slightly thicker one because babies can have incredible strength when they really want to grab something and you don’t want the dowel to snap.
2. Drill a hole the same width of the dowel through all of the wood pieces
I traced the end of the dowel on all of the wood pieces in approximately the same location, near the top of the wood pieces. I don’t think it matters too much if they line up perfectly at this stage. The level of the gym can be adjusted later.
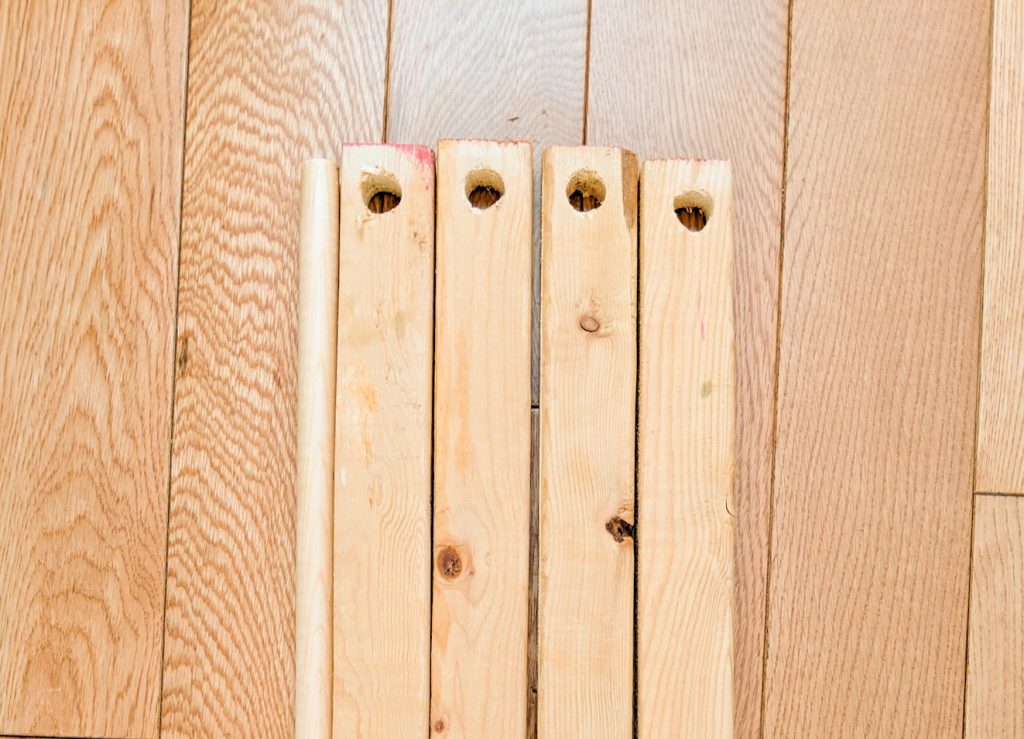
3. Drill a smaller hole for the rope about halfway down the wood pieces
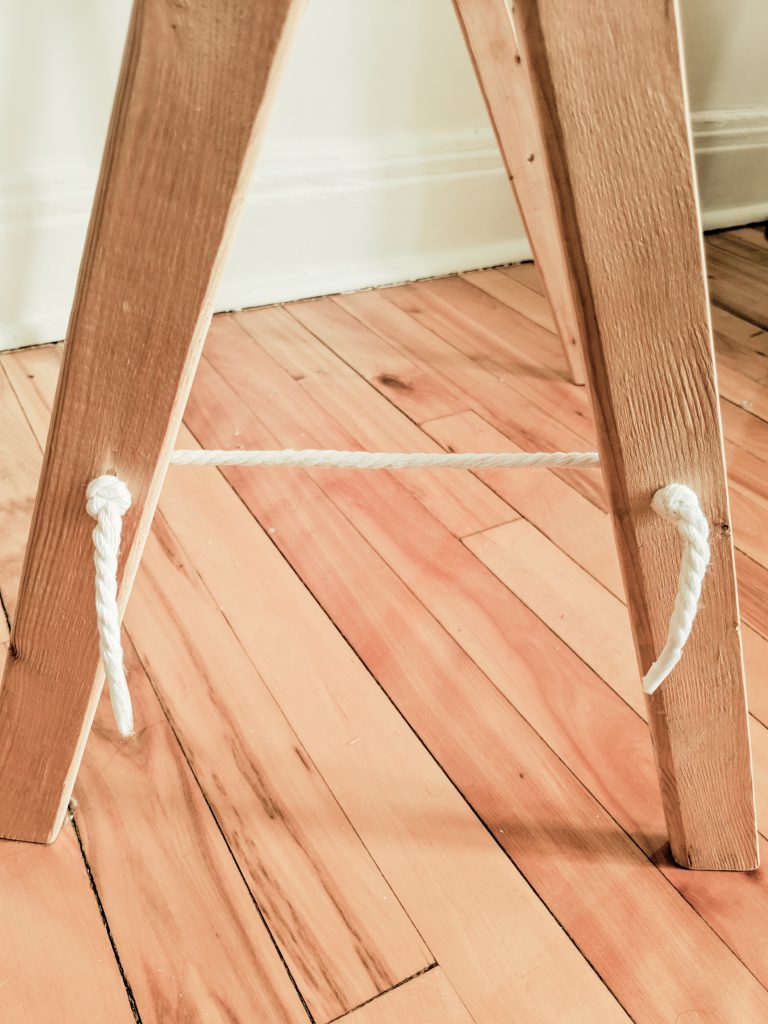
In order to keep the gym from collapsing when it’s open and in use, I used rope as the leg stabilizers. Drill holes into each wooden leg piece about the width of the rope you got. I went a little further than halfway down. We’re gonna come back and finish this part later.

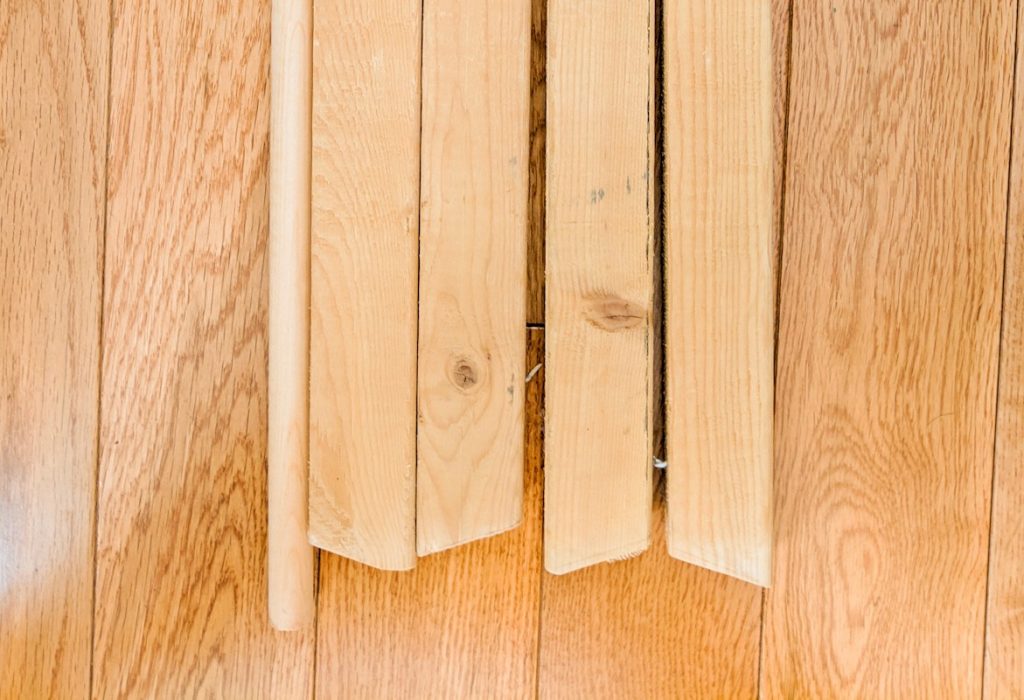
4. Cut off the bottom ends of all the wood pieces at an angle
This will help the legs to stand flat on the ground when open. How wide the default open position of the gym is will depend on how steep of an angle you saw off of the legs. I didn’t want to give up too much height on the gym so I didn’t end up going too steep. If the gym doesn’t end up being stable enough, I can always go back and fix it later.
5. Sand the wood
Sand all sides of the wood, all the holes and the dowel really well. You don’t want you or the baby to get splinters! I used a rougher sandpaper to do the holes and the really rough parts of the wood/all the edges, and then did a once-over with a finer grit. You can also paint it or put some kind of design on it if you’d like, but I kinda like the simplicity of the wood.
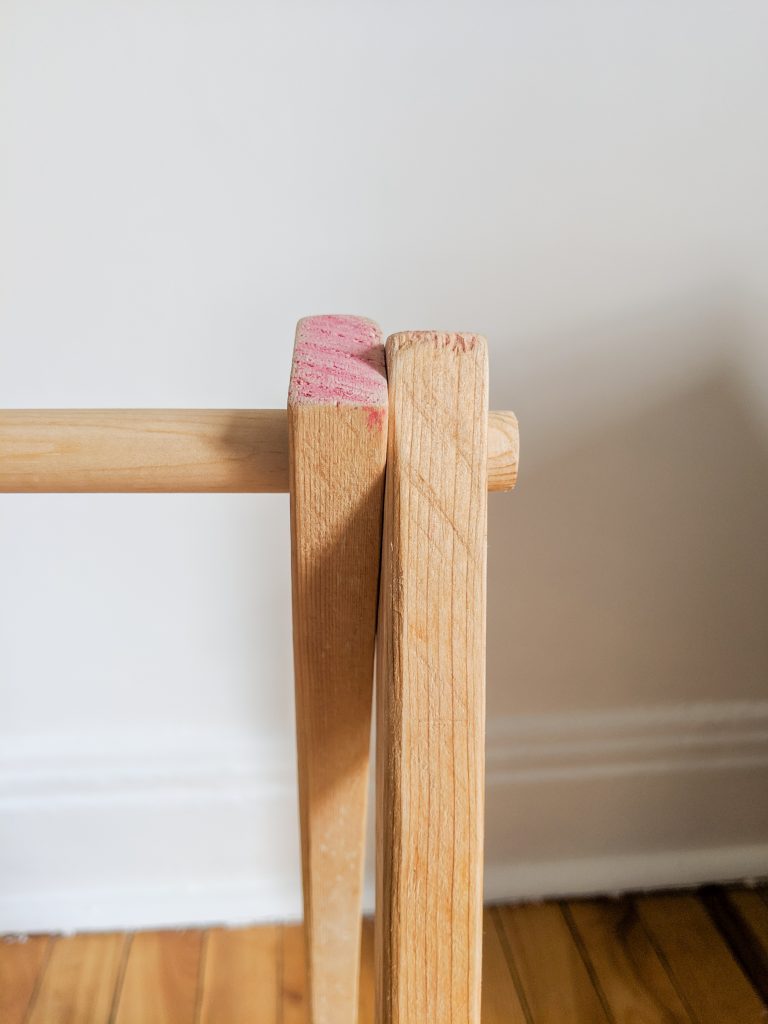
6. Attach the dowel to the legs
Hopefully, the holes you’ve drilled fit the width of the dowel just right without being too loose or too tight. You want the two legs on each side to be flush against each other so there are no gaps where the dowel connects them. If you can’t force the dowel through the holes with just your hands, try using a rubber mallet or a hammer with cloth.
7. Attach the rope to the lower holes
Cut two equal lengths of rope a few inches longer than the distance between the rope holes of the legs when they are open.
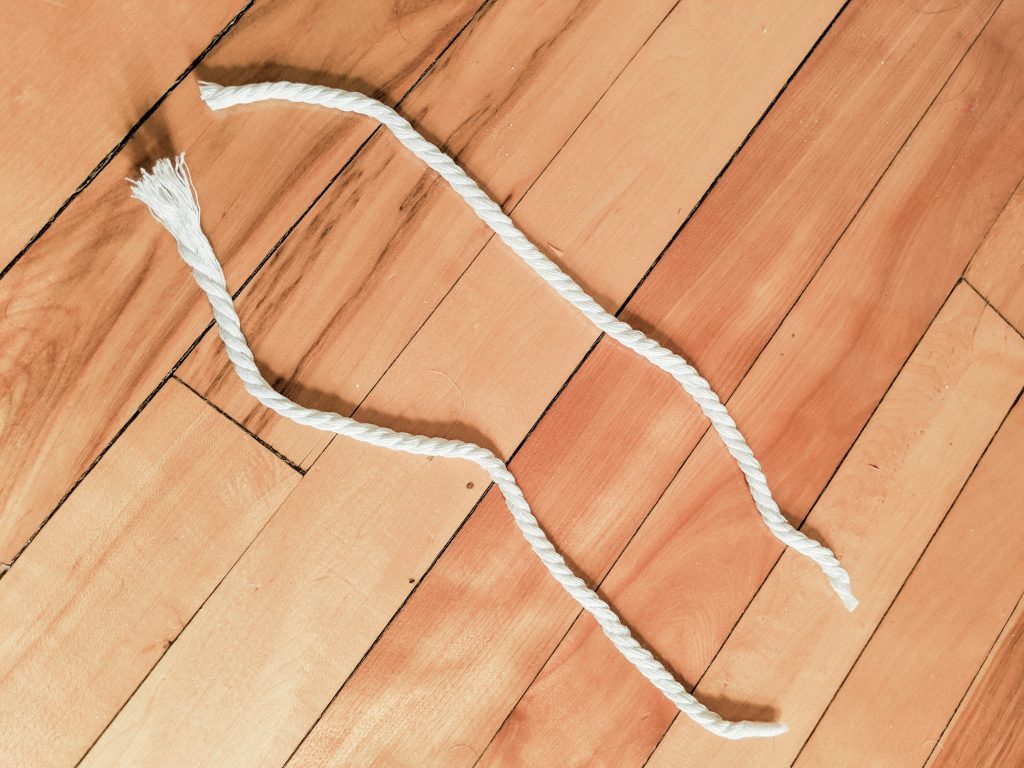
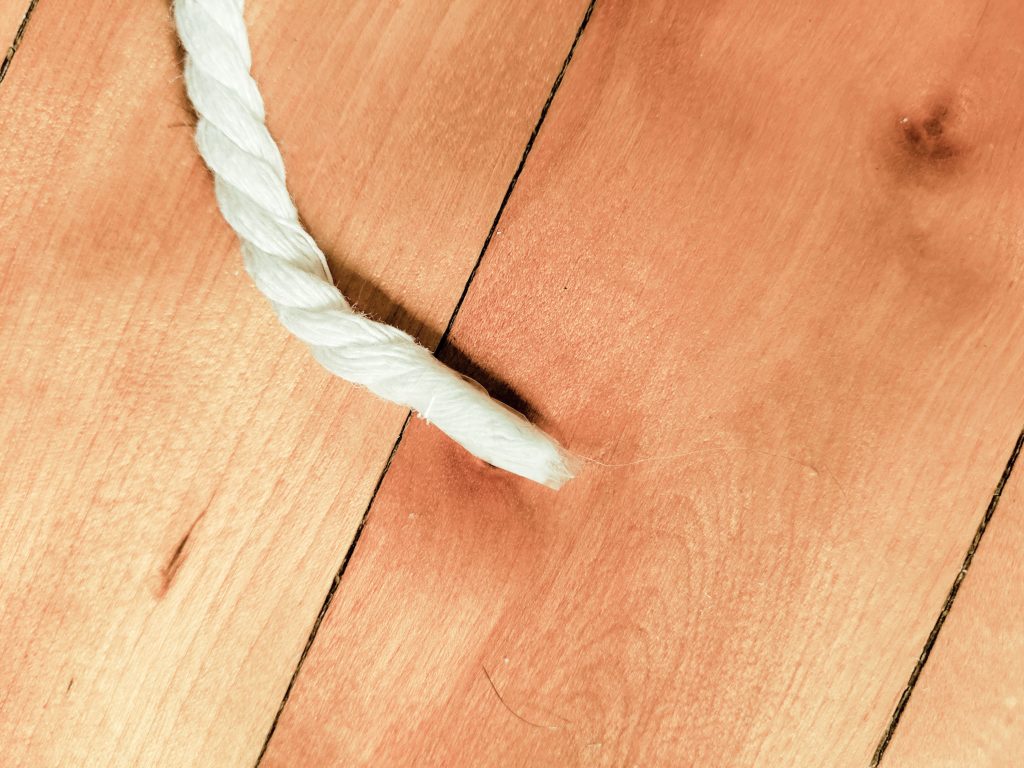
My rope was quite frayed at the ends when I cut it, so just to keep it from unravelling (and to help with the next step), I taped the ends closed with some scotch tape.
String the rope through the holes, and knot them once or twice so they can’t be pulled back through. The tape on the ends really helps to get them through the hole easily. I cut off the excess rope after I was satisfied with the knots, but you can leave the ends if you want.
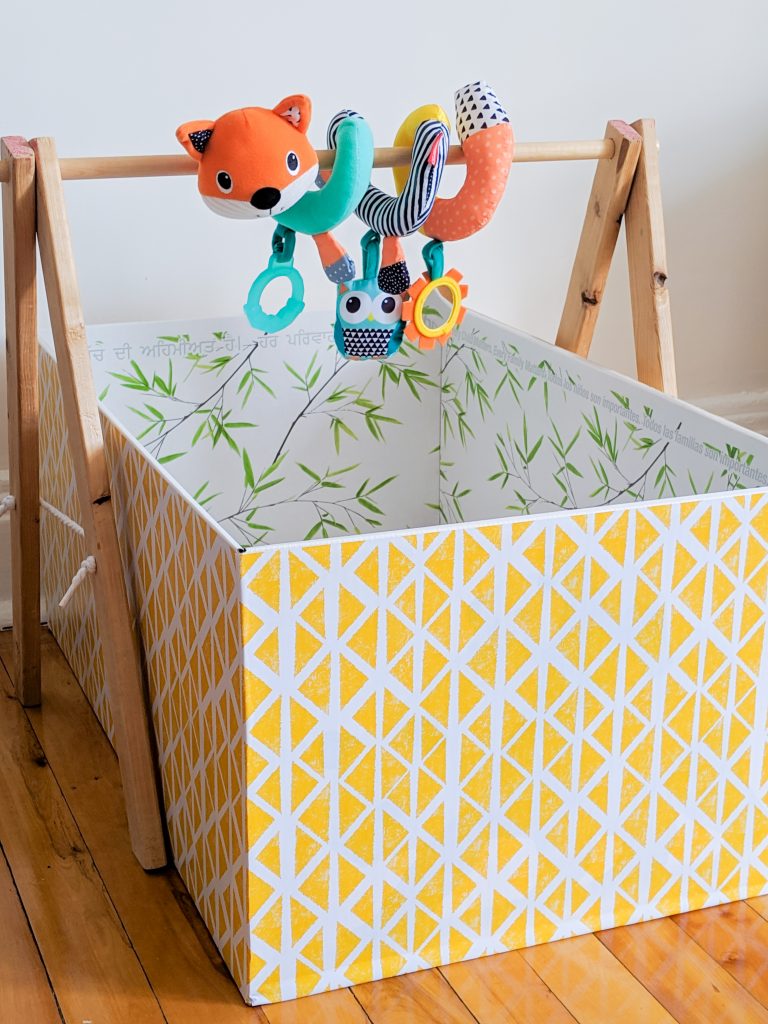
And to finish of the DIY gym, you can attach whatever you want to the dowel for baby to look at/grab. You can make your own interactive experience on rings or buy a pre-made sensory toy. I ended up getting this cute spiral fox from Infantino for about $13 at Winners. There’s tons to look at, a rattle owl, a mirror and a teething ring. And the fox’s paws have crinkly paper in them!
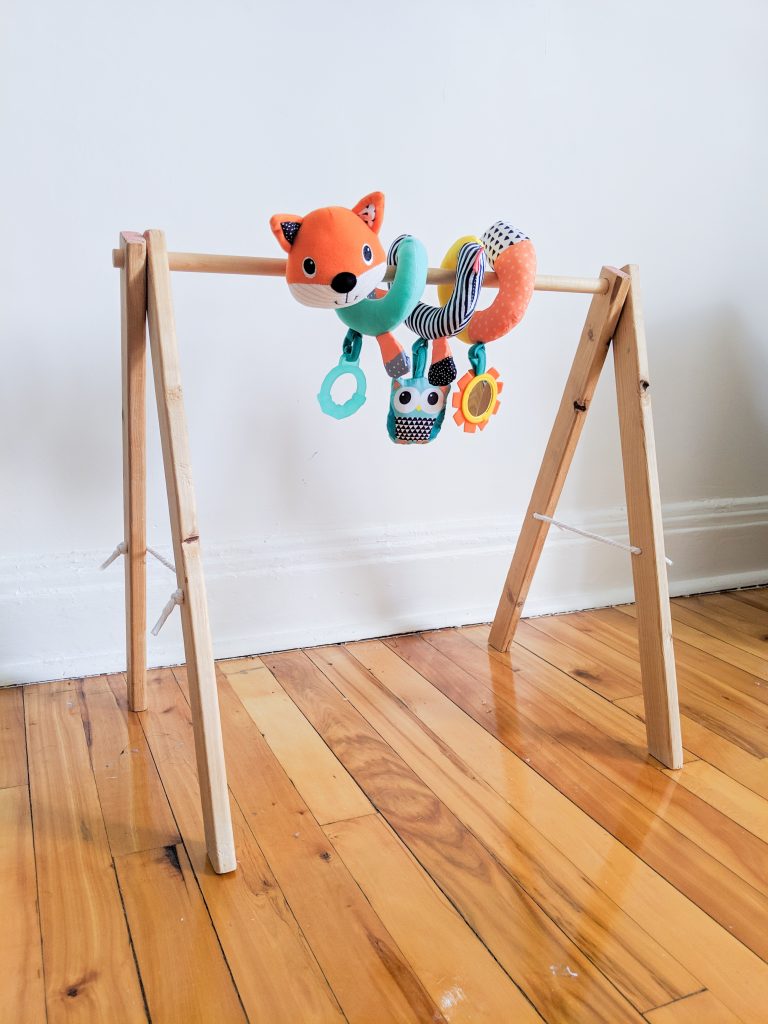
I actually love that it’s all together on a spiral instead of separate toys on rings. It’s so easy to put the whole thing on the dowel and take it all off to attach to a stroller or car seat. You don’t have to fiddle with multiple little pieces.
And what I really love about this kind of a baby gym is that it’s so easy to move it around to wherever your baby is lying. A lot of baby gyms have arches that are attached to a mat so you’d have to move the whole system. It’s just so easy to put this type of gym over the baby box I have or a rug or wherever the baby is hanging out. And I’m a big fan of the minimalist/neutral baby style. Not so much into the super loud stuff!
I really like the idea of a sensory mat though. That might be a future DIY post…
So what do you think of this super simple, minimalist baby gym I made?
xoxo
When you’re putting the baby gym together, keep the angles of the legs in mind: you want to make sure the feet are flat against the ground when it’s set up. (I definitely messed this one up the first time around.)
Yes, making it level is a good idea! 🙂