
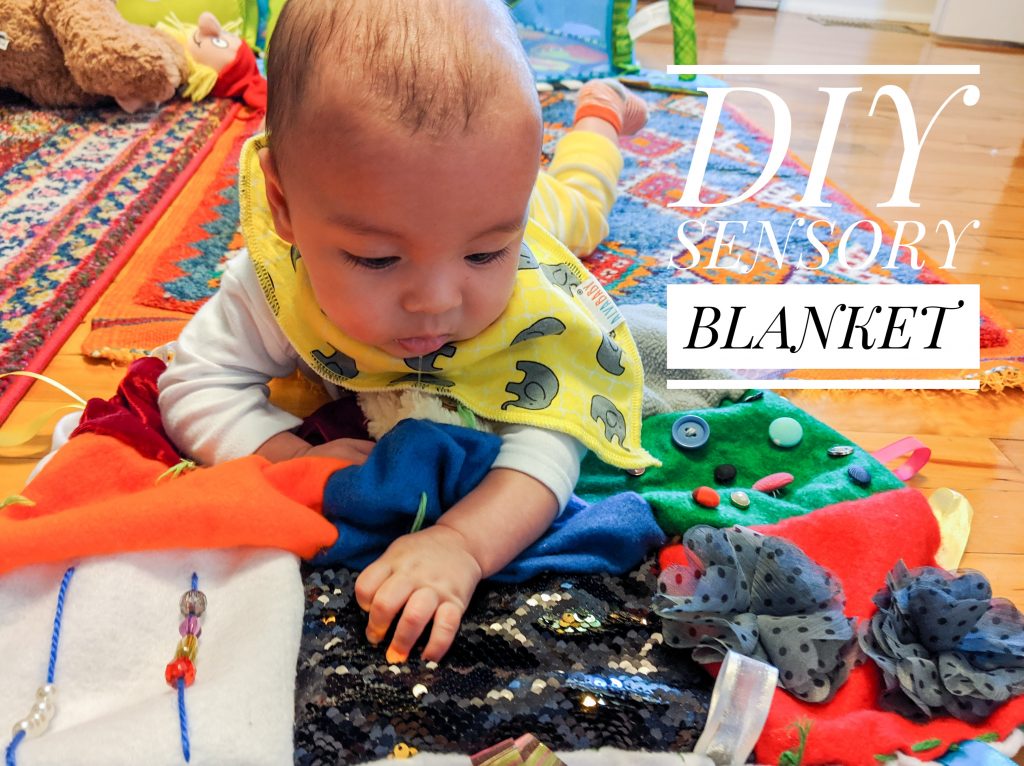
I’ve had it in the back of my mind to make Theo a sensory blanket for a while now. In the beginning, babies aren’t super alert and don’t have great control over their hands, but Theo’s been grabbing like a champ, and focusing on so much more in his environment for the past few months.
So I set to work making a super fun, colourful, textured blanket that can really capture his attention and help him explore his sense of touch! It’s pretty easy actually and really does not have to be perfect. Babies don’t really notice crooked seams and uneven stitching. At last Theo hasn’t said anything. Maybe he’s just trying to be nice.
Materials
-various types of fabric (felt, fleece, faux fur, sequins, velvet etc.)
-various colourful/textured/noisy craft bits (beads, buttons, flowers, zippers etc.)
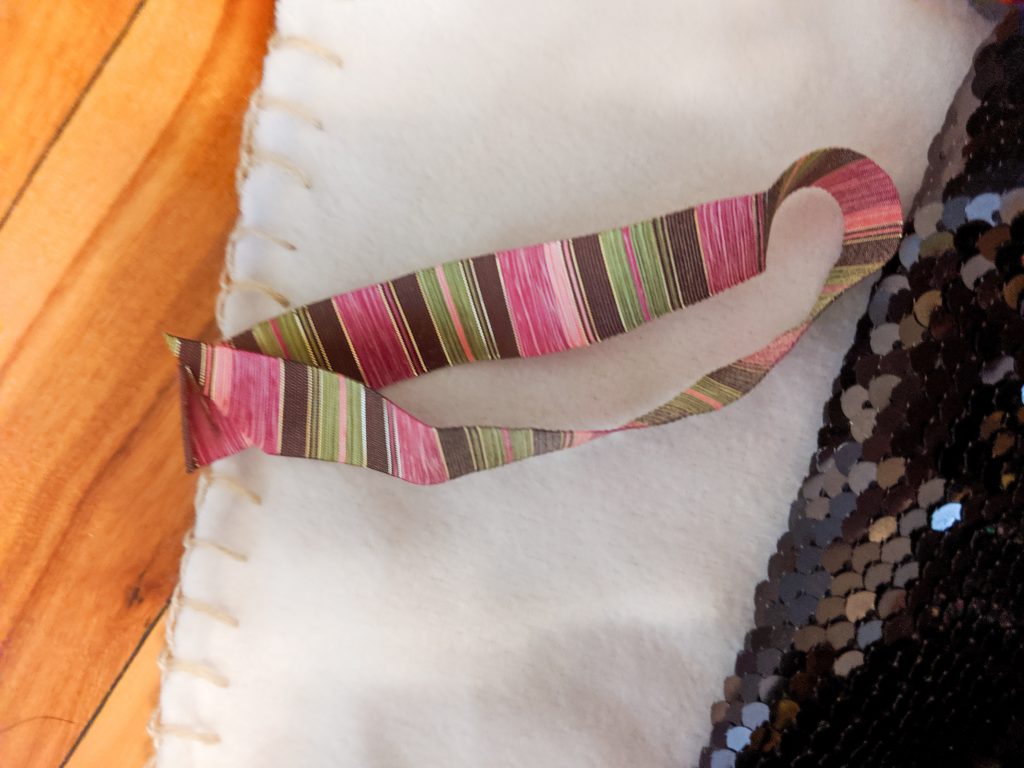
-various colourful/textured ribbon
-sewing needle
-yarn
-scissors
1. Gather materials
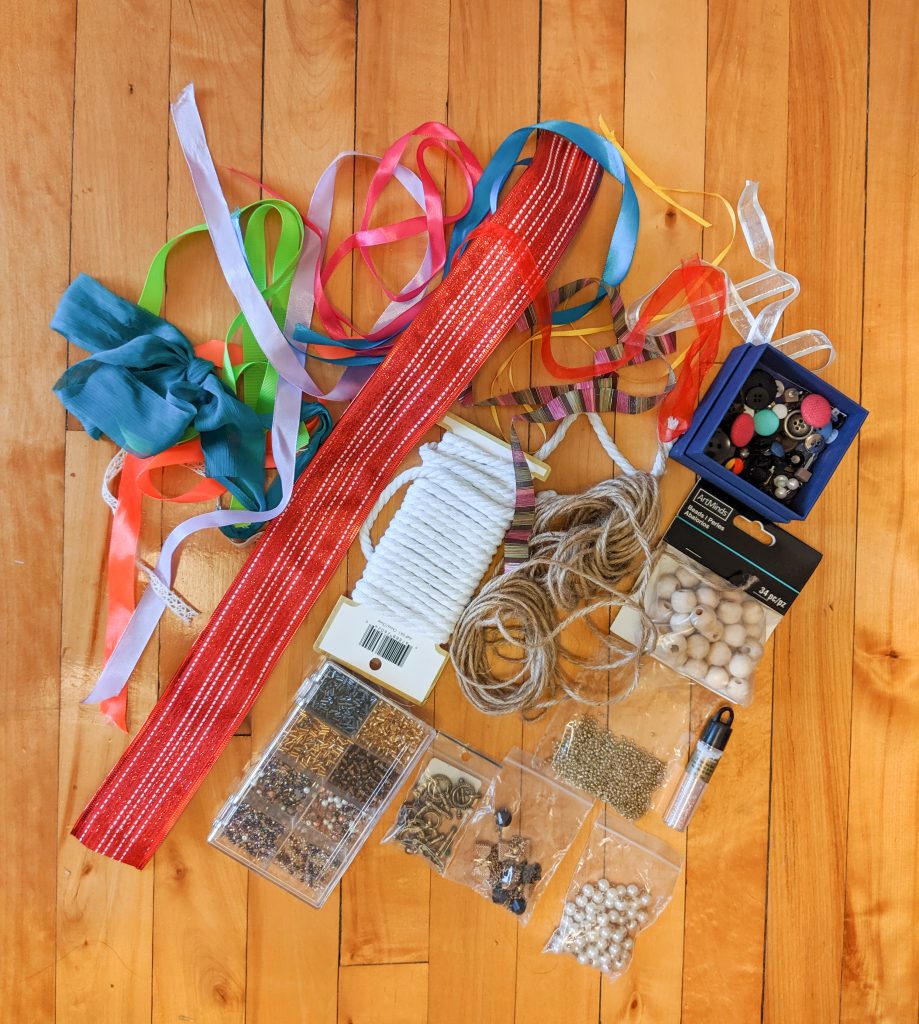
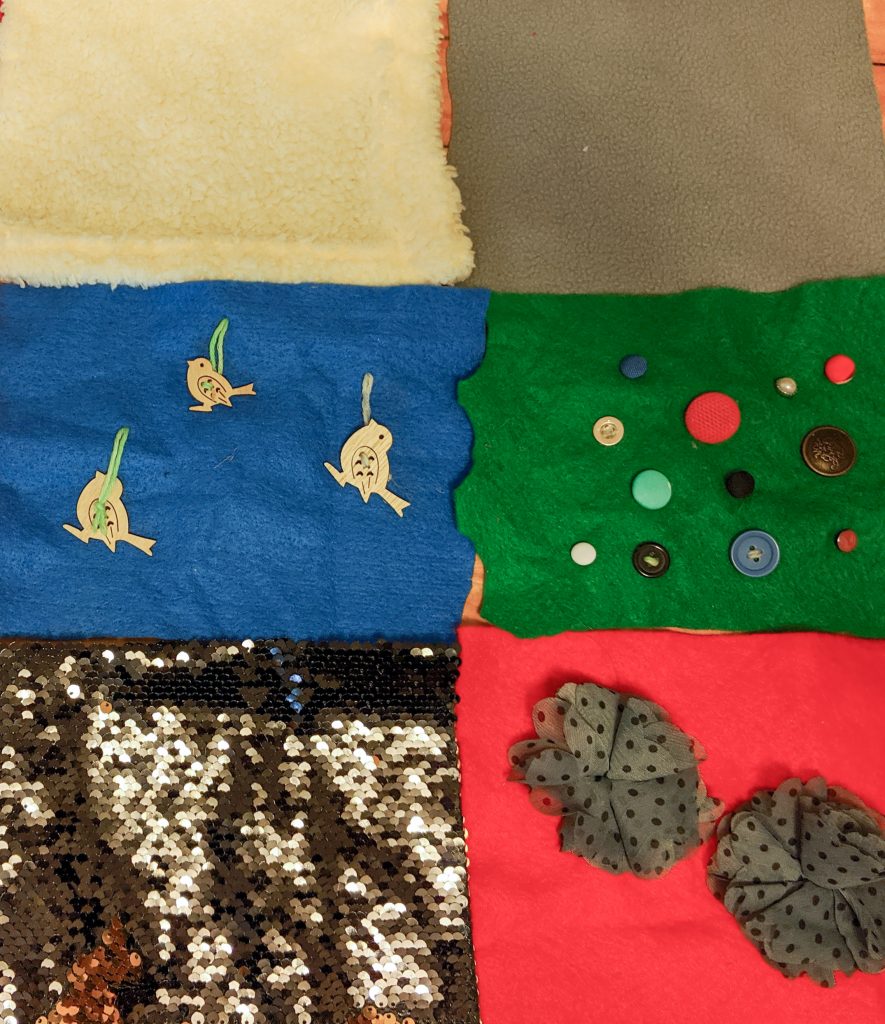
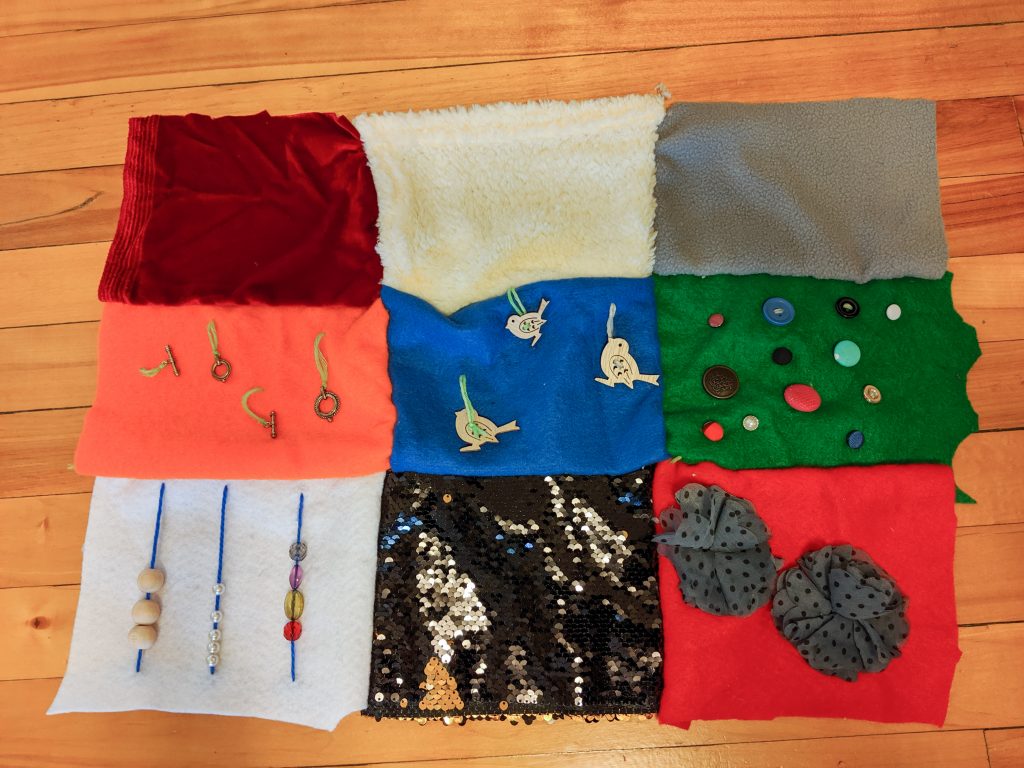
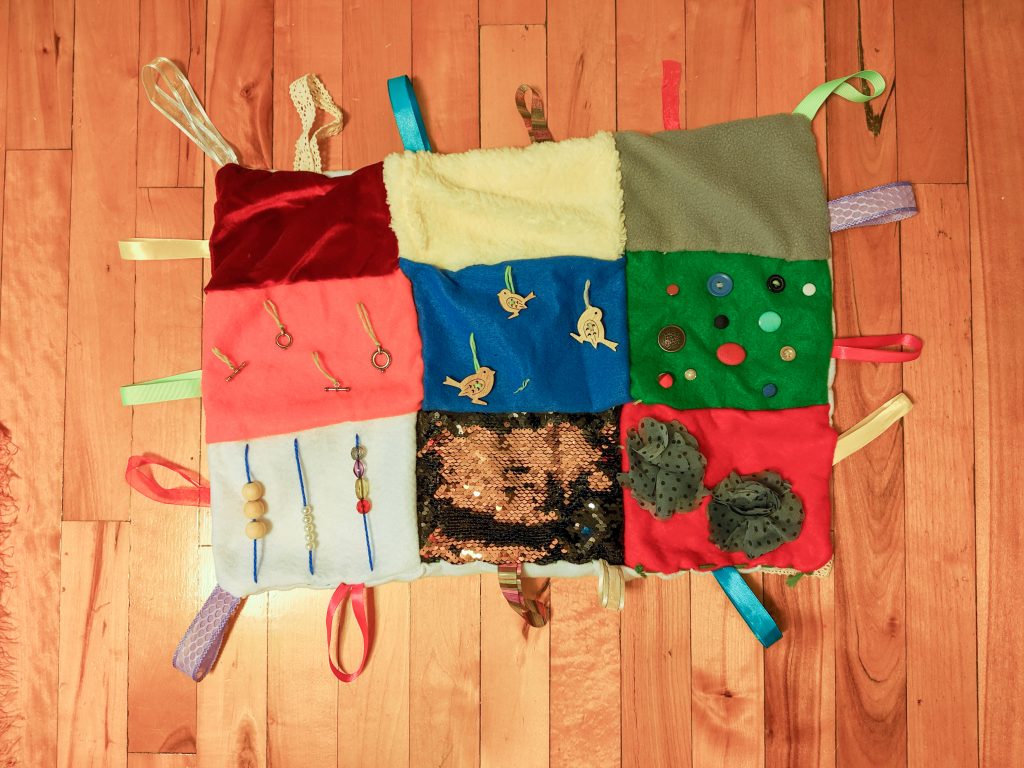
This is a really good opportunity to use up some of your scrape bits of crafting materials and fabric. I just kind of rummaged through my DIY closet and found lots of really neat things I thought would be interesting to Theo. I wanted to make the blanket a feast for the eyes, but also to stimulate his ability to explore with his hands. So I focused a lot on colour and texture when gathering my materials.
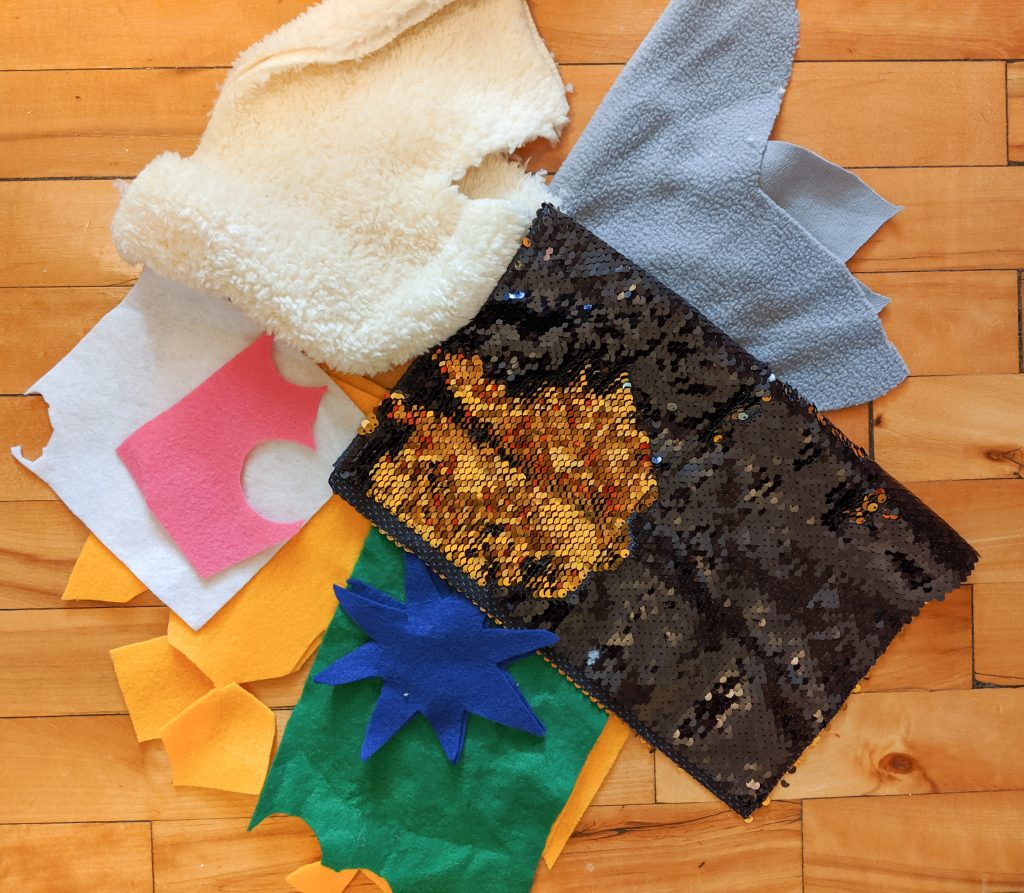
2. Cut up fabric into rectangles
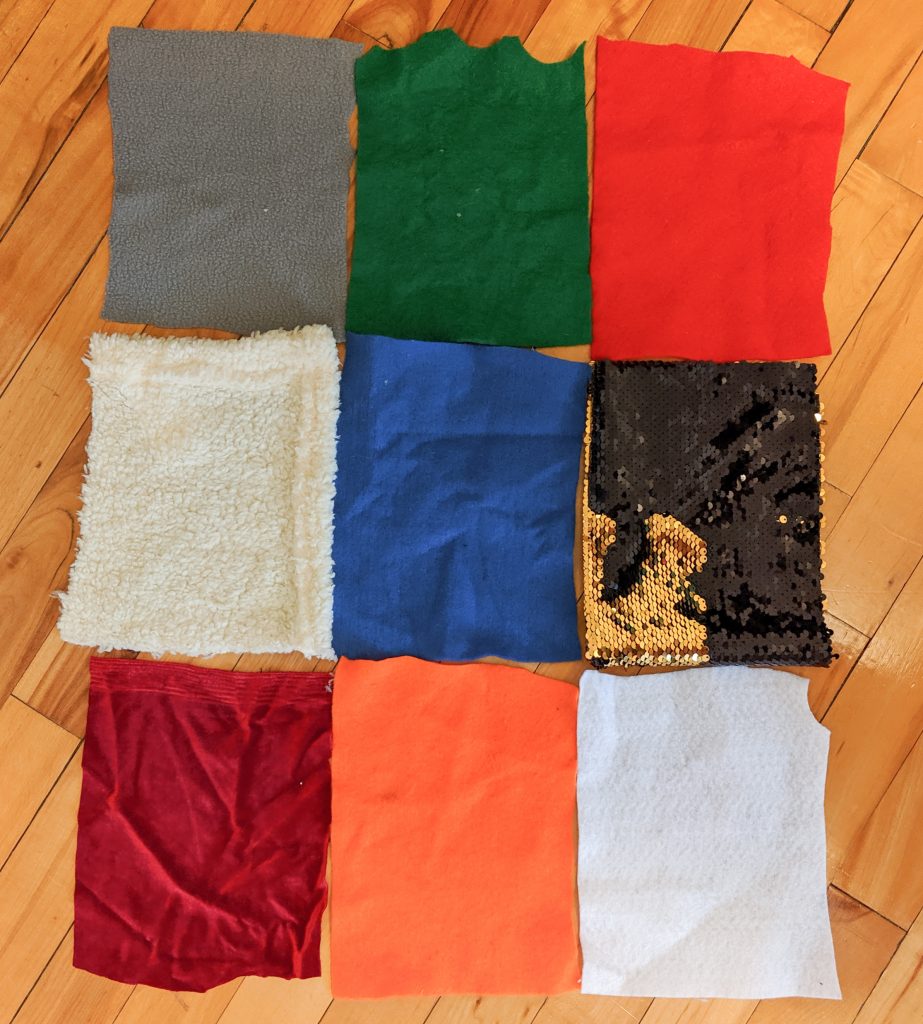
I ended up using up a lot of my scrap pieces of fabric for this project. I had some leftover red velvet, some fleece, some faux fur, and lots of felt. The only thing I bought new for this project was one of those double-sided sequined fabrics, where you can flip the sequins by running your hand over the top in one direction and it would be a different colour on the back.
3. Add interest to fabric pieces
This is where you can just be creative! I’m only going to walk you through one of the squares I made because it was actually a bit of a complicated process for me to figure out. I wanted to make a kind of abacus thing where beads could slide back and forth on a string. It’ll be a while before Theo can use his pincer grasp to manipulate the beads, but I thought he might find it interesting to touch the beads and moving them can come later.
Also Theo’s obsessed with string/rope. Babies are always attracted to the most dangerous things…
Anyway, the first step is to thread your sewing needle. I used yarn with a large needle because I used a lot of felt in my blanket and I don’t find regular thread to be thick enough to be sewn into felt for security purposes (it’ll get pulled all the way through the felt really easily.)
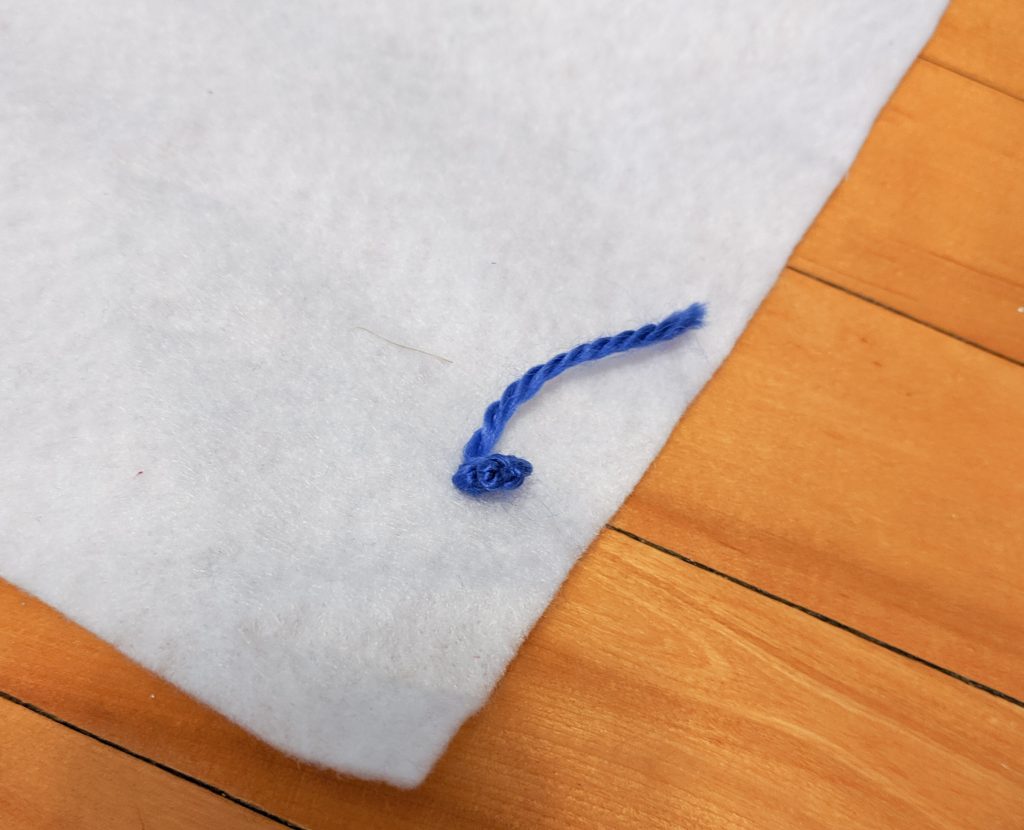
Once you’ve threaded your yarn, DO NOT knot it at the end. Leave the ends loose.
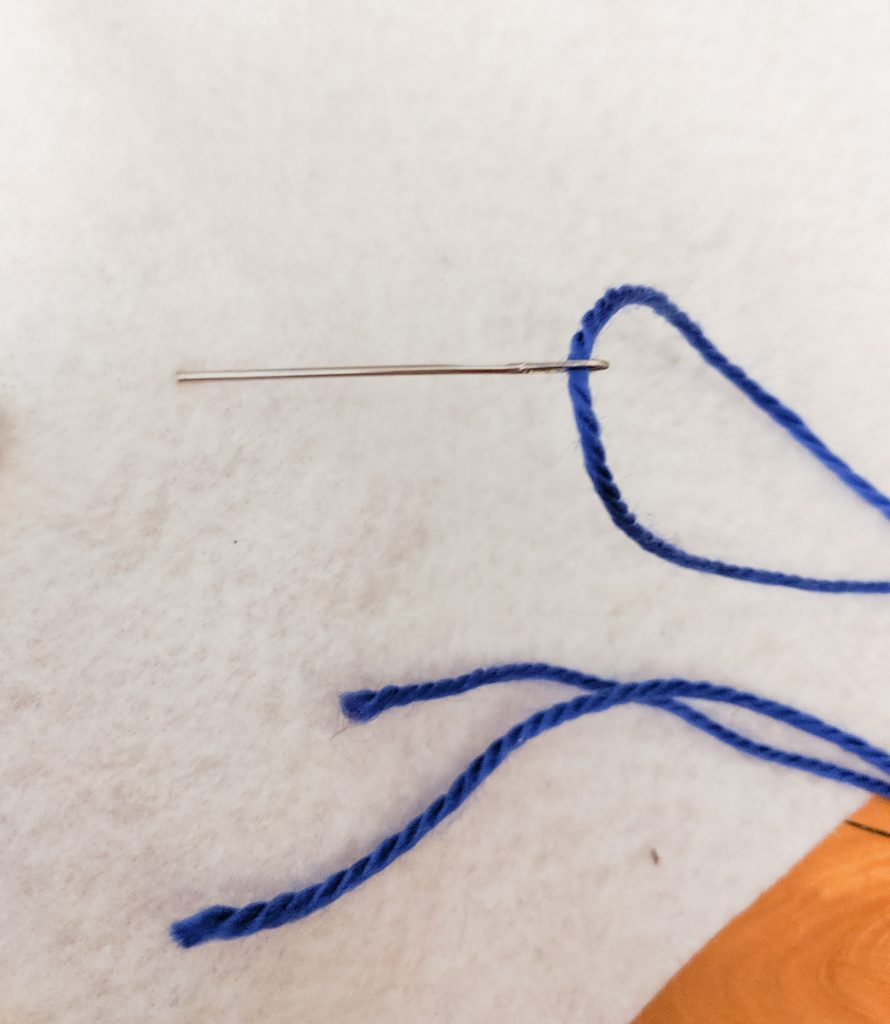
Sew through the felt until the needle passes all the way through to the back side. DO NOT pull the yarn all the way through.

Instead, pull ONE END of the yarn through to the back side of the fabric. Remove the needle from the yarn.
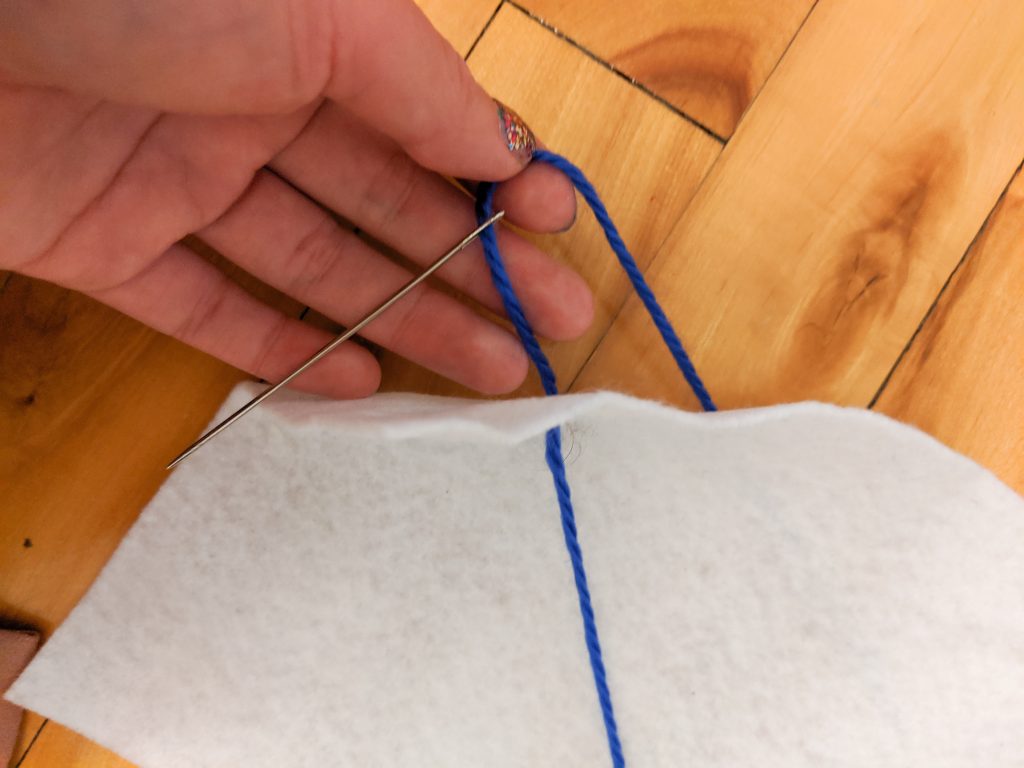
Attach some beads to the front portion of the yarn and thread the needle again on the front side.
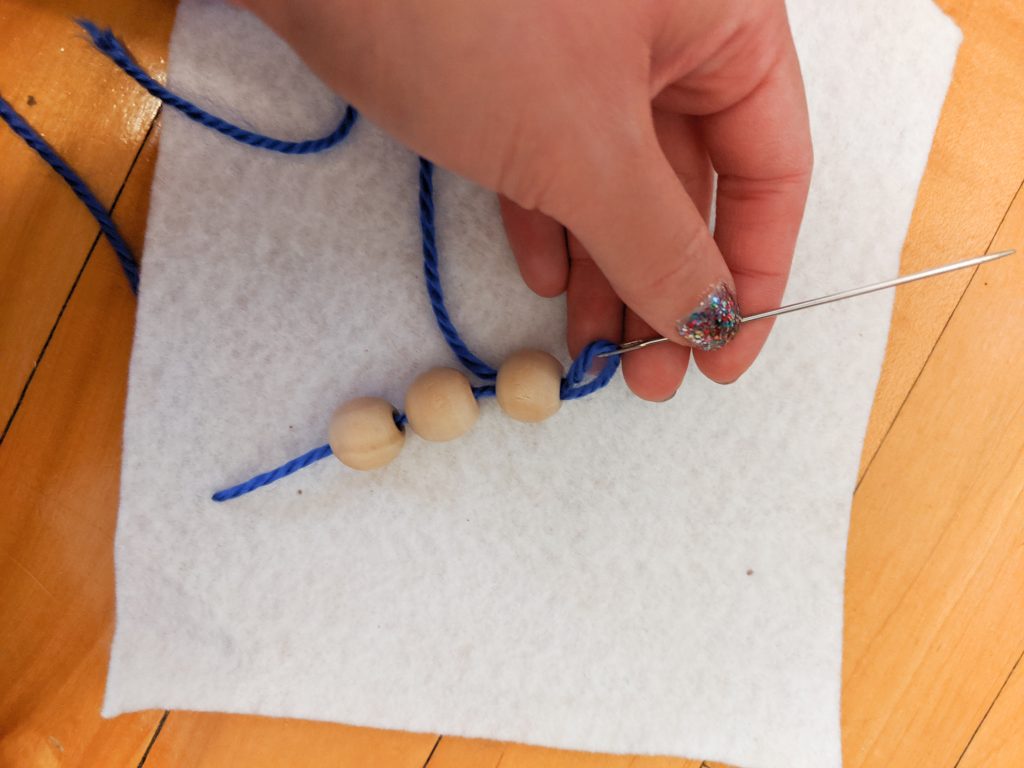
Sew through to the back side of the fabric a few inches down from where you sewed through the first time. Pull the loose end of the yarn all the way through to the back. Remove the needle.
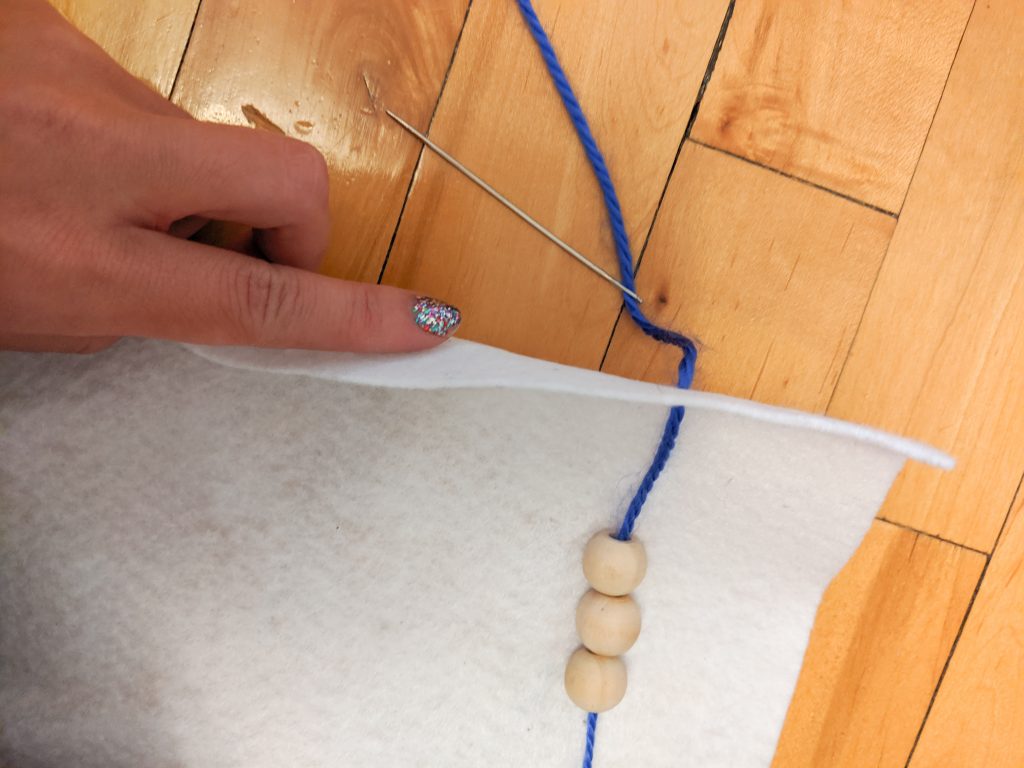
Now knot both loose ends of the yarn in the back of the fabric. I knotted them, like, ten times, just to be safe. Babies can be really strong and you do not want them to be able to pull the yarn through and release the beads!
For the rest of your fabric squares, you can do pretty much anything you want! I made some things that dangled, I attached some different sized, coloured and textured buttons, I sewed on some polka dotted fabric flowers I found at the dollar store. And some of the squares I left blank because the fabric itself was interesting enough!
4. Sew fabric pieces together
Once your bits and bobs are on the squares, sew them all together. If you don’t want the stitching to show, remember to always stitch two pieces together with the good sides facing each other.
You can opt to make the back a sensory experience also, but I decided to just use a large piece of fabric. I just cut out some leftover fleece material in the same size and shape as the entire blanket when it was sewn together.
5. Attach ribbons all around the border
To sew the whole thing together and attach your ribbons so they make loops that go all around the outside of the blanket, put your two blanket pieces together with the good sides facing each other.
Arrange the ribbons into loops with the loop part facing down/inside.
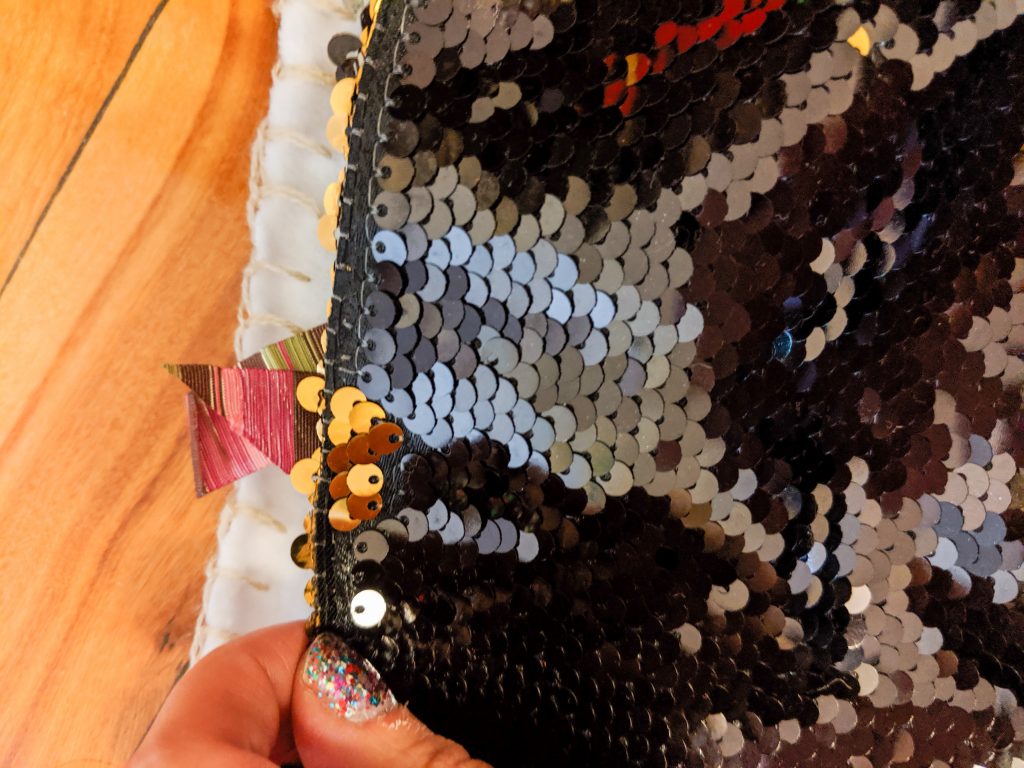
Sandwich the ribbon between the two pieces of blanket so that the loose ends of the loops are sticking out just slightly.
Sew the two sides of the blanket together and make sure you are stitching the ribbon ends to the fabric as you go.
Leave a small opening somewhere along the border so you can turn the blanket inside out when you’re almost done. Sew up the opening once your blanket has the good side on the outside.
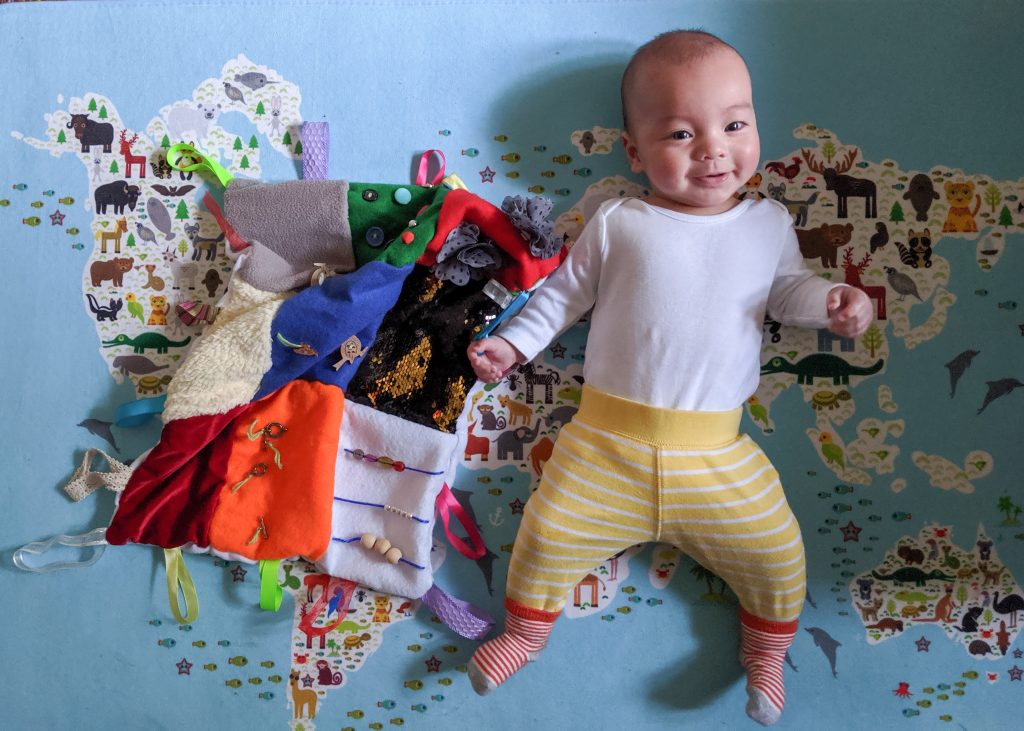
And there you have it! A super simple “toy” you can make for your baby to play with! Now, if you opt to create a blanket with several choking hazards on it, make sure you supervise your baby while he/she is playing with it.
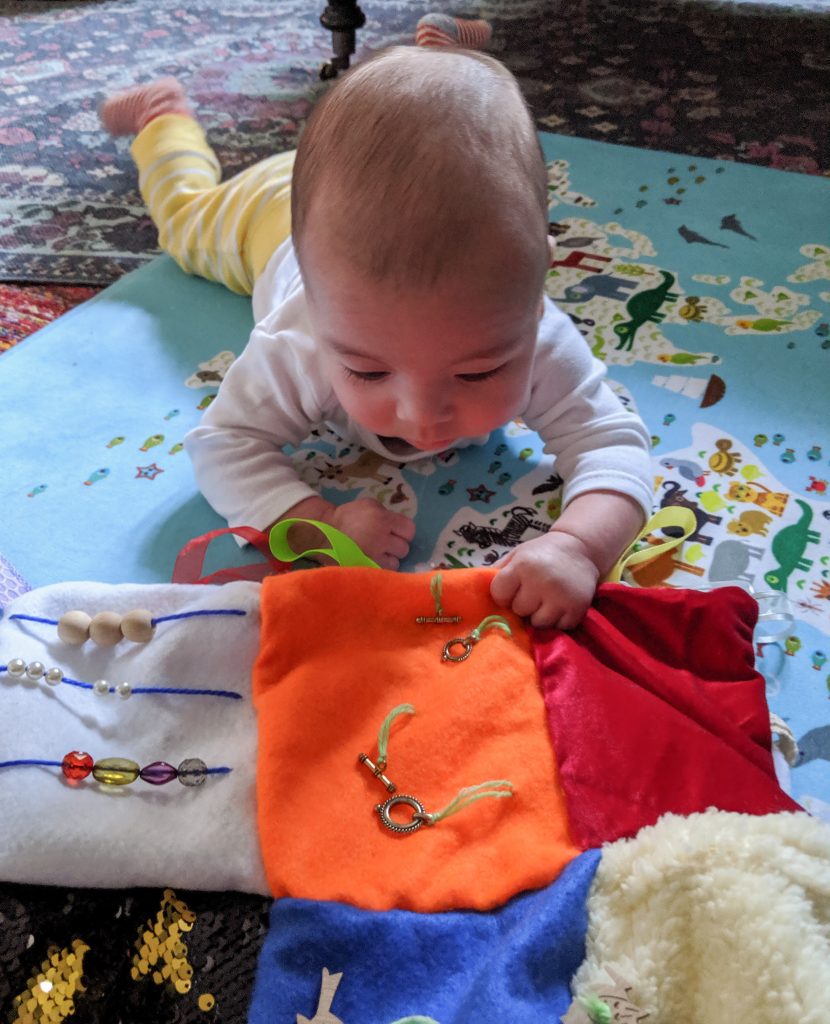
Theo’s favourite features are the ribbon loops and the polka dotted flowers. He’s also super fascinated by the sequined square, but who doesn’t love sequins?
The good thing about these DIY toys is you can adjust them as your child grows up and becomes interested in/able to do other things! What other fun things do you think would go great on a sensory blanket?
xoxo
WHY would you risk the life of an infant by allowing them to play with beads, buttons, and sequins??? This idea is DANGEROUS, thoroughly irresponsible and absolutely thoughtless.
My thoughts exactly! I googled “sensory blanket for baby” and this popped up. This post needs to be removed immediately.
I did say in the post that you need to supervise the baby when they’re playing with this, if you put things like what I put on it. And it’s all about what you’re comfortable with. I’m fine letting my kids explore things with their hands as long as I’m watching. If they start moving their hands towards their mouth, I stop them. You definitely should not let them play with this alone!
Not sure why there is negative feedback to this. The post very clearly states this is for parent supervised play, maybe people should learn to read more thoroughly before jumping to start drama.
Thanks for the idea – this is exactly what I was looking for as my son is so enjoying feeling different things. And to the panicked posters above – relax, I will supervise my son while he explores different textures. Watching him discover new things is such a joy, I wouldn’t want to miss out.
Yeah, and both of my kids were not even interested in the beads and buttons in the end, they were all about the ribbons! Glad you enjoyed the post!
its a brilliant idea and what people dont realise is……….you dont have to put beads you can attach what YOU like ……. its the basic idea that counts
Exactly! I made this post to just give some ideas, and show what I ended up doing, but I always encourage people to tweak it how they please!
Reading is fundamental but people don’t do much of that these days
I would NOT put beads on this either. I would possibly add a teething ring instead. Things that babies CAN be safe with putting in their mouths. EVEN with supervision. Things can happen very quickly a phone can ring or knock at the door. All you need to do is look away for a sec and the baby could find a loose bead and swallow it. My mom was baking bread with me and and I was a toddler, she was giving me small pieces of bread and then I started choking she didn’t know why. She rushed me to the hospital and I swallowed my hair barrette. HOW did I get it, she had no idea. She was with me the whole time. Things happen people. the doctor said it was good I was eating bread it would prob. cushion the barrette until it “passed” and it did.