
It’s the start of the hygge season, all things cozy and comforting! Warm drinks, candles, and luxurious textiles…
I find myself always wanting to change up my decorative couch cushion game every once in a while, and until I’m mansion-level rich (and I have a room just for storing all my decorative pillows) I’ve decided that changing the covers every once in a while will just have to do.
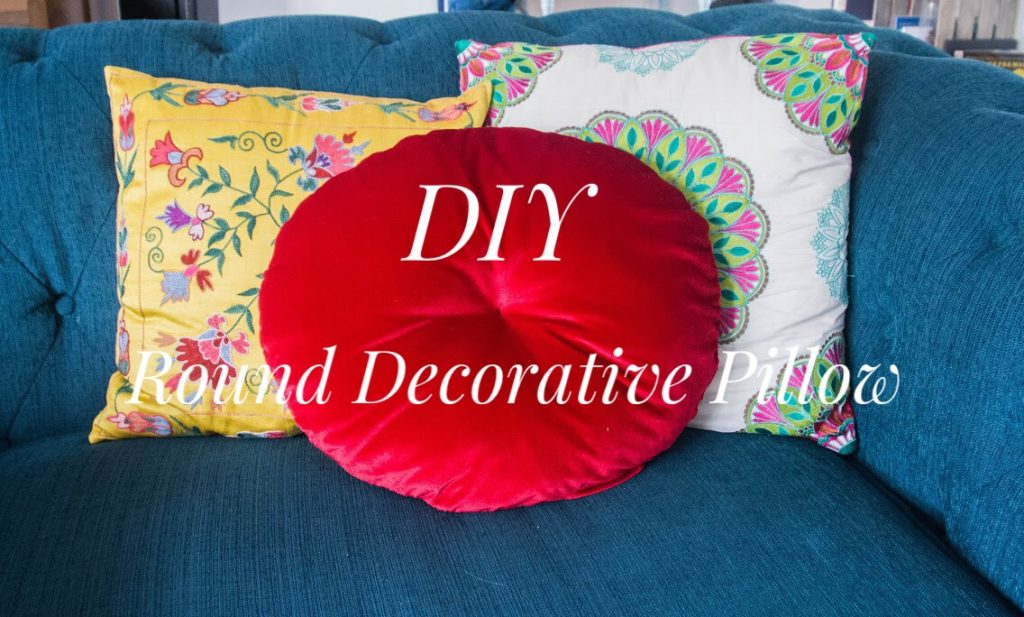
I especially like using cushions of different shapes, sizes and textures together to create a fun pillow vignette, but the cost of buying cushion covers can really add up. Here’s a super easy way to make your own round decorative pillow!
Materials
-half a meter of fabric
-sewing needle
-pins
-thread in the same colour as your fabric
-chalk
-round cushion or cushion filling

1. Use chalk to trace your pillow in the fabric
Mark an outline on the underside of your fabric with chalk that’s at around half an inch larger than what you want the finished product to be. I happened to have a round cushion on hand that I no longer liked and decided just to use it as my cushion filling without dismantling it. You can just use regular pillow/cushion filler, available at any craft or sewing supply store.

2. Cut out the two sides of the cushion pattern
Cut out the pattern you drew and use it as a template for the other side of the cushion. Basically, you need two circles of fabric that are identical in size. Attaching the first one you made to the remaining fabric with pins will keep it from moving around while you cut.

3. Sew the two pieces of fabric together
You should sew the pieces together with the good sides facing each other, so the stitching won’t show. If you have a sewing machine, I highly recommend using that for this. I don’t, so I hand sewed it. Because I was using an existing cushion as the “filling,” I had to stop every once in a while to make sure I was matching the shape and size of it.

4. Turn the cushion cover inside out so the good sides are facing out and fill it
Leave an opening of several inches in your stitching so you can turn the cushion cover inside out and fill it with your existing cushion or cushion filler.

5. Sew up the opening
Pinch the sides of the opening fabric together so that the frayed ends will be inside the cushion when you’re done sewing. I essentially sewed as close to the edge of the two sides as possible so there was minimal excess fabric puckered under the stitching. There are different methods for closing an opening like this, ones where you’re hiding the stitching better, but I didn’t really care about it too much. The fabric I chose was a rich red velvet and red thread blends in pretty well if you aren’t looking too hard.

6. Draw in the middle of the cushion
Find the middle of the cushion, sew through it to the other side and pull the thread taut so it makes the fabric pucker towards the centre. Repeat this several times until your pillow is as puckered as you want. You can also attach a button to the centre to finish it off if you want.
I’ve seen these round velvet cushions go for upwards of $50 or $60, so I am super happy with how mine turned out at a fraction of the cost! And even better, once I get tired of this cover and want to change it up again, I won’t even feel bad about it.
xoxo