
When we first bought our house, it was suffering from some severe aesthetic difficulties (check out our bathroom reno here, it’s a pretty good representation of what the house was like before). I wish I had taken more photos of the rooms before we went to work on them, but we were practically at Home Depot buying paint, plaster, you name it, the second the last box was off the moving truck.
I am not a patient person.
We’ve left the kitchen pretty much untouched these past two years while we prioritized other projects. I also wanted some time to think about what kind of a design aesthetic I wanted in the kitchen, how much work we were willing to do, and what our budget would be.
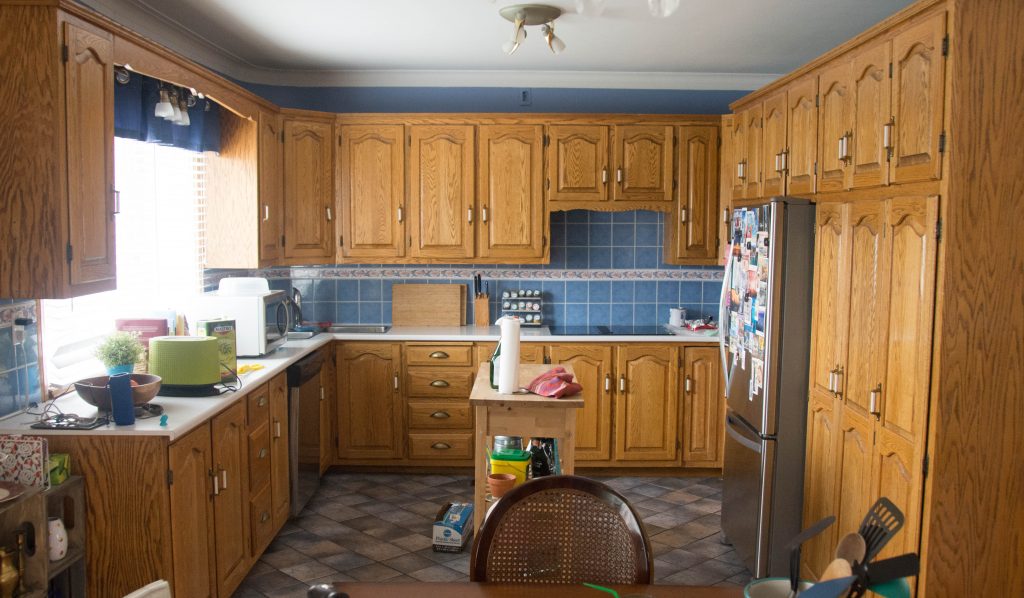
From the beginning, Kyler and I both pretty much agreed that the bones of the kitchen were just fine. We liked the layout, and we had tons of cabinets and counter space. I didn’t mind where all the appliances were. It really was just the finish of it that needed sprucing up. Not to mention, we spent a pretty penny fixing up the bathroom not too long ago and we were not looking to spend a lot again so soon on a room that was perfectly functional and only a little bit ugly.

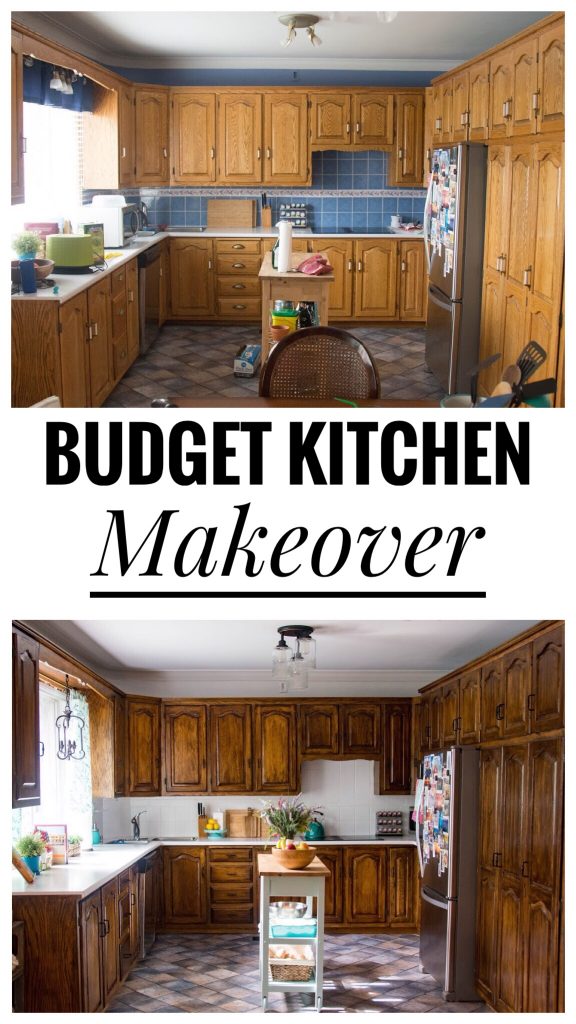
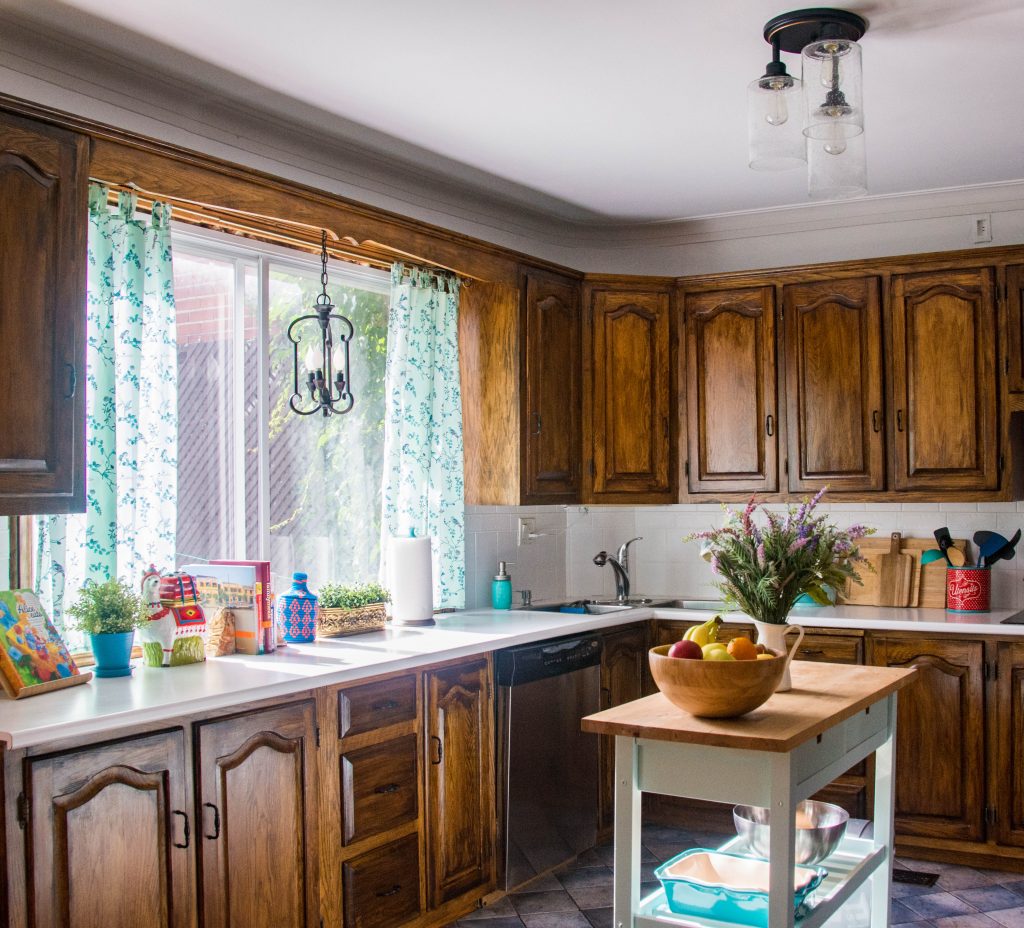
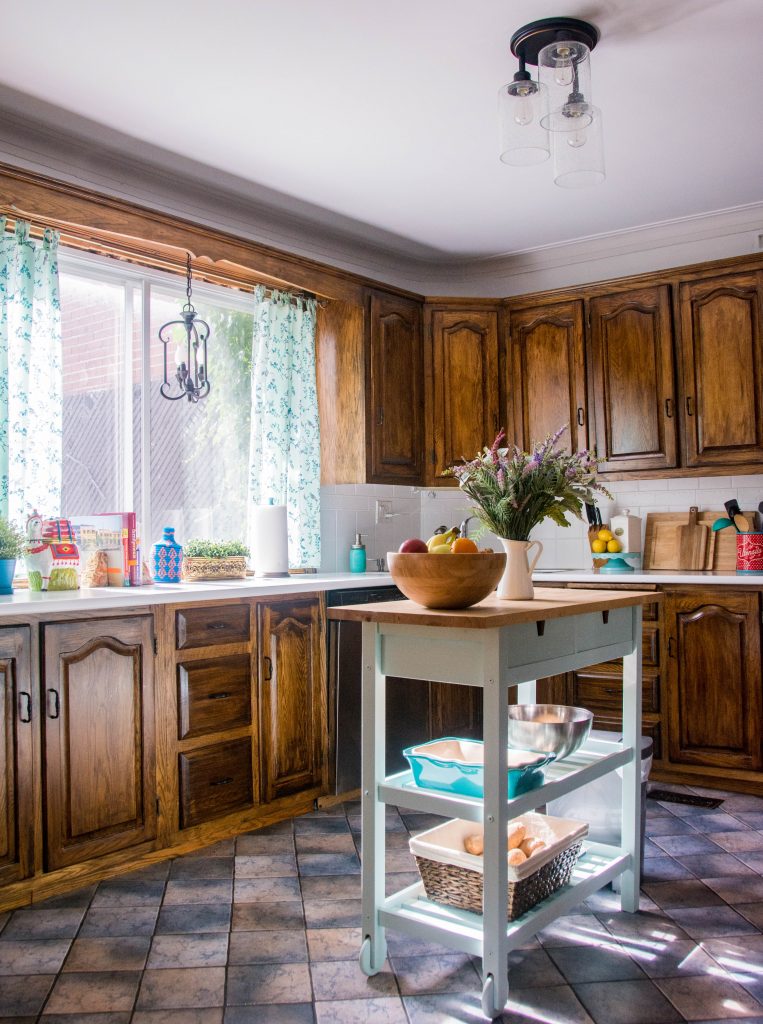
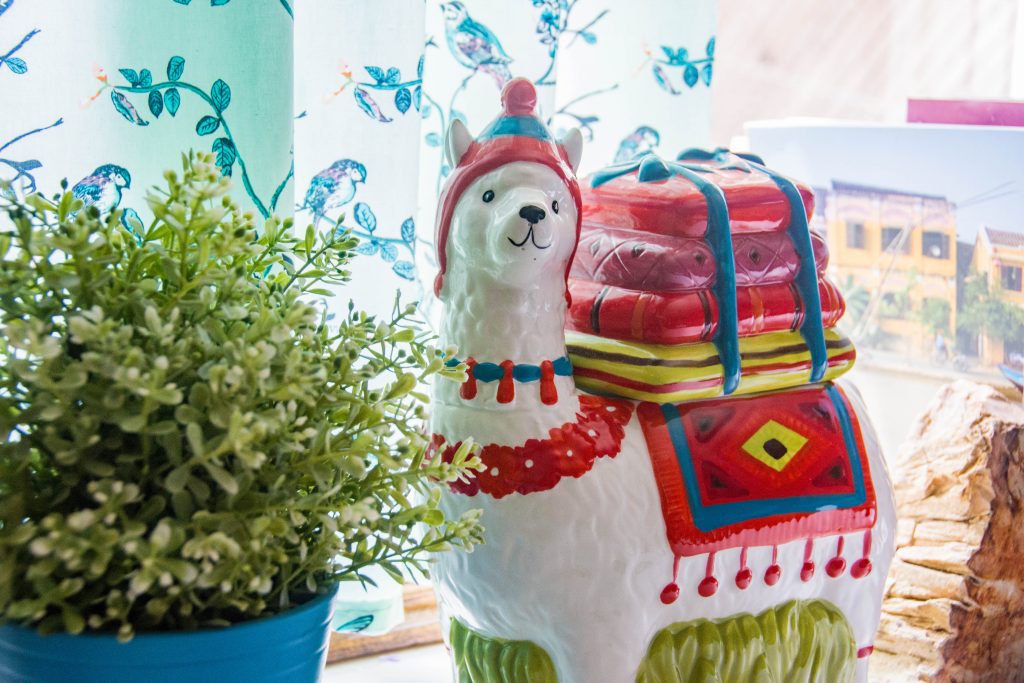
So this summer, we went to work polishing up the kitchen. I decided to extend the kind of vintage, French country vibe of the dining room into the kitchen. Of course, I’ve put a more eclectic/colourful twist on the traditional rustic kitchen look, but did you expect anything less?
Here are the super easy ways we totally transformed our kitchen for under $500!
1. PAINT THE BACKSPLASH / WALLS
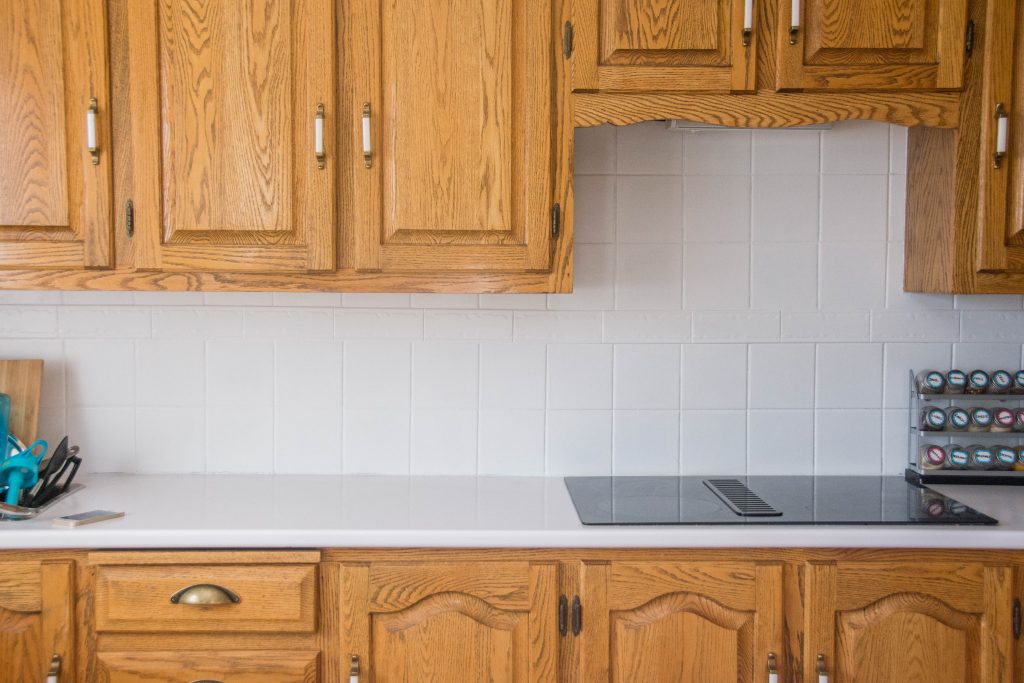
I did a whole how-to blog post on painting the kitchen backsplash tile earlier this summer. Basically, if it’s not in your budget to completely retile your backsplash, painting the tiles is a great option!
If you’re willing to spend a bit more money on sprucing up your backsplash, you could also try using stick-on faux tile, which offers more design options than paint alone. We have a lot of backsplash space so it would have run us a few hundred bucks for a good quality product in a nice pattern, so I opted to just go for paint to start and I’m very happy with how it turned out.
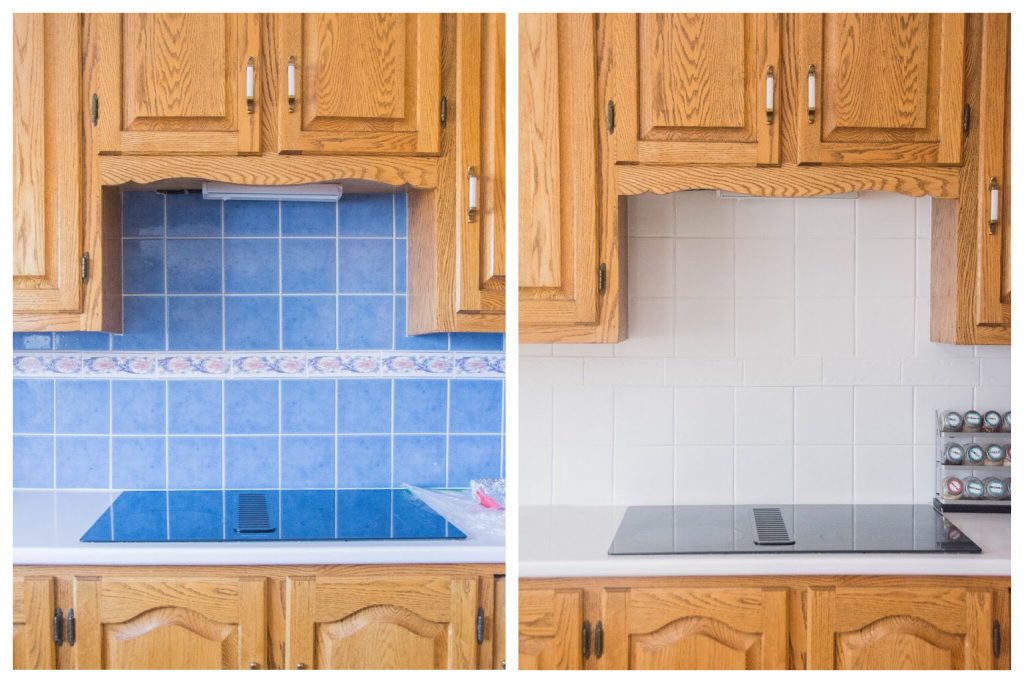
I went with white because I thought it would look best with wood cabinets and I always want to make spaces in my home brighter and airier. White is also just classic and beautiful. Not to mention, if you want to spice things up with fun appliances, colourful accessories and funky decor pieces, they really do best against a simple backdrop.
In the future, I might experiment with painting a pattern on the tile, but for now, I am super happy with how we’ve transformed the dated look of it to something much brighter and fresher.
Zinsser Perma White Semi-Gloss Paint – $19.37
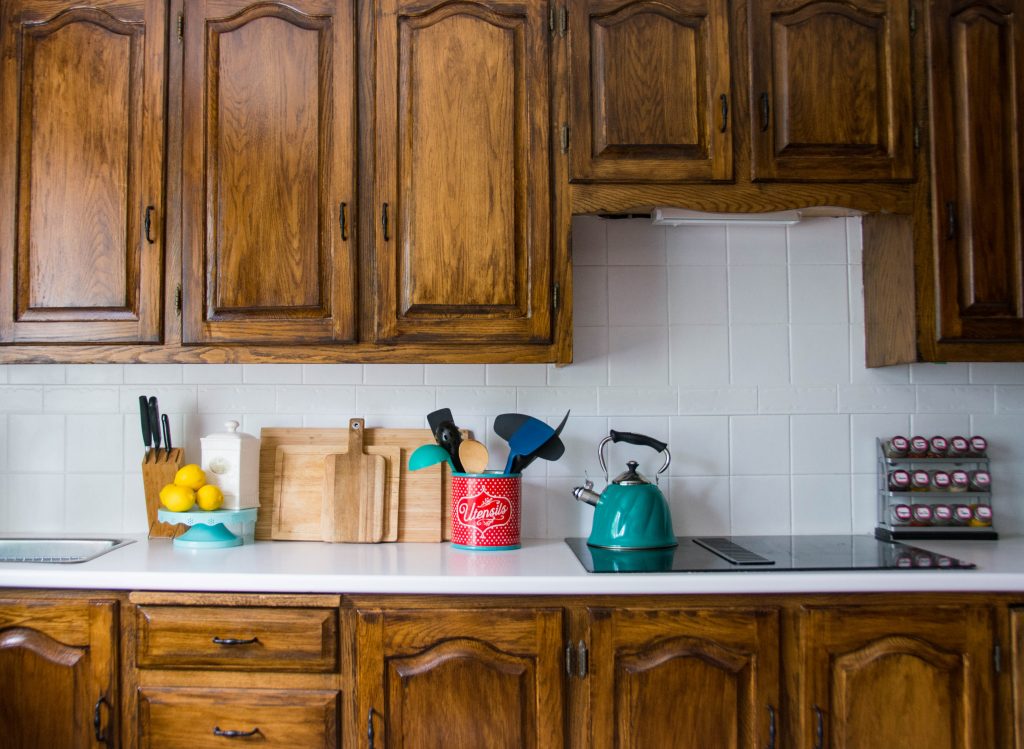
2. PAINT OR STAIN THE CABINETS

In my opinion, the single most impactful thing you can do to transform your kitchen is paint or stain the cabinets. I made a whole post about how we stained our oak cabinets here, if you’re interested in a more detailed how-to guide. I think it turned out pretty well, definitely a big improvement on our original orange oak cabinets.

This was the most labour-intensive and time-consuming of all the updates we made, but considering we had a whole 41 cabinets and drawers to remove, sand, stain and seal, we only spent about two weeks on this project, which is not that long at all. If you opt to paint your cabinets instead, using a chalk paint, for example, it would go even faster since you don’t even have to sand the wood!
Minwax Wood Finish in Deep Walnut – $12.37
Minwax Polycrylic Protective Finish – $14.74
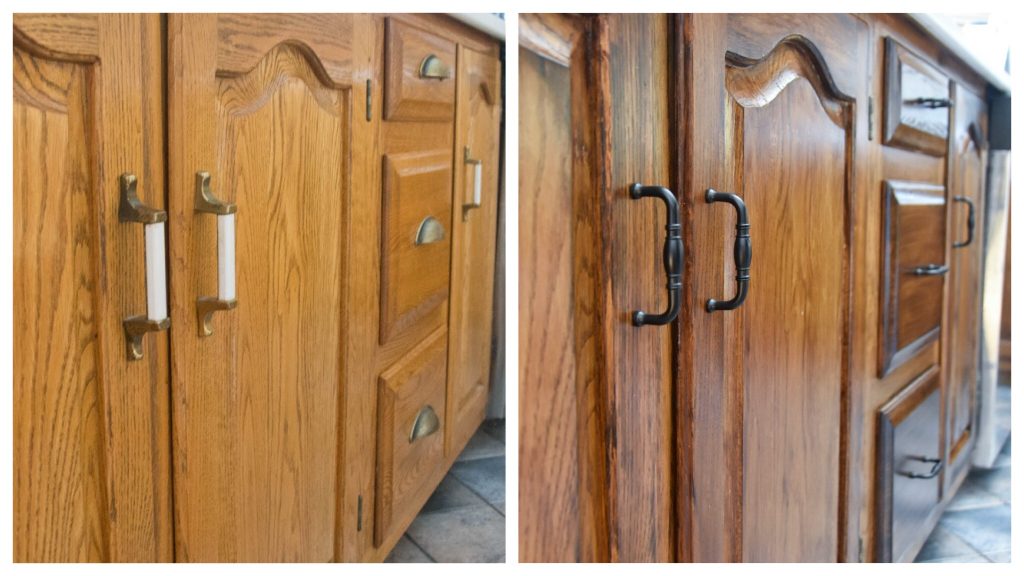
3. REPLACE THE CABINET AND DRAWER PULLS
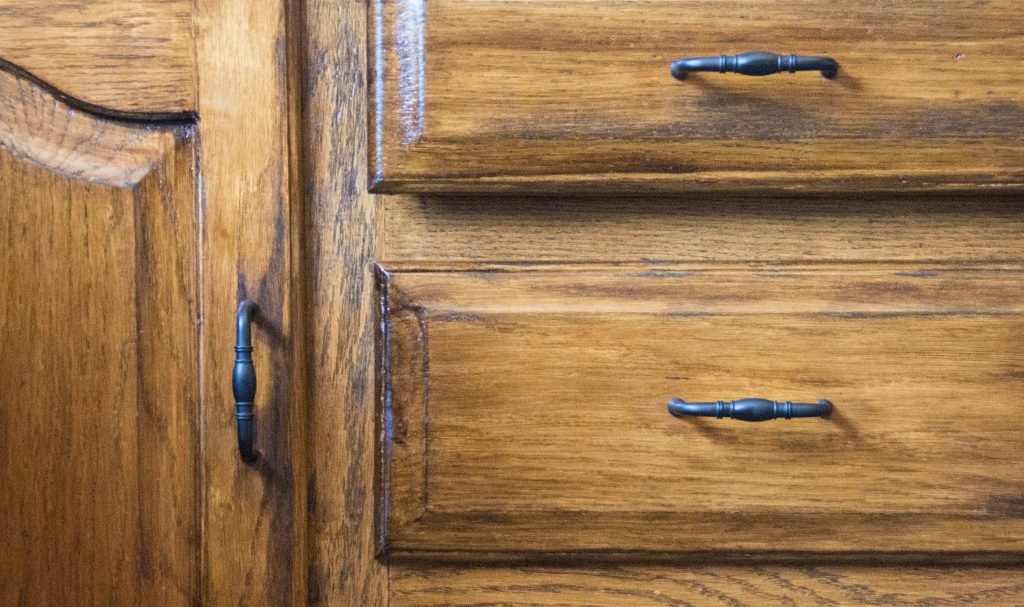
Speaking of cabinets, a really subtle, yet impactful way to update your kitchen is simply changing out the cabinet hardware. As much as I love brass and gold accents, with how warm-toned the cabinets are, I felt that using such warm-toned hardware was not doing the cabinets any favours.
Chrome/silver/stainless steel was also out of the question for me. I felt the contrast was a bit too stark and it would not make much sense. So I settled on a matte black finish, in a more vintage-inspired design, which compliments the vintage appeal of the oak cabinets. It also keeps my design aesthetic somewhat consistent throughout the house. Gotta have those vintage-inspired elements in every room!
If you don’t have a ton of cabinets and drawers (we have an abnormally large number, I would say), changing your hardware could easily cost you less than a hundred bucks!
Amerock Granby 3″ Centre Bar Pull – $3.35/each – TOTAL: $137.35
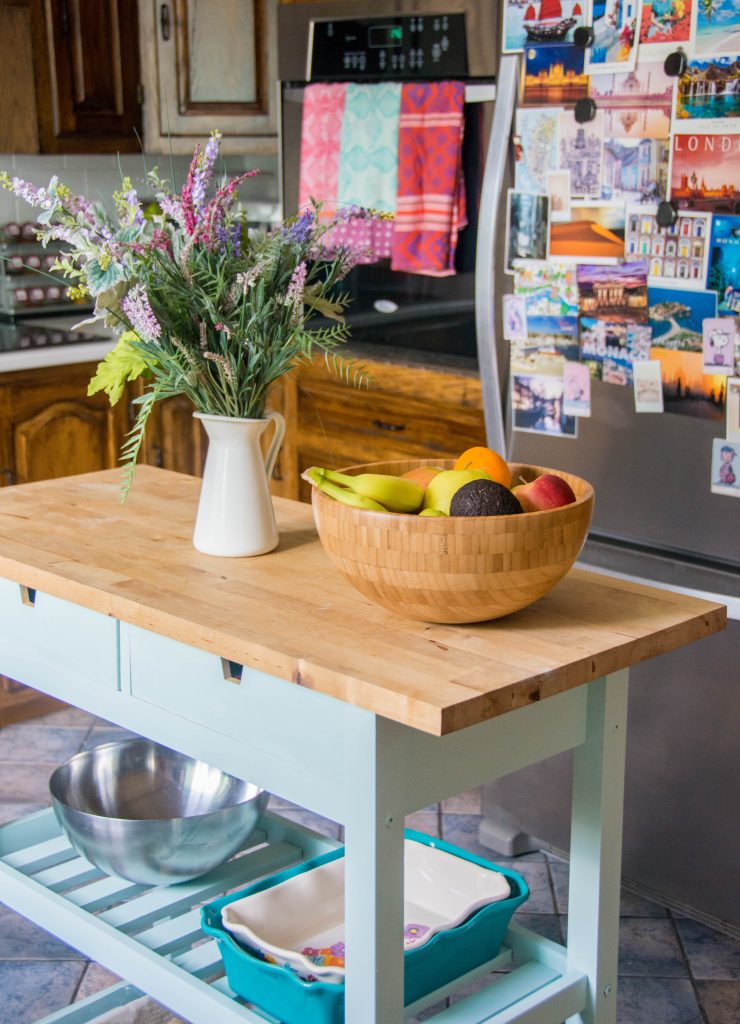
4. REFINISH OLD FURNITURE PIECES
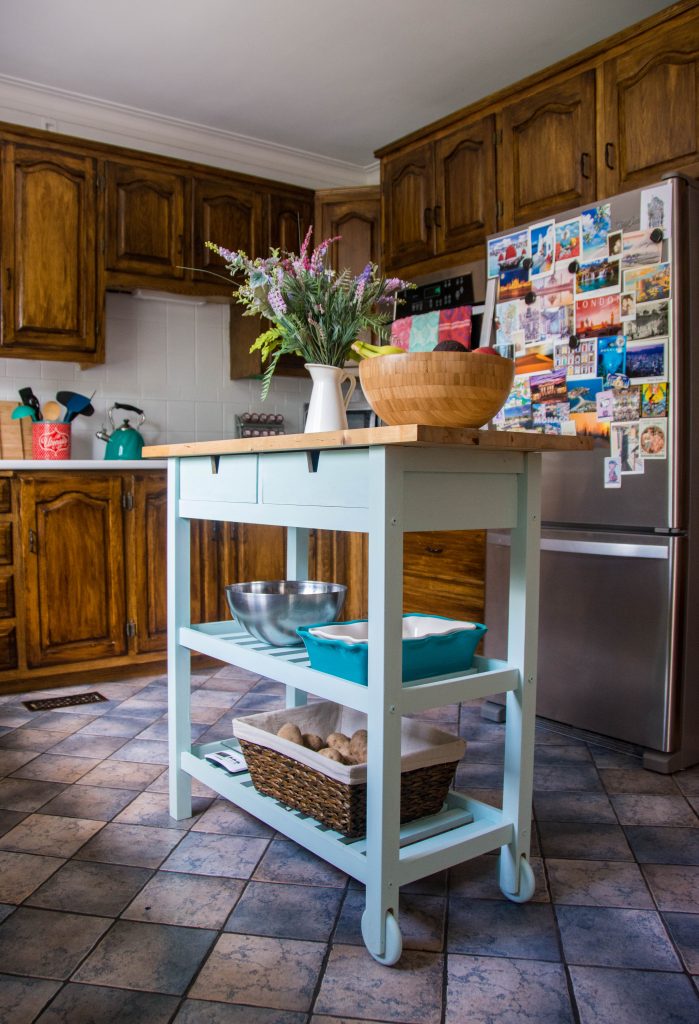
This was one of the simpler ways I “transformed” the look of the kitchen. It only took three or four hours. I didn’t even bother sanding the island down and just used a bit of chalk paint. Click here for more a more detailed DIY guide!
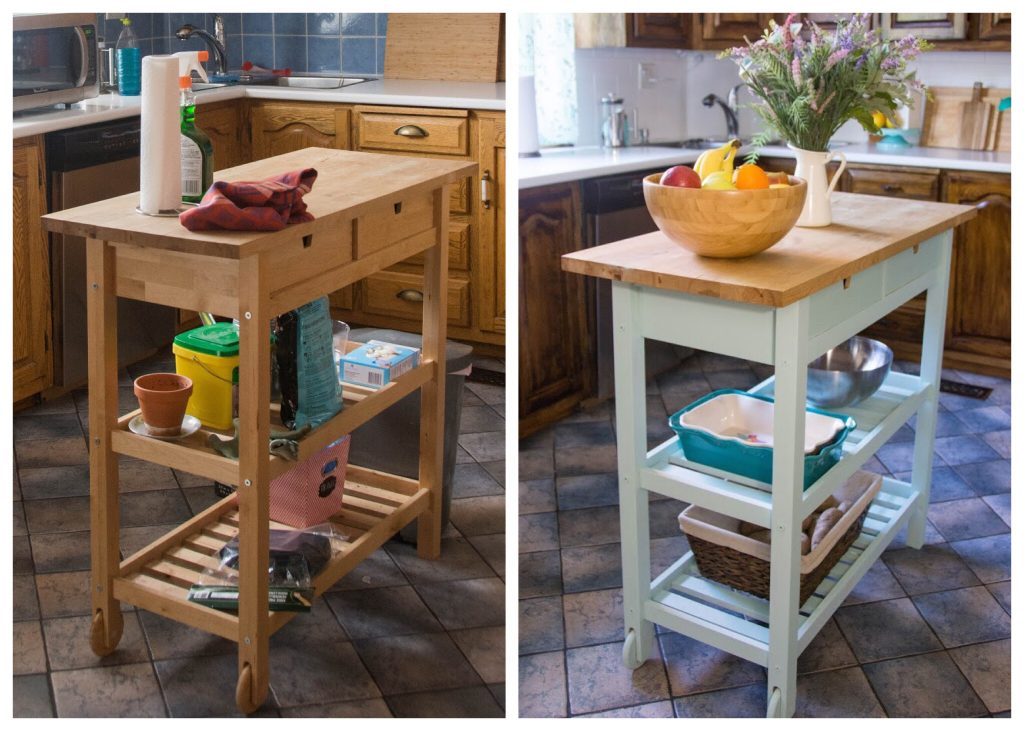
I could just be kidding myself, but I kinda feel like by refinishing the body of the island cart, at first glance, you can’t even tell it’s a generic Ikea piece! I mean, I’m pretty sure that’s the point of a lot of Ikea furniture, that is, “customizing” a pretty basic model so it actually becomes unique and personalized. All I know is, it is just one more part of a cohesive kitchen story now and I’m loving it!
Rust-Oleum Ultra Matte Chalked Paint in Serenity Blue – $14.98
Americana Decor Chalky Finish in Refreshing – $11.00
5. CHANGE THE LIGHT FIXTURES
I’ve said it once and I’ll say it again: one of the easiest ways to completely transform a room, is to update the light fixtures. The old owners of our house had really simple, bland, builder lights throughout the house and they have all since been updated.
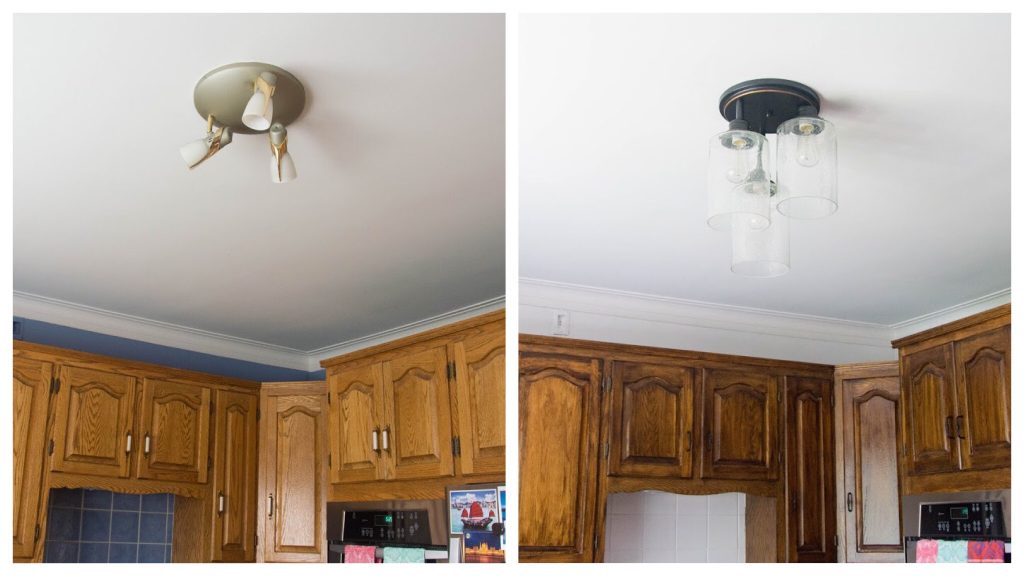
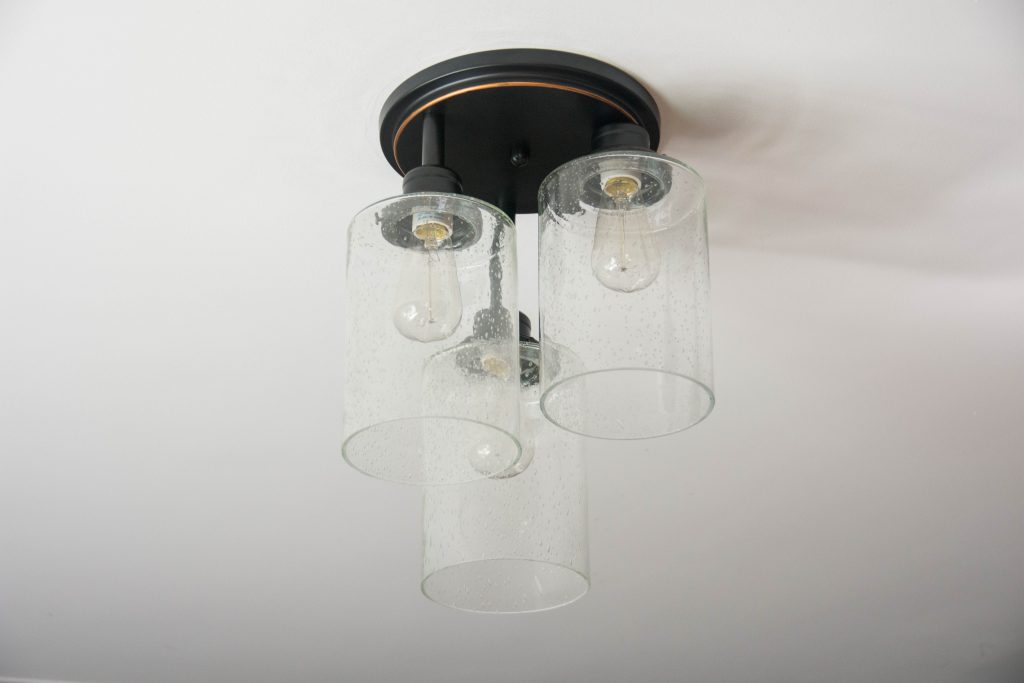
Long story short, Kyler and I could not agree on what type of light fixtures to get in our kitchen. He basically wanted to prioritize function and I wanted style. He hated every kind of light fixture I ran past him and vice versa. After much debate, we finally agreed on sort of rustic cascading jar-like flush-mount as the main light. I don’t love it, but I definitely don’t hate it. And I did see his point about having a functional light in the kitchen. We only have the one spot for a ceiling light and our ceiling is not very high.
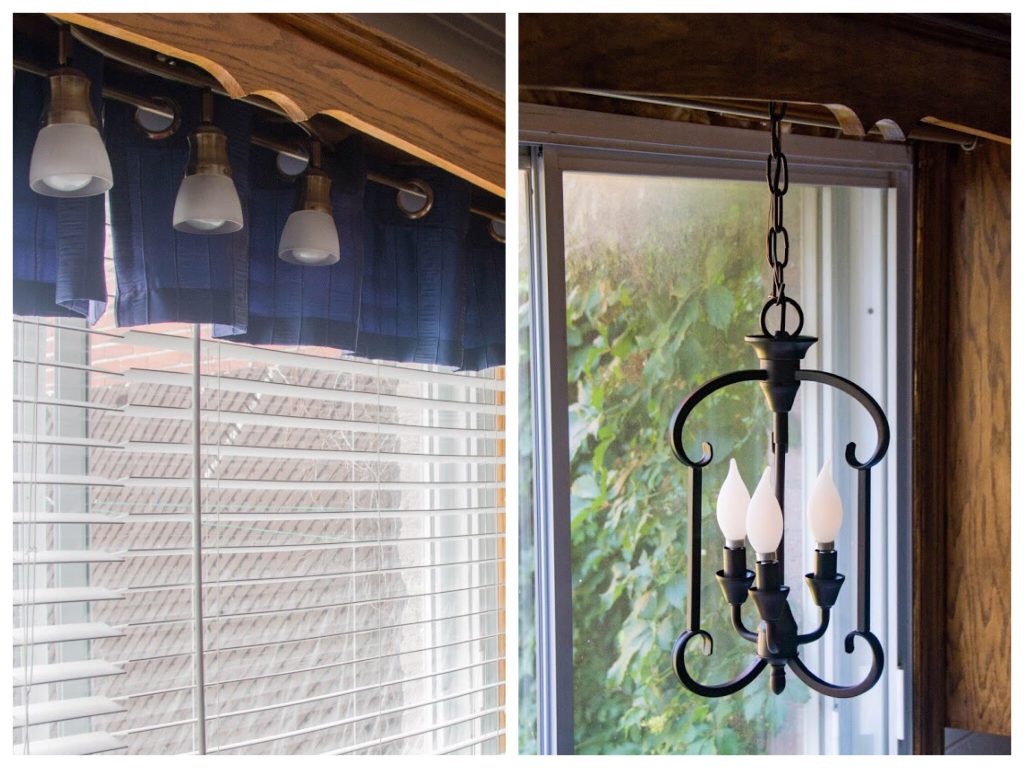
And since I more or less acquiesced on the main kitchen light, I had a bit more leeway on the window light, where I opted for a more statement-making, refined pendant with a bit of flair and tons of charm. I like to think they’re two sides of the same rustic country coin. One’s a bit more solid and industrial, the other, more whimsical and French-inspired. Marriage is sometimes about compromise, boys and girls.
Gracie Oaks Leedom 3-Light Semi-Flush Mount – $110.99
Warner Robins 3-Light Pendant – $129.99
6. UPDATE THE WINDOW TREATMENTS
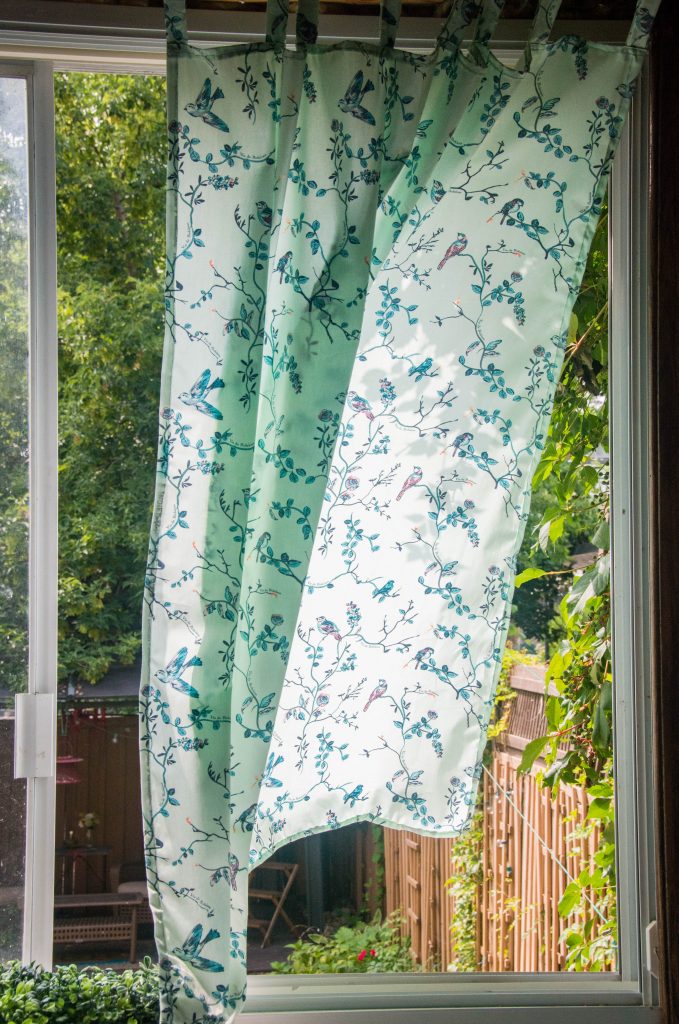
One of the first things I did when we moved into our house was replace every single window treatment in every room. The kitchen is a good example of what was going on throughout the house before I got working. I get that horizontal blinds are very functional and all, but I am a textile window treatment girl through and through. Curtains are just so much more whimsical, cozy and interesting.
I really love the look of a roman shade in the kitchen, but we have one really wide window, wider than most, and I wasn’t sure a roman shade would look great with a window that wide. So I opted to make my own simple curtains instead. Click here for more details/a full how-to guide!
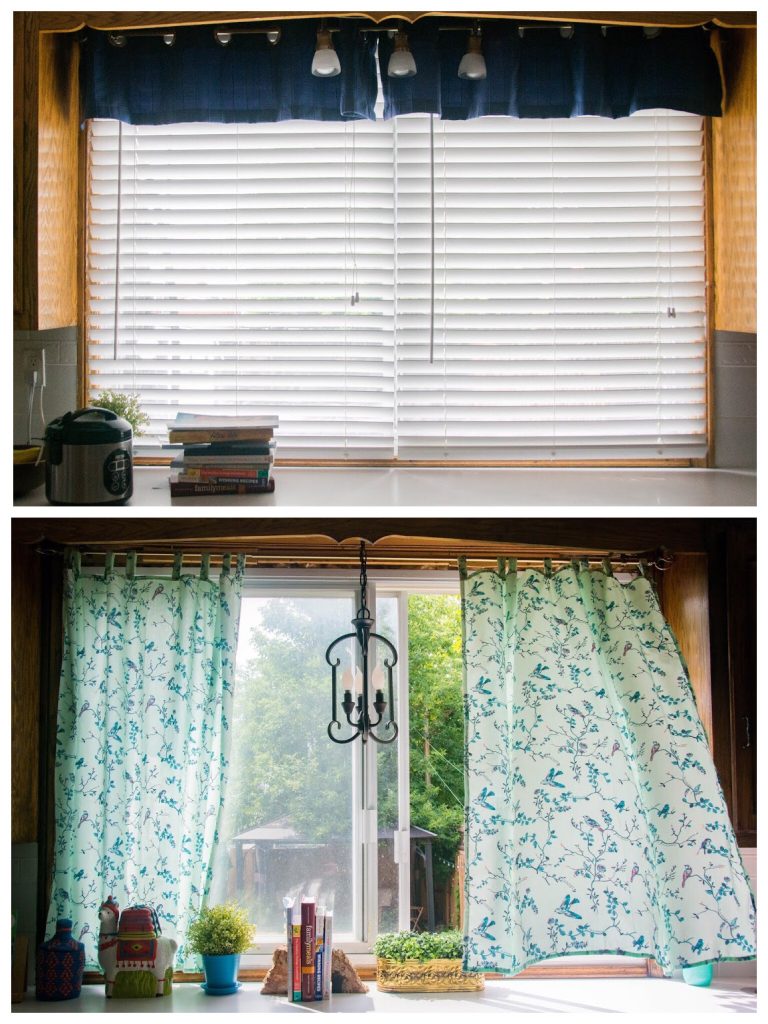
Side note: what is up with window valences? I really don’t understand what they are for. Is it to hide the blinds at the very top? ‘Cause it is certainly useless for blocking the sun in the late afternoon…
Mint Vie de Bohème Sunrise – $8.00/half yard – TOTAL: $48.00


TOTAL REMODEL COST: $498.79
So what do you think of our budget-friendly kitchen transformation? It’s definitely not done yet. We are planning getting new countertops eventually and replacing the old, drafty window. And I’ll probably be making other little changes here and there throughout the years. But, so far so good, I would say. I am loving the direction our new kitchen is going!
xoxo
Could you give me a more detailed explanation of what you done to refinish cabinets ‘ i have the same cabinets that you have ‘and love the final outcome ‘ any stripping involved?
We didn’t strip the cabinets, we just sanded it down roughly, and applied the stain. Because we wanted to go darker, it was fairly simple! I made a blog post with details about staining the cabinets. It’s linked under the 2. PAINT OR STAIN THE CABINETS heading. Good luck!